Jump to content
SAU Community

R33 Gtst Track Build


Dale FZ1

Recommended Posts

Probably time to show a few pics from my build now it's caged and been run. Won't bore people with pics of removing sound deadener and street car gear, they've been done before and this chassis is no different.

Specs

R33 series 1. Cage/seat/harness. A/C and heater system removed. Complete stock harness retained but re-routed.

30DET engine currently running high mounted Kinugawa turbo. Vipec v44 plug in ECU. Exedy clutch, standard box, 4.375 diff gears and Kaaz 1.5 way centre.

MCA Red suspension, adjustable rose jointed arms. Guards cut/flared.

I'll post up a few pics that might be of interest, once I can get the pics to load up.

post-19642-0-76802600-1404116456_thumb.jpg

post-19642-0-32431100-1404116491_thumb.jpg

post-19642-0-96226000-1404116525_thumb.jpg

  • Like 2
Link to comment
Share on other sites

ECU relocated from lower kick panel area to the behind-dash cross brace. Lower front leg sections of the cage forced our hand on that one but as a big plus the ECU is now much more easily accessed with the glove box gone.

post-19642-0-65501700-1404125168_thumb.jpg

Link to comment
Share on other sites

Photo quality is pretty average but the aim was for good component access and have everything properly (securely) mounted.

The whole shell was painted inside, underneath, engine bay and boot in Massey Ferguson grey. Outside got a hit of white 2 pack. Colour choices for practicality and less difficult repairs if it gets bent. Don't ever think that a colour change on a 33 is any small undertaking if you plan on doing a reasonable job.

On the upside, it was very good to find no evidence of rust/corrosion in the body.

Link to comment
Share on other sites

It's primarily for super sprint type events.

The cage I'm really satisfied with. It is very much modelled along the lines of a rally car and is a reasonably competent ROPS. Not that this thing is planned to go on its lid... :no:

It does have a few more bars than I've seen in some club circuit car builds looking for minimum weight, but the calculated penalty is about 20kg max. We'd be kidding ourselves to ever think that a basic-build R chassis is ever going to be light, and I could drop 10kg if I was so inclined. I'm happy that there is a robust safety structure around me, and if I want a lightweight car I will be building a Clubman.

By comparison with Neil's cage I currently have not installed either a lower lateral brace on the main hoop, or Sainz bars at the A pillars. Cross bracing above/behind the driver is a little different also. Looks like a V formation in each area, but stand back and it's actually a big X that starts on the windscreen head rail and ends at the rear cage mounts. Thanks to Neil for helping with a few pics and his views on things.

The improvement in chassis rigidity is significant. Jacking under one corner now makes it quite easy to lift 3 wheels off the ground. And it's very noticeable in driving the thing. My view is that the cage is your fundamental framework that the car is built around, and this thing hits the marks.

Cage construction by MR Sheetmetal in Nambour. Well known fabricator in rally, winch challenge, and off road racing circles. Highly recommended.

Link to comment
Share on other sites

Couple more pics.

The rear parcel tray sheetmetal was removed, as was some sheet used to mount the OEM seatbelt reels.

Integrity was maintained by the rear tower brace, much closer to the struts than I've seen other efforts that basically tie the tubs

post-19642-0-78685000-1404202633_thumb.jpg

post-19642-0-20018800-1404202787_thumb.jpg

Link to comment
Share on other sites

With a lot of fiddly work this two piece sheet aluminium dash fascia went into place and looks pretty good.

The centre piece is held in place with six 5mm metal threads, and pulls clear from the dash with all gauges and wiring in place for easy checking and any service work.

Full marks to both MR Sheetmetal and Motorsport Auto Electrics for making this idea take shape.

Basic setup with a master switch and a few other switches for various functions. The yellow one is to trigger ECU logging. Gauges for pyrometer, boost and oil temp.

post-19642-0-76680700-1404203354_thumb.jpg

Edited by Dale FZ1
Link to comment
Share on other sites

Here's something from the engine bay. Clearly there is no ABS, standard size master cylinder and installed a simple aluminium brace to counter any firewall flex. Braided lines were run throughout, with an initial need to shift things away from hot wastegate on the front left hand side. Earls fittings used, definitely not cheap but the quality difference is very noticeable when making the lines. Much less tolerance in sizes.

post-19642-0-49430300-1404204264_thumb.jpg

Edited by Dale FZ1
Link to comment
Share on other sites

Here's the engine bay. Just another highmount turbo setup. Uses a Kinugawa TD06H4 - 25G 12cm, Hybrid manifold and Turbosmart 50mm gate. Ceramic coated hot bits, and lagged dump pipe. No noisy screamer either, this thing has a merge down low.

Quite a lot of time spent trying to keep things away or protected from radiated heat. Brake lines and the loom were the main areas of concern, although the turbo's water and oil lines took time to get done to my satisfaction. Time will tell how effective that is.

The oil and water lines used Pro Flow fittings. Much cheaper option and they weren't too challenging to make up. The production tolerances in these fittings are much wider than for Earls. Used a bit of high temp orange flameproof sheath where things ran close to the manifolding, and plastic sheath in other parts to stop things chafing.

post-19642-0-20702300-1404208221_thumb.jpg

post-19642-0-62166700-1404208258_thumb.jpg

Edited by Dale FZ1
Link to comment
Share on other sites

There's a lot of P clips and nut-serts (aka riv-nuts) to hold all that stuff in place. Time consuming to do. My sparky is a master craftsman and in lots of areas it's hard to know where he's been. Things look (to me) as if they were always intended to be where placed. Very cluey, and has had a hand in a number of high profile builds. We retained the full OEM loom, mainly to avoid a lot of work for a little gain (ie weight loss), but also avoiding other problems with stuff not working properly.

After this job was done, I found a different type of loom fastener that we will use on a build being done by one of my sons. But I'm happy with the under/over setup on this car.

Link to comment
Share on other sites

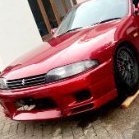
View of the bodywork. Flares by Topstage Components - quality gear, reasonable price and fast delivery. Needed them to cover the wheels 18x10 +12 offset. It might be possible to run 11 or 11.5 inches on the rear but these are big enough for my current needs.

Possibly there are better looking flares out on the market but I couldn't find them. These things are for function and I like the look of them.

post-19642-0-27837900-1404211343_thumb.jpg

post-19642-0-24459300-1404211401_thumb.jpg

post-19642-0-30527400-1404211438_thumb.jpg

Link to comment
Share on other sites

Cooling is an issue I've spent time getting to grips with, and the measures implemented seem to have worked if our first event are an indication.

Basically there was a history with this car where I struck cooling problems at speed on the track. I eventually deduced that a cold air feed to the pod was dumping enough air into the engine bay that there was inadequate air pressure differential across the radiator. No airflow = no heat exchange = problems.

I implemented a fair few changes, but kept with the Chinese M Spec radiator. Ditched the OEM fan and fitted a BF Falcon thermofan assembly. Dimensions are near spot on. Controlled the fans via the ECU. Installed a fibreglass bar with big openings for airflow, and fabricated some shrouds/ducts to push air onto/into the radiator core without spilling around the sides. Used rubber to ensure air leakage is minimised. Fabricated an undertray that starts at the front bar and finishes past the crossmember roughly near the steering rack. That more or less makes the whole engine bay a duct, dragging air out under the body.

I also did a bit of work on making sure the power steering system doesn't run hot and spit ATF out the reservoir. Never liked the drift boy look of fitting an old sock to soak up excess. So it got a dedicated cooler, generally used on automatic transmissions. Ducted with air from the front bar and venting (hopefully) out the hole evidently made for that purpose.

Engine oil cooling was done the same way, on the opposite side of the car.

First event showed ECT stable at between 88-94 degrees according to the data. Engine oil temps reached max 110 degrees but seemed more regular at 105. And no power steering spits. This was on a 3km track with plenty of higher speeds and as much full throttle as I could handle over 4 laps so there was opportunity for temps to build. But the system seemed to control it even with the car double entered and with little cool-down time between runs.

I've previously noted that people are a bit hesitant to comment frankly about whether their cars can control temps properly when run hard on the track.

I'll get some pics up in due course.

Link to comment
Share on other sites

Great thread, and good to see another GTSt out there :)

I've previously noted that people are a bit hesitant to comment frankly about whether their cars can control temps properly when run hard on the track.

Damn straight. And very few people run their cars hard at the track for extended periods anyway

Link to comment
Share on other sites

I'd like to try regularity events, which I think are a great concept. From what I've seen they run for longer periods so having temps controlled was a priority. We are all sinking reasonable coin into these toys and nobody needs a cooked motor. I haven't seen much evidence of cooling issues with other popular marques eg. MX5, early Z cars so it's just a case of understanding the right fix for these things.

The Ford-spec thermo pod was a good but probably not essential addition when you look at the extent of the other cooling mods. After a run the fans cycle in/out during idle-down. And the radiator/fan unit comes out as one, making things easier than with the OEM unit.

Interesting to note that the China-spec radiator is doing a reasonable job now it's fed properly.

Link to comment
Share on other sites

View of the bodywork. Flares by Topstage Components - quality gear, reasonable price and fast delivery. Needed them to cover the wheels 18x10 +12 offset. It might be possible to run 11 or 11.5 inches on the rear but these are big enough for my current needs.

Possibly there are better looking flares out on the market but I couldn't find them. These things are for function and I like the look of them.

how much modding was there to fit and what not on the flares?

Are they the universal type? or for the 33?

Link to comment
Share on other sites

Create an account or sign in to comment

You need to be a member in order to leave a comment

Create an account

Sign up for a new account in our community. It's easy!

Register a new account

Sign in

Already have an account? Sign in here.

Sign In Now


×
×
  • Create New...