GXE23
-
Posts
161 -
Joined
-
Last visited
-
Feedback
0%
GXE23's Achievements
")


-
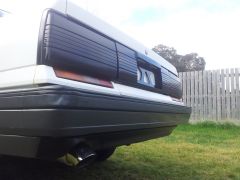
After Monday 23/12/13 - Driving to VicRoads registration appointment, and having the car die and show once again the same signs, I had it taken to a recommended Mechanic, and he diagnosed it as once again - The Distributor/CAS. So buying the one off Ebay and replacing it was literally money down the drain as the one one Ebay was f**ked, and had seized up completely. I ended up paying $443.00 for a "Restored" Distributor, and the car has since run like an ABSOLUTE DREAM. Wednesday 19/02/14 - I got the car registered at 10:55am @VicRoads, Sale Victoria for $677.00 which was exactly $100.00 cheaper, than I was quoted on the phone, since the champion put the car down as $800.00 Dutiable Value, instead of the GXE's recommended $2,300 D/V. Also the Yarram Tyre & Exhaust Service boys Quentin and Cale have done once again brilliant work for me, and Quentin, being the absolute top bloke he is, patched a tyre for me on one of my 17" chromies (that I had purchased with a screw in it, to prevent air-leak) COMPLETELY FREE OF CHARGE! ABSOLUTELY STOKED! So now she's got plates. Brought her home, and threw the cannon on, which at first I absolutely loved!! But after driving it for a solid day or two, (Even to Me - a bloke who likes loud cars, and doesn't really have an issue with "drone") even I think the car is RIDICULOUSLY loud, and every time I've driven into town itself, I've been watching my rear-view like a mother' waiting to get pegged. I got down under the car, and the hotdog between the Cat & the rear Cannon / Dumpy (where a proper muffler should be, not a hotdog) is only about 8 - 9" long. So tomorrow I'm going to see if I can't get a bigger hot-dog put in, anything from perhaps 12" - 18" depending on what the boys reckon, but I'll leave it in their capable hands! FINALLY 'SKYLER' IS ON THE ROAD! AND I COULDN'T BE HAPPIER!
-
Merry Christmas All! I'm YET to get my R31 on the Road, however, I got my license back on 11.12.13 Absolutely stoked! After getting a new Nolathane rear suspension arm/bush/rubbers kit @ $190.00 and new Front & Rear rotors $81.00 / $70.00 and sending the car off to have other work done and it's roadworthy done. 8 Gruelling days later, a roadworthy certifcate, a hefty bill of $1250 (+$180.00 for inital RWC test) I recieved my Skyine back, still running horrible, stalling and spluttering on start up. On the drive home from the mechanics, the car died in the arse, and after a half hour or so a friend of my mothers (A mechanic) helped me diagnose, in 10 minutes, what 5 men couldn't over 8 days - A faulty Distrubutor/Crank Angle Sensor. I purchased a whole new distributor $70.00 , ignition module $84.00 and cap $31.00 and a week or so later, had it running absolutely micky! Best I've ever had it run! On Monday 23.12.13 I had the car booked to be at VicRoads @ 2:30pm to obtain rego & plates. After starting her up, letting her warm up for a little while, I set off on my ''maiden'' voyage of ever having driven the car I'd now owned for near on 8 months. After about 9 k's of smooth sailing, the car began to splutter and lose power, going back and forth from about 3,500 / 800rpm and eventually died completely. I'm more than less thinking it may be the fuel pump, or most definitely a fuel issue, given that there's plenty of spark, and my afm and intake seems to be working perfectly fine... Slowly but surely, I'll have my Skyline up and running
-
Here's some more images of the work I've recently completed: I cleaned my rotors with a wire-brush, an assortment of wire-brush drills, and some sandpaper, I will go over them again soon, instead with 100-grit flap-discs on the angle-grinder for a far better finish/clean up. But ultimately, their worlds better than they were before. Far further down the track, I dare say I'll upgrade/replace the rotors & brakes entirely. Rotors & Calipers BEFORE: (Also blacked out guard/behind rotors): Rotors & Calipers AFTER: Also, I gave my parcel-shelf brake-lamp housing a fresh coat of gloss black paint, as I removed it to clean off the blemishes that had accumulated on it, but found they wouldn't come clean, even a light sanding wouldn't solve the problem, so I have it a good sand back, and hit with a gloss black paint, now it matches the 6x9 spacers: AFTER:
-
Thanks L33SH, I appreicate the fact You seem to keep up with and approve of all my 31's mods I hope all is well with the R33!
-
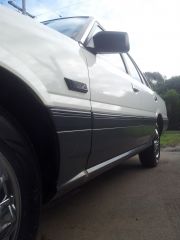
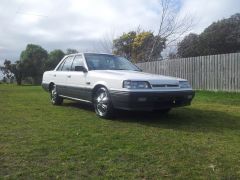
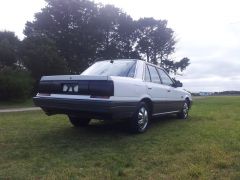
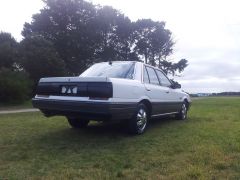
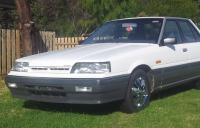
Sorry I've been SO slack with updating this build thread guys! Been working flat chat lately, both at my place of employment, and on the car itself! Here's an update, shall definitely post some more within the coming days! I've purchased new wiper blades, decided to clean my rotors right up and paint my calipers in an 'International Orange', resprayed my rear parcel-shelf brake lamp housing in gloss black, and also purchased a set of 17" 6 Spoke Chrome Rims, for the price of $400.00 inclusive with 4 tyres, all with about 95% tread. I said earlier on that I wasn't intending on getting any rims/mags for this car, but at that price, and having them within a very small distance to me, I couldn't let such an off pass me by, so here's 'The Liners' new shoes: I think they compliment the car very well indeed. Another major selling point, was the fact they were chrome, had they been any other or painted 17" rims, I'd probably have offered less, or overlooked buying them all together. I've resprayed inside/behind the guards as well in matte-black, then a couple of gloss coats to 'even-out' the 'back drop'' and accentuate the rims more.
-
After some discussion and picture swapping - I decided to swap the positioning of my Parkers and my Indicators. I opted for Bright LED White Parkers and already having plenty of orange indicator bulbs for clear lenses, putting them up on either side(s) of my head-lights wasn't an issue. In the image below you can see the 'swap' in progress. The new white LED parker (r.h.s) VS the incandescent/factory bulb (l.h.s). The indicator on the left is it's original/factory spot & the right hand side shows where I'll be moving both to. So now my parkers are down low and indicators are on the sides of my head-lamps: Once again, something simple, but unique and subtle to those unfamiliar with the R31
-
Thanks Heaps Leesh, I appreciate all the positive remarks/comments. Kudos! Have nearly ALL of the interior work finished and will have it all back together, I wont recognize the car with instuments/clusters hahaha!
-
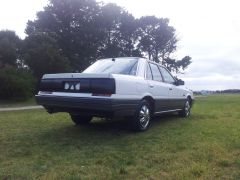
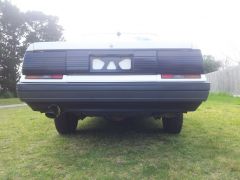
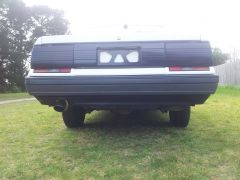
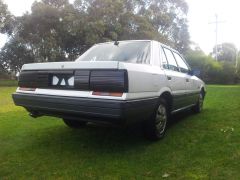
I purchased a second rear garnish for $20.00 so now I have two, I've opted to paint the second one white, just for something different. I know there's many who'll find it distasteful, and had I not had another garnish, I too would have kept it black. Here is the end result, this too has LED number-plate lights set up in it for pure white illumination. I also reverted back to factory looking tail-lights by removing the VHT Nite Shades with Carburetor Choke & Throttle Body Cleaner. It makes AWFULLY easy work and if you have the tail lights removed **I strongly recommend doing so if possible** - As I spilled some on my paint work and some of the nite-shades dripped onto my rear bumper and stained it, and it took a good hour or so of multiple cleaning objects/products to bring it back to the way it was, a real flamin mongrel of a job! So if you can remove your tail lights, do so & a can of this costs an odd $5 give or take, at your local hardware store, and removes the nite-shades without even needing to be rubbed, it just streaks off like wet paint. (I sprayed a rag and wiped it off with ease) *Note the top Gloss Black garnish boot lip/strip that runs above/along the garnish and tail-lights is not installed* **I have been up to plenty but just haven't had time to get on the forum and update as often as I'd like. Shall have a bit more to 'show' this week C=
-
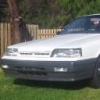
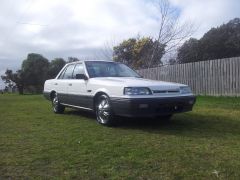
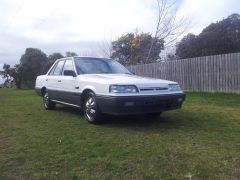
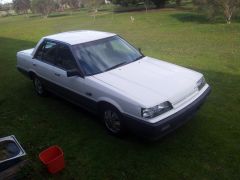
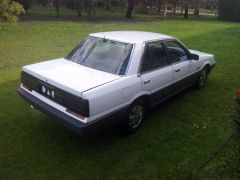
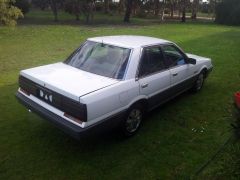
1989 Nissan Skyline R31 GXE Automatic Sedan. Purchased for $800.00 with 350XXX Km on the clock. This photo album shows the mods and changes it's been through since purchasing it stock standard at the beginning of May 2013.
-
-
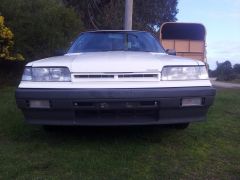
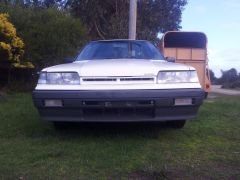
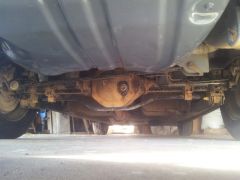
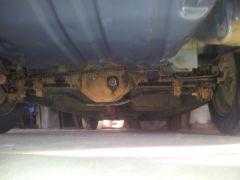
Here's my custom made clear front indicator lenses installed, before and after shots of the sides as well. Also, my rear bumper very bottom lip, was showing proper signs of aging, and slight rust. So I rust-proofed it, and being unable to get an ''exact'' match for the gray that already exists, I just opted for matte-black. Here's the end result. A lot better than what it used to be. *On that note, I must highly recommend "MOTOSPRAY" Automotive Paints. I have never come across a more exceptional Automotive paint (in a can form) in my entire life. More news and updates on the way soon. BEFORE: AFTER: I personally think simple touches such as a coat of paint and clear/colour coded lights do a World of difference, and it's so subtle, those non-familiar with the R31 wouldn't have a clue, which to Me personally, just makes it that much better. Also, I got under the car with some bug & tar remover, a can of heavy-duty degreaser & the karcher pressure washer and it too is a world of difference to what it was once before. Truth be told, it probably wouldn't hurt doing once again down the track. But for now (compared to the previous picture supplied when I posted about my Petrol Tank re-spray) it's a big difference.
-
I grew tired of the amber indicator lenses at the front of the car. So I went to Home Hardware and got a $5 30x30cm sheet of clear perspex, then got it cut to the size of the stock/existing lenses. I had to do a little filing and sanding on the corners to get them to properly fit. Then, I sanded both sides of them with 120grit Sandpaper to get a 'hazy' effect, until I was satisfied with it anyway. I then masked them up excluding the tips where the screws go on either side (just to hide the screw holes behind the lenses on the vehicle itself & so it in ways, coincidences with my clear/black side indicators) and sprayed them a matte black. Also picked up 10 orange indicator globes on Ebay for $9.99 and free postage. Will be set for quite some time now! Here's the end result: More pictures on the way and info, just haven't had the time or weather lately to grab snaps/pictures.
-
HELP! I've spent the past week trying to nut this shit out, but I'm getting no where. To skip over a lot of details and cut RIGHT to the chase. I am trying to complete my stereo install on my 1989 R31 GXE. I have re-run speaker wiring to doors/parcel shelf etc. I cannot for the LIFE of me (Without fear frying my head-unit) figure out which is 12V constant. And Which is 12v Accessories/Ignition. After looking on multiple pages/sites/forums, I now know that BLUE/BLACK are the Accessories/Ignition & WHITE/GREEN is 12V Constant. However, I have 2 white/green and 2 black/blue wires: Also I was told investing in a Voltage Tester would help. I have uploaded a picture of the one I have which works on 240V accessories but will not register ANY current on any of the wires on my car. Is this perhaps due to the type of Tester I have, as it doesn't have a "ground lead"? So ultimately, buying the tester has gotten me no further along with something that should be so simple. If anyone at ALL can help me with nutting out these last 2 wires, it'd mean the world.
-
Wheel turned up, as well as the boss kit. Finally debadged the car, still got a little bit of 'gunk'/glue residue to remove when I can get my hands on some sepitone liquid. As soon as I do I'll throw pics up. Didn't want to part with the badge as much so I threw it on the interior with what-ever left-over paint I had, from respraying my petrol tank. I first sanded it back, especially the rust, and then went about rust-proofing it and respraying it Machinery Gray: After looking at these properly now, and seeing it in certain light, Definitely gonna get under there with some degreaser and tar and grime remover and give it a blast with the pressure washer! Gah! That's filthy! Also purchased a Black R31 Rear Louvre which I'm yet to go pick-up. Paid $49.00 on Ebay for it. It's black, but I plan to hit it, with a Matte White or potentially a Gloss Black, yet to decide, will obviously make a final decision when I have it 'in my hands'. The top two 'support brackets' are missing. But this is no issue, as I'm going to have to slightly modify it to fit snugly around my (aftermarket) roof-antenna. Bloody ripper bargain if I've ever had one!!
-
Just purchased this little beauty for $75.00 and free postage. 320mm in diameter, compared to the more commonly found 350mm diameter, looks like it'll be a comfy wheel! And snagged a Boss Kit for $35.00 + free postage: