reden
-
Posts
36 -
Joined
-
Last visited
-
Feedback
0%
reden's Achievements
")


-
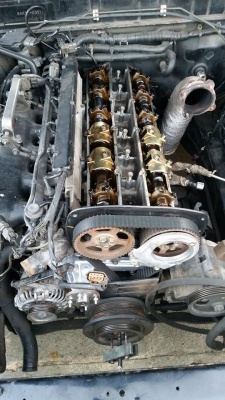
Bit of an update since my last post. Long story short my bores are scratched up real good so I'm building a 700HP+ R32. I have released a few videos since my last post. I've also bought some new parts too. So basically I set the timing up and put cylinder #1 at TDC (Top Dead Centre) and marked both cam gears and the balancer. I then removed the cam gears by undoing the idle tensioner to give some slack to the belt. After that off with the old gears, balancer and belt. I'm sure someone's written a more detailed post on the timing of an RB. My videos should explain it in a not so much mechanical minded way. So I'll leave a link here for anyone that wants to watch it Project R32 GTR Episode 3 - " Timing": I have a lot of things I want to do to this car now that I have to rebuild the motor. I'll report back soon with some info for episode 4
-
On a new report accurent affair did a cop said when you see a strut tower brace it means they have been drifting and labelled it a hoon bar. Hahaha it kinda does hurt the eye balls. umm the cylinder head is fkd and it has a coolant leak. There's a few other bits and pieces that need attention.
-
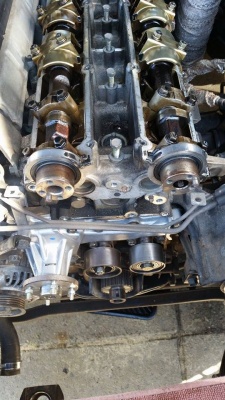
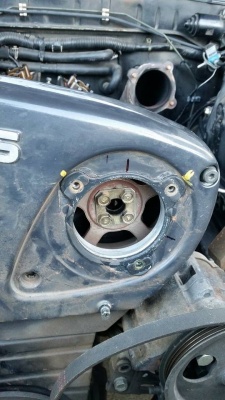
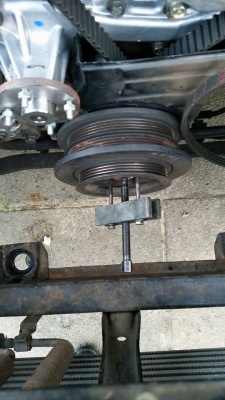
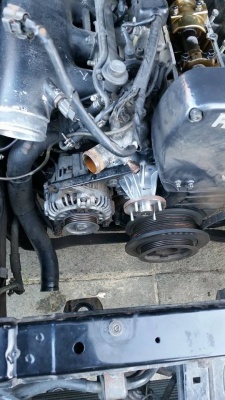
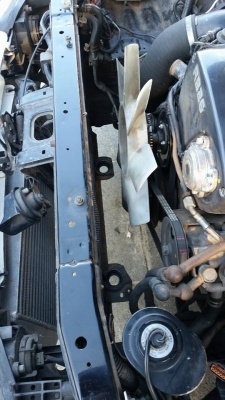
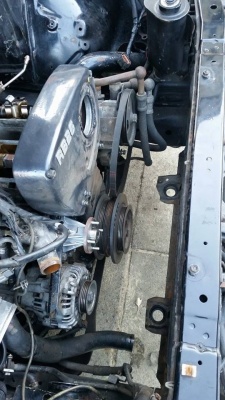
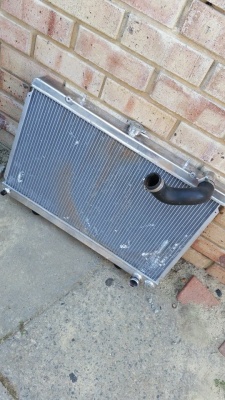
Hello, back again. I've been trying to smash out as much as I can after work hours to get the head off so I can start cleaning and start the laundry list of things I want/need to do. So I began this day removing the Koyorad radiator (Koyo FTW). Simply unbolting the two rad supports up top then disconnect your hoses and rip her out! Next I took out this front unit that sits on the exhaust side of the cam and at the front of the engine. I can't remember what its called but I marked its position and unbolted it. Something tells me cam angle sensor or factory adjustable cam. either or none it came out After that it was time to hit up the cam covers and have a look at the cam shafts and everything else that lay beneath. Bolts hold the covers in place. There was a couple earths but after a short time there they were. From here the front cam gear cover was taken off with a couple bolts and that exposed the cam gears. I had also disconnected both the alternator belt and power steering belt by loosening the brackets on each unit to provide enough slack in the belt to remove it. I ended the day by getting a rattle gun in on that crank bolt. Then get a pulley puller onto the harmonic balancer. I later figured out i could have done my timing at this stage as I was unaware that the mark for the harmonic balancer was in fact on the cover that sits underneath the cam gear cover. It has a little notch in it used to line up cylinder number 1 with the balancer when setting up timing. Needless to say the balancer had to come off anyway so here it is... I can't remember how long this time. Keeping in mind I'm not a mechanic and I'm still learning things as I go. I do enjoy it A LOT and I hope you can enjoy it aswell. I'll post up the removal of cams and setting up the timing soon. If you want to actually watch me do it I have a Youtube channel: https://www.youtube.com/channel/UCzrs4YA2CxUckFJQoDYrSzA Where you'll find videos of my R32 GTR a long with my previous build on an R33 GTST RB25. First build video is scheduled to be out on the 27th of september I'll report back over the next couple of days with the cams and timing
-
-
-
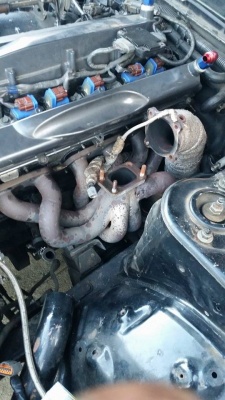
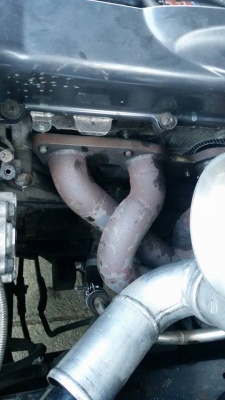
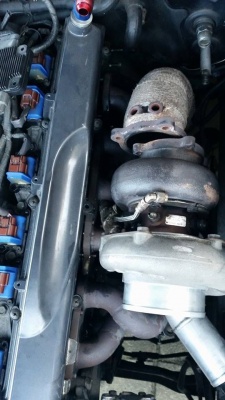
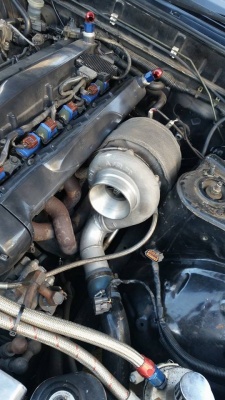
Getting straight to the business!!! First day of the tear down. I went for everything hot side. I worked in an orderly fashion. Removing the strut brace (hoon bar). Taking out the AFM plugs. Removed the Greddy twin intake to expose that compressor wheel I then moved on to taking out the oil catch can and the connected hoses. I then worked around the turbine housing removing the bolts then getting to the oil and water lines for the turbo. After that I then got to work on the exhaust mani. There wasn't a lot of room on the bottom nuts but persistence prevailed. With everything loosened and almost all nuts off we were looking the goods. But then I ran into a slight problem... The compressor housing was too big and kept hitting the strut tower wall. All I needed was that extra couple mill to get the exhaust manifold of the end of the studs. So then there was no option but to take the turbo off. With the turbo out of the way the exhaust manifold was fair game. It was a bit of a jiggle taking it off as there's that external wastegate and screamer pipe still connected. But we got there eventually I was so pleased with myself after a couple hours effort. Nothing was really too much of a problem and having one turbo instead of two make it so easy to work on the turbo. Definitely staying with the single. Next I'm going to be getting into the covers and aiming to get some timing set up! Will post updates soon
-
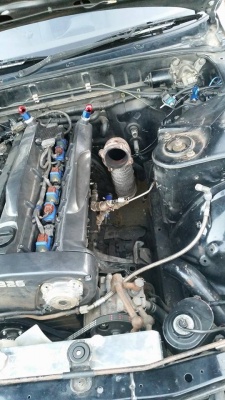
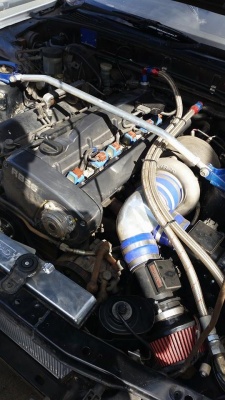
Hey guys, so I've recently picked up my new R32 GTR. I'm going to be covering everything I do to it in my youtube channel. I have already made a video show casing the new car. The link can be found here: I've attached a picture showing what the engine looks like. Apart from the solid lifters in the 26 is there any difference in the cylinder head from the rb25's?
-

Skyline R33 Ep. 3 "cylinder Head Removal"
reden replied to reden's topic in Projects, Overhauls and Build-ups
Hey guys, just sharing episodes 4, 5 and 6 all in one post. Please check them out. And please comment away if you have anything to say Skyline R33 Ep. 4 "Prepping The Head": https://youtu.be/fcF-b881Rfs Skyline R33 Ep. 5 "Machining The Valves": https://youtu.be/I_ehCtXZUOo Skyline R33 Ep. 6 "Reassembling The Head": https://youtu.be/K7zBtHrcAwU I will share the next few episodes when they are edited!!! I hope you enjoy the series -
Skyline R33 Ep. 3 "cylinder Head Removal"
reden replied to reden's topic in Projects, Overhauls and Build-ups
Hey man, I'm glad its been useful to you and hopefully others!! what you taking the head off for? -
Hey guys, I haven't posted in here for a while, but I'd like to share some videos with you all. I have been working on a build with my R33. I am doing a series of videos on it following everything I've done. So I have posted episodes 1 and 2 already. If you can't find them then here is a link for both: Skyline R33 Ep. 1 "The Beginning": https://youtu.be/2yXjUFe4BUA Skyline R33 Ep. 2 "Making Progress": https://youtu.be/GwTK__gP7p0 So please check those out if you haven't already. Here is the next video in the series: Skyline R33 Ep. 3 "Cylinder Head Removal": https://youtu.be/JE199lw3LlU I also have episode 4 out and number 5 is on its way. I will make a seperate topic for episode 4 and then another for ep. 5 I hope you find it interesting and/or useful in your own builds. Please share the videos around and check me out on Facebook: https://www.facebook.com/RedRedReden PM me if you have any questions or just want to chin wag about car stuff!! Thanks
-
Hey guys, I have episode 2 of my Skyline R33 build out: Episode 3 will be soon. Enjoy!!!!
-
Hey guys, I'm just curious as to the potential power gain you can achieve by porting the cylinder head of an rb25? Is it worth the money and time or would it be more beneficial to spend the money elsewhere?
-
My R33 Gtr (Lzy33R) - Built Rb26/30
reden replied to LZY33R's topic in Projects, Overhauls and Build-ups
That looks so clean!!! How long was your build? My R33 is parked up with the cylinder head off getting reconditioned. Putting GTX 3076R on hoping for 400bhp If you guys are interested check out my build -
I feel for you man Episode 2 https://www.youtube.com/watch?v=GwTK__gP7p0
-
Nah ive been on full licence for half a year. But i owned this when on my P's never heard of power to weight ratio being in the law. thats some bs man. come to WA haha
-
Oh shit you have turbo restrictions over east hey? damn im in WA.