


Super Roo
-
Posts
33 -
Joined
-
Last visited
-
Feedback
0%


Super Roo's Achievements
")


-
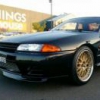
 So, I'm looking to fix up under the front of my R33 GT-R (1995, not a v-spec or N1). Specifically after seeing the one they had in the Nissan Heritage Collection when I was there on holiday recently (awesome place by the way, if you're in Tokyo you have to go check it out) I want to put the front brake cooling ducts, engine undertray, and the front halves of the front wheel arch liners back in as mine came with none of these things when I bought it. I know there are some clearance issues on the wheel arch liners with 18s and the stock BOV, but I've got some solutions for that so I'm not too worried. What I was hoping for some help with is working out which part to get for the front of the right front wheel arch liner and the engine undertray, as there are two part numbers for each of these. For the engine tray the numbers are 75890-05U20 and 75890-24U20. The first is the basic part, the second is listed as being for series one v-spec cars and the N1 in all years. I have actually found pictures of the two parts and the only discernible difference is an extra bulge on what I believe is the driver's side of the part. So my question is does anyone know what that bulge is for? Is it going to be useful to have that extra space down the track (for mods etc.) or is it some weird N1 specific thing that I'll never have a use for? I've attached the pictures. For the wheel arch liners I haven't found any pics. The base part number is 63844-24U00, and the alternate part is 63844-24U10. It sounds like the second part was used for the v-spec and N1 in series one, and the N1 in series two. By series three all variants used the first part. Does anyone know what the difference is? Thanks heaps to anyone taking the time to read and help, really appreciate all the knowledgeable helpful folks here.
 -
The resin is what actually sets the material in place. Without the resin you'd just have a carbon fibre fabric, which as you can imagine wouldn't hold its shape very well! The resin can either be added separately when the part is made, or it can be impregnated into the carbon fibre fabric. It's generally an epoxy resin of some kind.
-
Nice! The 370Z wheels (I believe?) suit it really well.
-
Good to meet you mate, and I'm sure you won't regret signing up - there's a lot a of great people on here with heaps of knowledge. Car sounds like a beast, looking forward to seeing it!
-
Nissan cross parts
Super Roo replied to Shojin's topic in RB Series - R31, R32, R33, R34 (1986-2002)
Someone else might be able to chime in with something more useful, but you can kind of do this by using this website: http://jp-carparts.com/index.php It has all the exploded diagrams that help you find the part numbers. You can then google the part numbers and see what cars they used that part on. Bit clunky and can be somewhat confusing to find the diagram or part you want, but it helps. Of course this only tells you if the part is identical - you might for example have a different cat on each model but they could still have the same bolt pattern and length and be somewhat interchangeable. For that sort of thing forums like this are great - have a search and see if anyone has already found an answer, and if not ask and some incredibly knowledgeable person will usually come along to help. It's definitely worth looking around for parts though. As an example I replaced the coil packs on my RB26, and found them half the price in the UAE. Apparently that part is common to several Nissan engines from the period and they stocked them there for a Patrol or something that used them. You do also want to be careful, as some parts will bolt on but won't work as well as the correct part, or they look the same but thread sizes are different etc. If you're talking aftermarket parts, most of the major sellers are pretty good about either having one listing if the part fits multiple cars, or you can find the part number and search to see what else it fits as above. Hope that helps! -
Hi mate, welcome to the forum :)! I've found it to be a great resource full of helpful people, I'm sure you'll love it here.
-
Okay, I’ve had a chance to have a quick look at mine, got the relay off but couldn’t get the plug out in the time I had. But from what I can tell there are four wires. If you’re looking at it standing at the front of the car, the blue and pink wire seems like it’s at the top, the yellow and green wire seems like it’s at the left, and the right and bottom are identical grey wires. Hope that helps, will try and get the plug out tomorrow if I have more time.
-
Alrighty, I'll help out if I can :). It's in the main fuse box in the engine bay yeah?
-
I'm not the best when it comes to auto electrics, but I do have an R33 GT-R and the air con works, so if all you need is a photo of something off a working car to reference I can do that for you mate.
-
Taking off thermostat Rb26 mission !!
Super Roo replied to flyt32's topic in RB Series - R31, R32, R33, R34 (1986-2002)
If you're still having issues this is what I found worked on mine when I did it recently: Bolt on top - easy enough Front bolt underneath - you can with sufficient determination post a medium quarter inch drive extension through the mess of pipes and stuff to reach it. Socket can get stuck in there though Back bolt underneath - unextended quarter inch will fit, but you can't really see it. I found it easiest with a mate above the car putting it on while I held it from underneath, as you have better access below but better sight of it above. -
Hi all, Thought I'd share my solution to holding the boot lid of my R33 GT-R up so it doesn't try and kill me. A little background: when I bought my car the gas struts were pretty dead. They'd hold the boot lid up but didn't really provide any assistance lifting it and a gust of wind or slight slope would send it falling down. The factory struts are built into the hinges, and are no longer available new. While my car was being resprayed I thought I'd get the paint guys to give me the strut/hinge units and see if I could get them regassed. Long story short I couldn't find anyone who could do that, but I did find someone who could replace them with new struts. The new struts were even modular so I could pop them of and change the amount of gas pressure in them as required to get them right. However there was a problem - the paint guys found the struts had fatigued the boot panel where they attach. I actually had to buy a new boot panel. We played around with the new struts, but basically anything with enough strength to hold the boot would require so much force to close that it would just fatigue the panel again. So for a long time I just had a piece of wooden dowel and a cloth to hold the boot up. Then my dad noticed that the bonnet stay from his Subaru Liberty would be about the right size, so we ordered one of those and it turns outs it's perfect! These are the parts you'll need. I believe Subaru sells them as a pack with everything you need. You'll also need to rummage up an appropriate bolt and washer (I used a Mitsubishi bolt from my old car). After we took these photos we also found the bolt didn't quite have enough purchase, so we made up a steel backing plate with little tabs on the end to hold onto so we could feed it into position. You could also use a nutsert. The prop comes with a rubber grommit that's the perfect size for this factory hole. You'll need to bend the prop ever so slightly so that when it's stowed it doesn't pop out at the end. You'll need to grind a little tab off the bracket - Dremel cut off wheel is your friend. The bracket works nicely mounted like this. I added some clear film underneath to stop it marking the paint too much. The prop rests nicely on this factory metal tab behind the right rear light. To get at it you'll need to cut a little of the boot liner carpet stuff away. This is what it looks like in position, stowed, and from the side to show how it holds the boot up: Anyway, hopefully this helps someone out. Please feel free to ask questions or let me know if you'd like more photos.
-
BCNR33 Boot Gas Struts Hi all, So, like many of you the boot gas struts on my car are shot, and 10kg plus boot lid guillotine is no fun. As the strut is part of the hinge and doesn't look like it comes off, I thought that while the boot was off for painting anyway it would be a good time to fix them. I did originally look at getting new replacements but the guys in Japan told me Nissan had discontinued them. Lots of people on the forums seem to have had them regassed or replaced, so I took them to a place that does that around the corner from my work. The guy said the struts go up to 1100N, but that with the hinge it won't fit on his machine so the only option would be replacement. The highest rated struts he has are 700N. I was wondering the following: 1) as people in other threads seem to have had a more straightforward experience where the guy just fixed/replaced their struts without any problems, does anyone have a recommendation for someone in Canberra who can do it? 2) does anyone know roughly what force the factory items should be pressurised to, and accordingly what force an aftermarket replacement would need to be capable of? Thank you very much in advance for your time and help, and sorry if this has been answered before (I did search).
-
WTB R33 GT-R Rear Speakers Hi all, many thanks as always for your ongoing help with my work on my car, it's greatly appreciated . Short version: WTB stock or similar rear speakers for R33 GT-R. Detailed version: A previous owner of my car did a super dodgy speaker install in the rear. They put in what I believe are 6x9s, but to avoid contacting the battery they had to put in MDF spacers which looked terrible and made the speakers contact the window. I removed them and the parcel shelf, but the shelf liner was cut to fit, so I've sourced a replacement. Fortunately they didn't cut the actual metal underneath, might be an extra hole or two but nothing structural. This leaves me in need of replacement speakers so I don't have gaping holes. Personally I really don't care about sound in the car (not what I bought it for), but my wife would like to be able to somewhat hear music haha, and it would be nice for longer highway trips, so I'm after speakers not a blanking solution. As far as I can tell there's no aftermarket amp, just the aftermarket head unit. So I'm after a pair of rear speakers that I can just plug into the wires and mount easily to deliver a factory appearance. Stock speakers would seem to fit that bill nicely if anyone has some following an upgrade, but I would also take some 6 inch aftermarket ones that are sufficiently shallow to avoid the battery and either use the stock holes or mount easily enough without massive amounts of hacking. The other thing is I have those speaker straddling child seat anchor points, and would like something that'll fit under those. Thanks for your time in reading this!
-
Cheers mate, will give that a go. It is pretty heavy, although it's also just a fairly aggressively sprung clutch to be fair.
-
Sorry it took me a while to get back to this - once again points to Matt. Vasiliy was an absolute pleasure to deal with, and the car passed no problems .
- 3 replies
-
- 1
-

-
- child seat restraints
- bcnr33
- (and 1 more)


