Search the Community
Showing results for tags 'body kit repair'.
Found 2 results
-
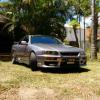
Fiberglass Bumper Repair I have found lots of good info on this website and I am posting this to give something back to the community. I have not seen any tutorials on repairing a fiberglass bumpers on this site (if there are any, sorry for reposting) and since I recently did this, I thought I would post my experience. Hopefully some out there will find this information useful. Overview: Like many others out there, my Skyline has a fiberglass front bumper (which will be replaced with a genuine plastic one as soon as I can save up the money and find one). Until then I have I have a cracked, damaged, piece of $hit letting down the look of my car. So, I have decided to repair the fiberglass bumper and extend its life. I am no expert and I have never done this before so this is a guide only, but anyone with any practical skills can have a go at this. What you will need: Die grinder ($40 el-cheapo will do) Fiberglass repair kit (about $30) Body filler (about $8-10 if you don’t already have some) Sand paper (wet-n-dry about $1 per sheet) Paint ($30-50 depending on what type) Beer (could get expensive here depending on individual) Step 1: Remove the bumper If you are not confident, take lots of photos of the bumper, its mounting points and screws before you take it apart. This way you have a reference in case you forget how to put it back together again. My bumper was only held on by a couple of screws near the wheels and some behind the number plate. Other bumpers may also have screws under the front corners and various other places. Remove all the screws and slide the bumper forward. Visually check around your bumper and don’t pull too hard on it until you are sure you have all the screws removed. Step 2: Fiberglass Repair You will need a die grinder; a cheap $40 one from your local auto part supplier or hardware shop will do the trick if you don’t have one. Use a relatively flat grinding disc and grind away all the loose edges. Don’t be scared at this point, all the loose stuff needs to be gone. You will then need to grind a groove along the cracks. Also grind all dirt off the area around the back of the cracks (on the inside of the bumper) so the resin has a nice clean surface to adhere to. I also sanded out any smaller cracks in the paint using fine wet-n-dry sandpaper. I had to do some major work around one of the front vents, so I used some straps to hold everything in place. This helped to align everything and reduce movement while the resin is applied and curing. Get your Fiberglass Repair Kit out and read the instructions carefully. These kits contain the fiberglass resin, hardener, glass matting and applicators. Get the matting and cut it to size for each crack. It should overlap the crack by 10-20mm on all sides. This has to be done on the inside of the bumper, so it is not visible once the bumper is back on the car. Mix the resin and hardener as per instructions on the pack and apply it over the matting using applicator. I only mixed small amount and did 1-2 cracks at a time. If you mix up too much, the resin will harden before you finish all the repairs. I used a Paddle Pop stick to get the resin over the matting then used the brush provided in the repair kit to smooth it all out. Once the matting is wet with resin it remains in place and this part of the process is easier than I expected. Once the repairs were done from the back, I used some resin and matting to fill in any large grooves and craters from the front. Make sure you don’t put too much on and have high spots as once it has cured, it will be a lot of work to sand back. Better to be low and fill the remainder with auto body filler later. My bumper has a fairly thin and flimsy section across the bottom of the front air dam, so I took an old piece of metal and fiberglassed it as bracing across the bottom of this part. I also fiberglassed metal washers behind the screw holes; this helps to reinforce these points as they are under most stress and most likely to crack. While everything was off the car, I also added some mesh to the inside of the air intakes. I didn’t want to use screws to hold it on because they are visible from the outside, so I decided to fiberglass it on. To do this, I cut the mesh to shape, bent it and fiberglassed it on. I used the matting and pushed it through the mesh to make sure it was held on as securely as possible. Now wait for the resin to cure. Don't forget to keep yourself lubricated... Step 3: Painting Sand all the repairs until they are smooth and use auto body filler on any low spots. Then give the whole bumper a final sand so it is ready for paint. This isn’t a painting tutorial so I won’t go into the details here. I sprayed it with factory white base and clear 2 pak paint. The picture below is after two coats of white, prior to the final clear being applied. While the bumper was off, I also drilled new mounting points for the number plate because they were too low and the number plate hung over the air dam and had a gap above it. Mounting it 30mm higher made a world of difference to the look. The finished repair looks heaps better than I could have imagined. The only thing I would have done differently would be to paint the bumper before putting the mesh on. This would have saved me masking it up, but overall I have happy with the result of just one day’s work.
-
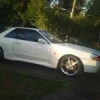
G'day guys, i have finally spent enough money on the engine (for the moment) and am starting to look more into the cosmetic side of things. Living in brisbane and working on an island off gladstone for 28 days at a time leaves me with alot of time to do research and hunt for places but it is hard to pick a good one. Does anyone have a place that they would recommend in brisbane or close to there that does resprays and would be able to fix the scratches on the body kit? Cheers Mitch