Search the Community
Showing results for tags 'install'.
Found 22 results
-
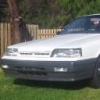
Hi guys I was wondering if any of you guys with R33s have replaced the centre dash with a tablet? Want to do it myself. Found this vid of a guy with a gtr that fitted one:
-
HELP! I've spent the past week trying to nut this shit out, but I'm getting no where. To skip over a lot of details and cut RIGHT to the chase. I am trying to complete my stereo install on my 1989 R31 GXE. I have re-run speaker wiring to doors/parcel shelf etc. I cannot for the LIFE of me (Without fear frying my head-unit) figure out which is 12V constant. And Which is 12v Accessories/Ignition. After looking on multiple pages/sites/forums, I now know that BLUE/BLACK are the Accessories/Ignition & WHITE/GREEN is 12V Constant. However, I have 2 white/green and 2 black/blue wires: Also I was told investing in a Voltage Tester would help. I have uploaded a picture of the one I have which works on 240V accessories but will not register ANY current on any of the wires on my car. Is this perhaps due to the type of Tester I have, as it doesn't have a "ground lead"? So ultimately, buying the tester has gotten me no further along with something that should be so simple. If anyone at ALL can help me with nutting out these last 2 wires, it'd mean the world.
-
Hi all Recently installed some new gauges on my GTT and saw there was nothing (that I could find) on wiring them up correctly so decided to make a little post to help anyone out in future There's a pic of the stock wiring loom. The green/yellow is a 12v power line which you connect to so you don't blow any fuses in your lighter and the red wire with purple strip (third from the top) is your headlight switch. Strangely I couldn't find a strong ground so I just hooked up a wire to this bolt which is visible once the A/C unit is removed For the ignition wire I just spliced into my blue/white wire from my head unit but you can also do this with your ignition or lighter, I just found this the easiest to do Lastly I SOLDERED and HEAT SHRINKED all the wires together and made sure not to do the old twist and tape that so many of us are guilty of. Alternatively you can crimp but as temp is relatively low under the dash board I don't think it matters what you do Hope this helps and if anyone wants to know how to do the full install feel free to comment/pm me
-
Pioneer avh-x8850bt review. Advice needed. Just purchased the pioneer avh-x8850bt, Does anyone have it installed and are experiencing any issues? No Digital radio was a bit of a surprise bit apple car play and android auto are a plus. Going to instal into my BNR34, any advice about rewiring the loom? Cheers guys xo
-
Hi all! I have looked through the forums and can't seem to find what i am looking for (also can't find anything i can understand well ) A friend of mine had a head unit sitting around at his place and seeing as my current one doesn't have AUX connection capabilities i want to install it in my car. Im in need of a new project to attempt but have read that i might be able to buy adapters so i can avoid having to wire it in myself? I am new to all of this so was hoping someone could point me in the right direction. i have attached photos of the head unit, and the wiring that came with. Sorry for the newbie question, but have decided to finally try and learn how to do it! Thanks guys
-
today i installed my engine (gearbox attached) and i thought i'll warn anyone attempting this to detach the tranny before installation it was a very tight fit probably due to the larger greddy plenum i had to drop the subframe 50-100mm for it to work
-
Hi All! Just a quick one - I am installing the OEM GTT triple gauge pod into my NA-T converted R34 however am having some trouble. I found a post on this website about how to do it, including the wiring diargam but I do not have the wiring loom for these gauges, especially the plug which goes into the back of them. If anyone has this plug/wiring loom I would be more than happy to purchase it off you so do let me know! Failing finding a plug, is there any other way to get these gauges to work? Any help would be hugely appreciated! Nihal
-
Hello world! Looking to make a quick tutorial on how to change out your tail lights in the s15 for a set of aftermarket lights. I have attached a video on the process you can view, and I have written the process underneath! Please let me know if you have any questions or feedback. Steps to swapping your tail lights. You will need to first start off by finding a nice set of aftermarket tail lights you would like to install into the car. I have chosen a set of Yashio Full LED tail lights (Apart from the reverse light) There are other nice sets out there too such as the dmax type and sex spec types. I prefer the Yashio ones. Tools you will need: - Phillips head screwdriver - Flat head Screw driver - Socket set (a spanner would work too if you don't have any sockets) - Mine was an 8mm socket, but I believe my nuts are incorrect so yours might be 10mm - You may also need some side cutters for cable ties if you have any Once you have said set of tail lights and tools ready, we will start off by removing the old tail lights. If you open your boot, you will find the where the boot closes, there is a grey strip which runs from the left to the right of the rear of the boot, pictured below. You will need to gently unscrew the Phillips head screws (circled in green), and you will find they cannot be unscrewed any more, just pop them out. You will then have some clips you need to remove, I have circled the points which need to be removed in red, just pop a flat head screwdriver in the tabs and pop them out. There are 2 of these on each side. The grey peace should now lift up and out of the way! Once you have the grey piece out, you will need to remove the 4 nuts holding the old lights in. there are 2 located next to the grommet, and then 2 moving out towards the middle, one is closer than the other. I have attached another image below of roughly where the nuts are located if you are looking down on it, you will see when you are working. you will also need to unplug the white connector going to your lights, I suggest you get a small Flathead and use it to push down on the release latch on the connector if yours are old like mine they can become a pain release. The light should now slide out of its place, make sure you are holding it from the front so you do not drop it Once the light is out, simply reverse the process. If you are installing the Yashio Tail lights like me, you will have a small black box you need to stick to the inside of your boot, and there will be a little plug you need to plug into that too, coming off the lights, simply unplug it to get the cable through the boot and back through the grommet, and then plug it back in once the cables back in the boot (I am not 100% sure what this box is for, initially, I thought it was just to decrease the current and voltage so that it does not fry the lights, but cannot confirm if this is it's only use. It is quite large and would expect such a device to be much smaller. If you know what this is for I would be curious to know Please let me know) Hopefully, you followed through with the tutorial and the new lights look great! Keen to see the results so post up some photos if you followed my tutorial, or even if you just came across it and you have your own lights If you have anything you think I missed and you would like to add, please let me know, I can add it at any time
-
Hi all. I know this has been done before, but i am doing this again with a video to make it a bit easier for people to visualise what needs to be done! I have attached a video below of the process of installing the fog lights into your S15 weather they are factory or aftermarket the process is similar. This is a LOT easier and quicker if you have an imported S15 from japan, if you have an ADM (and possible NZD) s15, this process might be a bit longer for you, but will explain your extras in the write up and briefly in the video. Come along for the install! Written Tut! Ok so for those of you who would like some more info, or prefer a read up, here is is in a step by step fashion please drop any questions below! Step 1: You will need the following: - An S15 - A set of factory or aftermarket fog lights - You may also need some 6mm thread nuts and bolts and some washers from memory to mount the lights into the bumper - FOR IMPORTED SILVIA: - You may need an indicator stalk with the fog light switch, else you can follow the ADM/NZ optional Extras to get yours working. (if you are missing the stalk and want one, please PM me on YouTube as i am more likely to see it sooner, or you can PM me here and i will try get back to you as soon as i can with info on how to get one, or if i can source you one) - FOR ADM/NZ MODELS ONLY: - You will need a inline Fuse - Some wire (12 - 14 gauge) - A Switch which Turns you on.. ehem i mean, can be used to Turn on your Fog Lights (Honestly any switch which you would like to use will do, just keep in mind you need to mount this somewhere you can access it) Step 2 (optional): You may want to remove your front bumper for ease of access, or maybe not, i did, good luck should you choose not to Step 2.5: If you are trying to remove your bumper, i have circled the screw location in the video: - There are some near the wheel well closer to the wheel - One inside the bumper up near the light on each side -The ones at the front in between the lights - You may also have some at the bottom if you have a lip, or not Step 3: If your bumper has any mesh or covers where the fog lights go, you will need to remove them at this point. The ones from the non - Aero bar must be unscrewed from the inside, and then slid out from the inside. I assume those on the Aero Bumper are the same (if someone can confirm i will update Thanks) Step 4: Before we mount everything in place, we will test the lights to make sure they work! - If you have an imported SILVIA and are using the factory fog lights, please plug them both into the plugs which you can find around where they will sit on the bumper. If you cannot find the plugs, it is likely you have an ADM or NZ model of the S15, and you will need to do some additional work - If you are using aftermarket fog lights and you have a SILVIA with the plugs, you will need to create an adapter by buying the plug from a wrecker, or online if you can find them, or by using some spade connectors (probably the easiest option as i believe they will fit) - If you are using factory/aftermarket fog lights and you have an ADM/NZ model S15 without the plugs you will need to run wiring to the cabin yourself. Step 4.5(For ADM/NZ Models ONLY): You will need to make your own wiring for this, i am not 100% sure if your s15 comes with the relay or fuse, but no matter, we can do this without any factory wiring, follow the next few steps - You will need to create a plug which goes into your Fog Lights, weather they are factory or aftermarket, you should have 2 wires coming off each at this point. (i would use spade connectors as above but up to you) - You need to choose where you want to draw the power from at this point, You can grab it directly from the battery if you want, probably the easiest way, otherwise you will need to find a fuse you can tap into, i would use the battery but this is up to you. Find your power source. - Wire in your in-line Fuse, i recommend 30 amps, if you believe you know better please do as you like (we don't like fires here...) - Run your wire into the cabin if you are getting power from outside, there is a grommet under the driver side fender which does into driver foot well, run the positive cable into here and then wire in your switch and mount it somewhere accessible to you! - Run the negative off the switch back through the grommet and outside the cabin, into the bay, then rout it down to roughly where your fog lights will be - You will need to split your power source cable and make sure to leave some slack for each connector as you should plug them in before mounting the bumper back - Terminate the wire into either the proper connector or spade connectors (pick your poison) and then join both neg cables back together to make your life easy, and rout the neg to a bolt which connects straight to the chassy to ground the connection. Step 4.6(For SILVIA Import Model From Japan): - If you have an Indicator Stalk with the fog light switch, you do not need to follow the next part of this step - If you do not have the fog light switch on your stalk, you can either buy one and fit it, or follow step 4.5 to install the lights as you would in the ADM/NZ model, or you can do some research to find out where you can tap into the factory wiring in the cabin and just wire the switch in there (i did not go through this so cannot offer much assistance, but if you do go through this, please comment and let us know how you did it, would love to add the info to the Tutorial ) Step 5: Test your lights to see if they Turn on Step 6: If Step 5 was Successful go to step 7, if the lights did not come on, please make sure to check your wiring, or try reversing the polarity as you might have plugged positive into negative on the fog light. If this does not fix your issue, you need to make sure your wire is plugged in and perhaps try using a multi meter to test for power and ground. If you are using factory wiring make sure the fuse and relay are installed in the fuse and relay box Step 7: Unplug your lights and mount them into the bumper (factory will go straight in, just need the mentioned bolts from above) If you have aftermarket lights, you might need to make your own bracket. Step 8: Mount your bumper back onto the car and plug the lights in at the same time Step 9: Clean and final test! Step 10: Profit? Please post some pics below of how yours turned out and what you did. Keen to see outcomes. Please feel free to let me know if there is anything i missed as i would like to make this the most accurate and up to date tut there is. Thanks and good luck!
-
Hi all I'm installing a hks gt-rs turbo on my r34 GTT. Read that I should prime it before I drive and to do that I need to cut the fuel supply or ignition. Could anyone recommend which I should do? Would I just remove a fuse and if so does anyone know which one? Also if anyone has any tips like pouring oil directly into the turbo before etc feel free to share! Cheers
-
 Exedy Twin Disc Install/Help I just recently purchased an Exedy Twin Disc clutch for my GTR R33 (RB26), and I'm currently in the process of installing it. However, after pulling the tranny, ran into a bit of a problem. The transmission and engine won't mate back together because the fork(pull type) and the output shaft sleeve on the transmission won't let it slip all the way back together( there is about 3/4 inch gap between trans and engine). I was told something about machining the sleeve down a bit, however my local car shop that deals quite a bit with JDM cars, they said it should just bolt right up. At this point I would love some help from the experts here, any ideas on what to do, or has anyone else run into a similar problem? If any more information about the car or clutch is required, just say so, first post here! Car is a 1996 Nissan Skyline GT-R R33 VSpec, clutch is an Exedy Carbon Twin Disc with a lightweight flywheel. Thanks for reading!
 -
I did a search but couldn't find a topic on this specific to the R34. Has anyone installed an aftermarket cruise control on an R34 GTT? How hard is it to do? I do a lot of highway driving and hate the fact that I have to keep an eye on the speedo every minute
-
will a s13 front under brace fit a r32 gtst? my mate is selling me one from his s13 so im curious if it will fit my gtst non attesa (rwd only) with sample pic of the s13 under brace
-
 Hi, Trying to install a boost gauge in my 89 R32 GTR. I've searched the forums and Google extensively and there is a lot of great information about teeing into the stock boost gauge line as shown in the attached picture borrowed from a diy thread on this forum. Problem is that line has been removed on my car. There are some other diagrams but I'll be honest, I don't get it. As I am a simple person and visual learner, does anyone have or can anyone take a photo showing me where that line used to connect to the engine? That way I figure I can skip teeing into that line and just connect the tube directly to the engine. Thankyou in advance!!
 -
Hey ive got some 400R skirts and rear GTR pods off my old car which i want to install on my new one. My old 33 had the holes drilled etc and brackets to fit the pods which wrap around the rear bar, but my new 33 has never had any after market kit on it; therefore im looking for ways i can do the install. What would be the best way to mount the side skirts? ( i dont want to only use sikaflex etc ... needs to be secure ) And how do you mount GTR pods on a GTST? (doesnt seem to be much info on this? is a "glue" the only way??) Any help is appreciated . But preferably i'd like some detailed steps Car is a series 2
-
Hey guys, Was wondering if anyone knew the best place to get undercar LEDs? Apparently I need custom ones made up for the back and the front (sides are fine) because of the way the exhaust runs and because the K-Bar is too low. I heard Jaycar has these LED strips you can cut to length that are made for undercars. Haven't been to check them out yet though. I'm after preferrably the 1000 colour LEDs, if not then just white as I have a Black and White them going with my car. Let us know. Cheers
-
Hey Guys/Girls So last week I was checking out the exhaust setup on my R34 and it was just a simple HKS Catback, since I had ordered a turbotech boost controller I decided it would be a good idea to help the car breath better and open up the rest so I went ahead and purchased a KLS stainless steel turbo-cat dump pipe from Ebay. $235 posted. - http://www.ebay.com.au/itm/230881892110?ssPageName=STRK:MEWNX:IT&_trksid=p3984.m1497.l2649 There are numerous options ranging from $150 up to 600+ when purchasing this however I liked this one because a) it was reasonably priced for a stainless steel one and b) it had the 2-1 flow from at the top of the flange. I got it installed into my car today (another $200) and I wanted to share so you guys can make informed decisions on your setups. As the guys at the shop told me the dump pipe normally adds a slight increase in boost response due to the more open flow and bolting directly onto the stock turbo this is a good for those not wanting to run an aftermarket/custom setup. On the drive home I didn't notice any power difference at all, and the sound still remains the same. The guys told me I was losing about 40% flow due to my OEM cat been nearly stuffed so with that in mind I have found a Xforce stainless steel for $195 posted. Will be ordering next paycheque to complete my full system! Hopefully, combining that with my new dump pipe it will see a slight increase, I do feel allot happier running 10psi with a much more open system. I will post results from my new cat when I get my hands on it, hopefully in a week or so.... It should be noted that the dump pipe fits fine but came up just short so the guys had to make a small bend to connect to the cat, otherwise is all ok with the OXY sensor etc. If I get a chance ill throw some pictures up tomorrow.
-
I'm trying to install a new head unit into my 92 GTST, I got the until in but I'm not getting anything from the speakers, I'm pretty sure I have it hooked up right but I read somewhere that the amp in the boot wont operate with a new head unit. I'm trying to avoid rewiring all of the speakers but I'm pretty new to the audio world and any help would be much appreciated.
-
Hey guys, Ive got a kit id like to install on my 33. I have a genuine GTR spoiler and Skirts, with a GTR rep front bar but with genuine Gtr front indicators. The skirts and spoiler are easy enough to install, but because ive got genuine parts, Im going to need someone who is familiar enough with these to preferably wire up the middle brake light for the spoiler, and correctly wire up the front indicators to my S2 Gtst indicator connectors. So ideally for the sake of ease id like one place who would be able to not only fit all the items but wire them up correctly as well. Does anyone have any recommendations in Melbourne? Preferably western suburbs/Geelong area.. Or if anyone is super familiar with this stuff, id be more than happy to shout a couple of slabs/bottles/whatever your poison is for the time. Or if its super simple a few pointers to get the job done Thanks guys!
-
R33 S2 RB25DET FFP Install - HELP Hi all, First poster here I've got a few questions about installing a FFP. I've got a stock R33 S2 with the usual (FMIC, BOV, POD, Coilovers) around 176,000kms on the engine. The engine itself is very healthy, running stock boost but pulls like a dream, always serviced every 5,000kms with Penrite 10W40 Racing 10, spark plugs etc by myself of course. Now, I bought a FFP the other week, pretty sure its a Greddy remake, got it for a cheap price with all the fittings, screws and throttle body. Also bought the stock Inlet Manifold Gasket from Autopro just incase the one on is no good. Basically I want to tidy up the engine bay a little as I hate the look of the stock plenums and the J-pipe crossing over the engine is a pain to take off every time to do spark plugs. I'm very mechanically minded, been around RBs for years, done a few things to them and done a few engine rebuilds etc. So my questions are; anyone here done a FFP install themselves? How long did it take and what difficulties did you run into? Anything major to drill/reshape etc or just bolt on stuff? Where does the BOV get relocated to as the crossover J-pipe gets removed? Where do all the vacuum lines go? If anyone can get back to me ASAP with answers or even videos that would be more than appreciated as I don't want to start something and end up not being able to drive my baby, looking at doing all this over the weekend, cheers guys! NOTE: PICTURES WILL BE UPLOADED (ENGINE BAY, FFP, THROTTLE BODY)
-
R32 GTST boost tee Installing R32 boost tee Hey so I'm trying to install my boost tee. All tutorials online show cars with the solenoid or external wastegate. The 32 GTST doesnt seem to come with a solenoid so that method doesn't work, now people say to connect tee to the line from turbo compressor to wastegate but there is no line from turbo compressor to wastegate. Only line is from wastegate to intercooler piping ( as seen in image ). Would this one be okay to use?