Search the Community
Showing results for tags 'lights'.
-
Currently have my engine out for a rebuild, and doing some other works on the rest of the car while it sits, like taking the steering wheel off to replace the clock spring and removing the wiring and button the previous owner wired in to the dash to make the horn work. My dash lights like the ABS, AIR BAG, HICAS, etc that come on when you turn accessories on as well as the climate control unit stay on when the ignition is off and key is taken out. Unfortunately Im not sure if this was happening before i pulled the steering wheel off and replaced the clock spring. Is this likely just something with the wiring that will be sorted when the engine is back in and everything wired up? Or could it be something from the wiring under the dash with the ignition? Thanks in advance
-
Hey guys i have a bunch of 4ft fluro lights in the for sale area... im only putting this up here to keep it local :-) $20 each.... $15 if u want 11 or more... all in perfect working order - happy to test in front of you at my place. give me a call or msg if you want any 0410 529 460 Cheers Greg
-
Hi All, I have recently done a projector upgrade on another set of headlight so selling my originals. Selling Left and Right Headlights (not high beam). Were factory Xenon but got converted to Halogen during compliance. I ran an ebay HID kit in them for over 2 years without any issues (can be bought on ebay for $50 - all wiring is there already). Good condition, just need the HID bulbs / ballast installed. Will throw in x2 LED white parkers. $215 (Can post at your expense). Pics to come - PM/Reply if interested so can take them sooner!
-

Clear Blinkers / Foglights Series 2 Stagea For Sale
ステージア posted a topic in Stagea Parts Classifieds
Clearing out some excess Stagea bits I have. Get rid of that unsightly orange and make you car look like this: The orange and yellow inside lenses have been removed from the blinkers to give a clean clear appearance, especially with the use of "stealth" or "chrome" bulbs. They have been opened & resealed (not by me) I have used them for years and they did not leak. NB. The images don't show it but there is a slight yellow tinge to the plastic lenses as most of these this age do. Inspections welcome Mascot NSW $75 for the set. Happy to post @ buyers cost call 0401 454 406 or PM More bits to come.. Thanks for watching -
Wrecking 200ZR Everything is available MINUS motor & gearbox Message me a price and we can sort out a deal, Can post Text 0451490030
-
Hey folks As the title suggests - chasing a pair of clear headlight covers/lenses for a r32. I believe the gtst and gtr/n1 headlights are same size. Any suggestions or tips? Or if you have some for sale from a pair you are wrecking. Don't even mind paying for headlights as well if the price is right but preferrably chasing lenses only. Something like these: Nik 0467003003
-
WTB R34 Xenon or Not Headlights to USA Ciao Ragazzi, I want to buy a complete pair of headlights for my R34. I don't want to bother with any units that have broken screw tabs/brackets. 100% working condition please. It would not be a issue if the covers are fogged / yellowing. kik: aleoking // line: backt0thefuture // ig: iam__valentino *Needs to be shipped to the USA*
-
Hello world! Looking to make a quick tutorial on how to change out your tail lights in the s15 for a set of aftermarket lights. I have attached a video on the process you can view, and I have written the process underneath! Please let me know if you have any questions or feedback. Steps to swapping your tail lights. You will need to first start off by finding a nice set of aftermarket tail lights you would like to install into the car. I have chosen a set of Yashio Full LED tail lights (Apart from the reverse light) There are other nice sets out there too such as the dmax type and sex spec types. I prefer the Yashio ones. Tools you will need: - Phillips head screwdriver - Flat head Screw driver - Socket set (a spanner would work too if you don't have any sockets) - Mine was an 8mm socket, but I believe my nuts are incorrect so yours might be 10mm - You may also need some side cutters for cable ties if you have any Once you have said set of tail lights and tools ready, we will start off by removing the old tail lights. If you open your boot, you will find the where the boot closes, there is a grey strip which runs from the left to the right of the rear of the boot, pictured below. You will need to gently unscrew the Phillips head screws (circled in green), and you will find they cannot be unscrewed any more, just pop them out. You will then have some clips you need to remove, I have circled the points which need to be removed in red, just pop a flat head screwdriver in the tabs and pop them out. There are 2 of these on each side. The grey peace should now lift up and out of the way! Once you have the grey piece out, you will need to remove the 4 nuts holding the old lights in. there are 2 located next to the grommet, and then 2 moving out towards the middle, one is closer than the other. I have attached another image below of roughly where the nuts are located if you are looking down on it, you will see when you are working. you will also need to unplug the white connector going to your lights, I suggest you get a small Flathead and use it to push down on the release latch on the connector if yours are old like mine they can become a pain release. The light should now slide out of its place, make sure you are holding it from the front so you do not drop it Once the light is out, simply reverse the process. If you are installing the Yashio Tail lights like me, you will have a small black box you need to stick to the inside of your boot, and there will be a little plug you need to plug into that too, coming off the lights, simply unplug it to get the cable through the boot and back through the grommet, and then plug it back in once the cables back in the boot (I am not 100% sure what this box is for, initially, I thought it was just to decrease the current and voltage so that it does not fry the lights, but cannot confirm if this is it's only use. It is quite large and would expect such a device to be much smaller. If you know what this is for I would be curious to know Please let me know) Hopefully, you followed through with the tutorial and the new lights look great! Keen to see the results so post up some photos if you followed my tutorial, or even if you just came across it and you have your own lights If you have anything you think I missed and you would like to add, please let me know, I can add it at any time
-
Hey, I've only just got my Stagea S2 today, and as luck would have it, the driver side headlight bulb exploded. However I'm struggling to figure out what bulb to replace it with. I've seen different answers with the D2R, H1, H1R1, H4, H3, and others. What I want to know, is which light is which, so I know what to replace. There is the outside quarter lights, with a large and small bulb on the inside. Then the inner quarter lights (Brights I think?) in the grill. And then the rectangle lights on the bumper. And for each light, which size bulb do they take?
-
Hi all. I know this has been done before, but i am doing this again with a video to make it a bit easier for people to visualise what needs to be done! I have attached a video below of the process of installing the fog lights into your S15 weather they are factory or aftermarket the process is similar. This is a LOT easier and quicker if you have an imported S15 from japan, if you have an ADM (and possible NZD) s15, this process might be a bit longer for you, but will explain your extras in the write up and briefly in the video. Come along for the install! Written Tut! Ok so for those of you who would like some more info, or prefer a read up, here is is in a step by step fashion please drop any questions below! Step 1: You will need the following: - An S15 - A set of factory or aftermarket fog lights - You may also need some 6mm thread nuts and bolts and some washers from memory to mount the lights into the bumper - FOR IMPORTED SILVIA: - You may need an indicator stalk with the fog light switch, else you can follow the ADM/NZ optional Extras to get yours working. (if you are missing the stalk and want one, please PM me on YouTube as i am more likely to see it sooner, or you can PM me here and i will try get back to you as soon as i can with info on how to get one, or if i can source you one) - FOR ADM/NZ MODELS ONLY: - You will need a inline Fuse - Some wire (12 - 14 gauge) - A Switch which Turns you on.. ehem i mean, can be used to Turn on your Fog Lights (Honestly any switch which you would like to use will do, just keep in mind you need to mount this somewhere you can access it) Step 2 (optional): You may want to remove your front bumper for ease of access, or maybe not, i did, good luck should you choose not to Step 2.5: If you are trying to remove your bumper, i have circled the screw location in the video: - There are some near the wheel well closer to the wheel - One inside the bumper up near the light on each side -The ones at the front in between the lights - You may also have some at the bottom if you have a lip, or not Step 3: If your bumper has any mesh or covers where the fog lights go, you will need to remove them at this point. The ones from the non - Aero bar must be unscrewed from the inside, and then slid out from the inside. I assume those on the Aero Bumper are the same (if someone can confirm i will update Thanks) Step 4: Before we mount everything in place, we will test the lights to make sure they work! - If you have an imported SILVIA and are using the factory fog lights, please plug them both into the plugs which you can find around where they will sit on the bumper. If you cannot find the plugs, it is likely you have an ADM or NZ model of the S15, and you will need to do some additional work - If you are using aftermarket fog lights and you have a SILVIA with the plugs, you will need to create an adapter by buying the plug from a wrecker, or online if you can find them, or by using some spade connectors (probably the easiest option as i believe they will fit) - If you are using factory/aftermarket fog lights and you have an ADM/NZ model S15 without the plugs you will need to run wiring to the cabin yourself. Step 4.5(For ADM/NZ Models ONLY): You will need to make your own wiring for this, i am not 100% sure if your s15 comes with the relay or fuse, but no matter, we can do this without any factory wiring, follow the next few steps - You will need to create a plug which goes into your Fog Lights, weather they are factory or aftermarket, you should have 2 wires coming off each at this point. (i would use spade connectors as above but up to you) - You need to choose where you want to draw the power from at this point, You can grab it directly from the battery if you want, probably the easiest way, otherwise you will need to find a fuse you can tap into, i would use the battery but this is up to you. Find your power source. - Wire in your in-line Fuse, i recommend 30 amps, if you believe you know better please do as you like (we don't like fires here...) - Run your wire into the cabin if you are getting power from outside, there is a grommet under the driver side fender which does into driver foot well, run the positive cable into here and then wire in your switch and mount it somewhere accessible to you! - Run the negative off the switch back through the grommet and outside the cabin, into the bay, then rout it down to roughly where your fog lights will be - You will need to split your power source cable and make sure to leave some slack for each connector as you should plug them in before mounting the bumper back - Terminate the wire into either the proper connector or spade connectors (pick your poison) and then join both neg cables back together to make your life easy, and rout the neg to a bolt which connects straight to the chassy to ground the connection. Step 4.6(For SILVIA Import Model From Japan): - If you have an Indicator Stalk with the fog light switch, you do not need to follow the next part of this step - If you do not have the fog light switch on your stalk, you can either buy one and fit it, or follow step 4.5 to install the lights as you would in the ADM/NZ model, or you can do some research to find out where you can tap into the factory wiring in the cabin and just wire the switch in there (i did not go through this so cannot offer much assistance, but if you do go through this, please comment and let us know how you did it, would love to add the info to the Tutorial ) Step 5: Test your lights to see if they Turn on Step 6: If Step 5 was Successful go to step 7, if the lights did not come on, please make sure to check your wiring, or try reversing the polarity as you might have plugged positive into negative on the fog light. If this does not fix your issue, you need to make sure your wire is plugged in and perhaps try using a multi meter to test for power and ground. If you are using factory wiring make sure the fuse and relay are installed in the fuse and relay box Step 7: Unplug your lights and mount them into the bumper (factory will go straight in, just need the mentioned bolts from above) If you have aftermarket lights, you might need to make your own bracket. Step 8: Mount your bumper back onto the car and plug the lights in at the same time Step 9: Clean and final test! Step 10: Profit? Please post some pics below of how yours turned out and what you did. Keen to see outcomes. Please feel free to let me know if there is anything i missed as i would like to make this the most accurate and up to date tut there is. Thanks and good luck!
-
Hey guys i was just wondering what is the most brightest H1 globes that you can go up to in victoria
-
i was wondering if theres any way to change the lighting inside my 2003 skyline, im not really into the orange lighting everywhere e.g. stereo, speedo, clock etc. id like to go for a whitish blue colour, kind of like in tron legacy colour scheme haha cheers
-
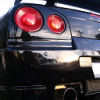
Hi all, I'm fitting some stock tail lights on my R34 after I got rid of my faded LED pair, and I noticed that the inner set of lights (smaller circle) take a pair of bulbs that I can't seem to find. Correct me if I'm wrong, but are these supposed to light up when the headlights are on? I've looked around, and the general consensus seems to be that T10 wedge types will work just fine, but they don't seem to fit on the sockets - no click can be felt or heard when they go into the sockets (using 12V 5W T-10mm, capless). I strongly feel that the plugs on the bulb are not long enough to reach the socket's metal contacts. After fitting them they don't turn on when the headlights are on, but brake lights work when pressing on brake and indicators work fine too. Is there another type of bulb that works with the inner circle? It could also be a fuse problem, but indicators and brake lights are working on both clusters, so I'm really confused about this. I've also tried fitting all four bulbs and then turning on the lights, but no dice. I've bought enough ill-fitting bulbs to create a shop of my own at this stage. Any help will be greatly appreciated. I've attached a photo to show which part of the light I'm referring to. Thanks!
-
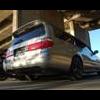
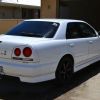
 Hey so up for sale are the V35 Series 1 Sedan Tail Lights with Trunk Portion $320 ONO These wheels on my car are on sale as well, here are some pics They are the HR Racing HR-472 Dull Black w/ Red lip around the wheels in 19x8 around 35 offset all round with tires, still has some good amount of tread left. Gutter rashes here and there $650 ONO
 -
Park lights wiring hiccup Hey guys and gals I'm having a bit of trouble with the recently Rb swapped s13. It now idles which is mint. But I cant leave the battery connected 'cos the park lights (clearance lights according to FSM) get constant power.. This is my first attempt at doing anything like this myself and so far its been all good. engine is in, running, all lights work properly (except the obvious), the stereo is pumping out sounds, new interior is in (seats, dash. carpet, the works) and paint is on the way. The problem I've run into now is that the whole 'exterior lamp' circuit gets constant power. So my clearance lamps and tail lights are always on. In turn, the dash, licence plate lights and heater control unit lights are always on too. I am not overly competent with wiring. I can do it... slowly. Definitely getting quicker and better with experience. I don't know much of the technical lingo and there is a lot of it that I do not understand. Thus why Im after a wee bit of advice. I have pulled all fuses (engine fuse box and kick panel fuse box) and these lights stay on. Unless you remove the alternator fuse. Then they are off. I also tried unplugging the switch up by the steering wheel and the exterior lamp circuit is still powered. If you twist the switch to the 1st position (ON) then the lights become a little bit brighter. Not much, but just noticeable. Had a mate here for a few days (happens to be an auto sparky). Couldn't figure it out in his time here. To be fair, we had no wiring diagram then and were doing other bits n pieces too. If someone reading this is electrically savvy and you want to help, let me know what you need to see pictures of. I've made the full 900 odd page manual with wiring diagrams etc and can post up pics. this just has me stumped. Where do I start? What would you do? Cheers guys Sean
-
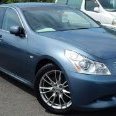
V36 Front Bar Hi Does anyone out there with an 07 V36 Sedan Type S know the height of the bezel/grille in the front bar, where fog lights would normally go. Also is it removable? I've tried looking at pictures and it seems small. I want to fit 90mm lights down there and Im preparing in advance so I dont have a car to look at. Pics for clarification. Any help greatly appreciated.
-
 R33 S2 Angel Eyes Fog Lights LED Basically replacing the series 2 clear fog lights located on the front bar with led angel eye projector fog lights. They will sit in place of the original glass lens sitting on a custom acrylic bracket to hold it in place and present a visually pleasing and professional look also keeping it weatherproof and maintaining the circular style. NOTE: Will be posting more pics later just a rough idea
 -
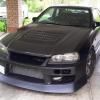
Hey everyone, I am currently doing a r32.4 build, but just doing the front end conversion, Im just wondering if anyone has done this before as I need some advice. Ive got my self the front end of the body kit, veilside 34 gtr bonnet, 34 xenon headlights and nismo side indicators.. all i have to get now is the front indicators, but the problem I have at the moment is I dont really know how to hook up the indicators etc. Do I have to get my hands on a 34 indicator loom or something.. any advice will be appreciated if people are interested in this thread I willl upload pictures etc as time goes on.
-
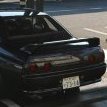
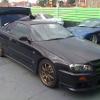
 hi guys im looking for indicators to suite this front bar if possible if anyone has any locally ? i need them urgently before i get yellow stickered for not even having indicators at all attached im not really fussy just anything that will work even GTR R34 ones if theyll fit
 -
I've looked around on the forums about LED interior lighting conversion. I got the jist of it all, and bought the LEDs I need. Then, I became addicted, and now I want to replace the lights in the hazard buttons, electric window switch buttons, and all those random little places. Does anyone know the package size needed for these replacements? (IE: T3, T5). What I found online so far is this: http://www.gtr.co.uk/forum/32293-hazard-light-switch-lamp.html But that post is dead as hell, and from years ago. Help would be appreciated! Thanks y'all.
-
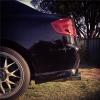
Hi all, Im not sure if this topic has been covered before, but Im sure this might apply to some of you. Have front end damage on my car, where the xenon light "clips" or tabs for screwing onto headlight bracket has been broken. Also has some damage to the light housing itself. Anyone tried to fix this problem by fabricating a custom mounting plate instead of shelling out hundreds of $$$ to replace the whole unit? Any suggestions on where I can get this done or is it achievable as a DIY? Picture below as reference
-
I've developed a bit of a problem with my R34 lately. Every know and then either as I'm driving or when I start the car up the following happens: Tachometer, speedometer and engine temperature gauge stop working Check engine light comes on TCS OFF and Slip light comes on HICAS Light comes on Central locking stop working Cigarette lighter dies Then eventually they will all start working again. Car runs fine the entire time. Any suggestions on problem/cause/solution or if anyone has experienced this before? Cheers!
-
Hi guys, Have had this issue with my R34 N/A sedan for a little while now. Probably about 3 months ago, whenever i would flick to high beams, my cd player would turn off and then turn back on. My speedo backlights would also flicker. I had my battery tested (which was the same battery which came with it from Japan), and was told it was not performing well, and purchased another. I believe that my alternator was also tested at this stage, and came up fine. A few weeks later, I had the same issue. So, I popped the bonnet and had a look at the battery terminals, just out of curiosity. The positive terminal appeared very SLIGHTLY loose, so i tightened it, and also cleaned it up a bit. Problems were gone, and no issues for another 2-3 months. Until tonight. Driving home, popped high beams on, and boom, headunit goes off, backlights flicker, and even the A/T light is glowing at me. I was pretty spooked by the A/T light, as I hadnt had this issue before. Anyway, I arrived at my home, and the light was off, and my high beams no longer affected any other components in my car. (I had been driving for 30 minutes - discovering the issue again in the meantime) I have these Ebay LED's in my parkers. And the rest of my headlights are standard Xenons. My headunit was also professionally installed. Can anybody lend any thoughts? Thanks!
-
I'm selling the below parts off my GTT. They are all the old parts I had laying around after doing my last upgrades, most are in great condition. Rear suspension | R34 GTT (fork type) - JIC Magic (Left seems to have lost pressure), otherwise excellent condition, no rubber cracks at all - $200 Stock internal fuel pump for R34 GTT - $50 Stock air flow meter - $50 Stock cat converter - $50 Stock mirrors in gloss black, great condition but right mirror is missing the plastic that connects to door - $50 Return flow intercooler 600x240x60, excellent condition - $200 Rear seat belts with coils, excellent condition - $50 Rear stock seats, slight staining on seats but can probably be cleaned - $150 Stock right head light, none xenon, broken clips and floating clear plastic bit on inside - $200 I have pictures of everything so just send me a text on 0431516718 and I'll send a picture of whichever part. Pickup from Adelaide or bank deposit+postage at buyers expense. Cheers, Tom
-
Pair of R33 GTR Headlights. Lenses on both have no markings ,scratches, no yellowing or cloudiness. Everything seems to be intact. These were purchased from Japan but have sat in the box they arrived in for months. Located: Victoria any questions please PM me and I will get back to you ASAP.