Jump to content
SAU Community

Light Up Skyline Sign


PRDTR_33

Recommended Posts

hey i was wondering if any knows how to light up the skyline sign at the back?

i was thinking of putting a neon tube on the back but dont know how to connect the neon to the back light to make it switch on when i turn the lights.

anyone have another suggestion i would like to hear it thanks you..... by the way im shocking when it comes to electronic, soo i would have no idea where to start when it comes to wiring things.

post-25344-1149236738.jpg

Link to comment
Share on other sites

  • Replies 80
  • Created
  • Last Reply

Top Posters In This Topic

Top Posters In This Topic

Posted Images

these lightup panels were a factory option. look around importers sheds and the like, they might have one lying around. justjap.com, try them

Link to comment
Share on other sites

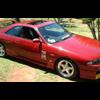
Thats my car in that pic

i used 14 hi bright red LEDs run in series with a resister, then they are tapped into the brake light feed from the rear lights for power

i tried a neon first, wasn't bright enough and didn't fit in there very nicely.;

it was a S1 clear panel, that was sprayed the cars colour, then sanded off the paint from the letters.

Link to comment
Share on other sites

these lightup panels were a factory option. look around importers sheds and the like, they might have one lying around. justjap.com, try them

the option from factory looks no where as good as craved's car looks though. The factory option looks like some one went over it with glow in the dark paint.

Link to comment
Share on other sites

there are small kits u can buy at jaycar that consist of bars of say 5 LED's that are 12V DC already so its perfect for ur car. they're quite bright i think, look at the MCD rating of LED's to determine their brightness.

ie. those little LEDs u see to indicate stuff are like 15mcds. there are 6000 ones etc. the single ones u will need a small board consisting of a voltage regulator and 2 capacitors or so depending on the voltage of the LED's, most likely they wont be 12..if they are its better to use such a regulator anyway.

i'd probably suggest u use one or two CCFL tubes instead. Theyre really thin and much brighter than neons. The reason being that led's will have regions of brightness etc. ie. the centre of the led, then dim away till the next one and so on. It wont look completely even whereas two CCFL tubes i think would give just the blue glow etc. one just above the writing and one just below. u could be creative and put a little mirror next to the ccfl making all the light go in the middle only.

Link to comment
Share on other sites

Thats my car in that pic

i used 14 hi bright red LEDs run in series with a resister, then they are tapped into the brake light feed from the rear lights for power

i tried a neon first, wasn't bright enough and didn't fit in there very nicely.;

it was a S1 clear panel, that was sprayed the cars colour, then sanded off the paint from the letters.

that sounds easy but do you think you can take pic of it and show me steps by steps of how you did that?

that would be great if you can... if you wanna send it to my email its.... [email protected]

thankz

Link to comment
Share on other sites

Here is my "SKYLINE" backlight.

post-1811-1149328684.jpg

This is how i done it myself :thumbsup:

The "SKYLINE" facia (S1 R33) was first sprayed the same colour as my car. It is advisable to use a few coats of black paint, then spray your colour as required. The black paint should not allow the light to come through.

I then used my Dremal tool to cut out the rear plastic of the facia. Do not attempt to pry the facia apart, you will only end up cracking the plactic.

post-1811-1149329058.jpg

Then i used a sharp blade, off a Stanly knife (remove the blade from the Stanley knife), to carefully cut off the paint from each letter. (Not as hard/long as i thought it would be :)).

post-1811-1149329173.jpg

Using a Jaycar "bread board" and my electronic experience, i positioned two hi-intensity LEDs, in series with resistors, in between each letter. This was done to try and minimize the focus of the LEDs. YES, it is damn bright :banana:. It may also help to file the top of the LED's, this will disperse the light better.

post-1811-1149329318.jpg

It is now ready to be secured into position, I just used some 'Locktite 406' super glue and a small plastic tab at each end. Once fixed, i coated/sealed the rear facia with a good layer of sicaflex, to ensure it is as water resistant as the original.

post-1811-1149329540.jpg

I had to remove one of the 4 mounting bolts to allow the wires to enter the boot. Using a multimeter i found the wire that lights the night lights and spliced the 12V wires to it. The ground wire was bolted to an existing ground point. Sorry, i forgot what colour the 12V supply wire is :(.

post-1811-1149330254.jpg

Hope that helps ;)

Good Luck

Alan

Link to comment
Share on other sites

Awsome job Al! I have an R32 and have thought about this many a time but couldn't figure out how to get several LED's on the go without wiring each LED individually with thier own resistors but if you can get the common power boards that might just be the trick!

I think I'll only use it as a third brake light though

Edited by ellie
Link to comment
Share on other sites

On a 32 it is a lot harder as the letters are imbedded into the bar and the bar is not transparent. You will need to cut out each letter carefully (very hard), then fix a red diffuser behind the letters and seal them, then place the LED's behind that. A lot of work :thumbsup:

I decided to use it as a night light as the LED's are not bright enough during the day, certainly not good enough as a third brake light. Also the police may state that the "flashing" letters (when in traffic and appling brakes numerous times) will be a distraction to other motorists.

Good Luck

PS: Funkymonkey has made the SKYLINE backlight for the his previous R32, maybe he can help you out.

Link to comment
Share on other sites

Here is my "SKYLINE" backlight.

post-1811-1149328684.jpg

This is how i done it myself :P

The "SKYLINE" facia (S1 R33) was first sprayed the same colour as my car. It is advisable to use a few coats of black paint, then spray your colour as required. The black paint should not allow the light to come through.

I then used my Dremal tool to cut out the rear plastic of the facia. Do not attempt to pry the facia apart, you will only end up cracking the plactic.

post-1811-1149329058.jpg

Then i used a sharp blade, off a Stanly knife (remove the blade from the Stanley knife), to carefully cut off the paint from each letter. (Not as hard/long as i thought it would be :().

post-1811-1149329173.jpg

Using a Jaycar "bread board" and my electronic experience, i positioned two hi-intensity LEDs, in series with resistors, in between each letter. This was done to try and minimize the focus of the LEDs. YES, it is damn bright :P. It may also help to file the top of the LED's, this will disperse the light better.

post-1811-1149329318.jpg

It is now ready to be secured into position, I just used some 'Locktite 406' super glue and a small plastic tab at each end. Once fixed, i coated/sealed the rear facia with a good layer of sicaflex, to ensure it is as water resistant as the original.

post-1811-1149329540.jpg

I had to remove one of the 4 mounting bolts to allow the wires to enter the boot. Using a multimeter i found the wire that lights the night lights and spliced the 12V wires to it. The ground wire was bolted to an existing ground point. Sorry, i forgot what colour the 12V supply wire is :D.

post-1811-1149330254.jpg

Hope that helps ;)

Good Luck

Alan

hey thankz for the picture and everything, do you think you can show me a closer look at the circuit board bcos i wouldnt have a clue on where to solder the LED and where to put the resistor or which resistor to use.

sorry im like a total newbie when it comes to electronic circuit

Link to comment
Share on other sites

  • 2 weeks later...

Oh, completely for got :

Close-up probably wont be possible as unit is sealed.

Are you prepared to spend almost $200, on parts/paint/etc? As that is what it cost me.

Link to comment
Share on other sites

No probs, will do soon.

The clear "SKYLINE" panel is off a S1. All S1 Skylines have this clear panel between the rear indicators, you then paint it (to match the body colour) and use a fine blade to cut the paint off the lettering.

Can not use a S2 pannel as it is made from black plastic.

Link to comment
Share on other sites

Where do you get the clear panel from?

there is one for sale for $30 in the for sale section ..

dont remember the thread name, but the guy has a link to a ns.com thread for his pics

Link to comment
Share on other sites

Create an account or sign in to comment

You need to be a member in order to leave a comment

Create an account

Sign up for a new account in our community. It's easy!

Register a new account

Sign in

Already have an account? Sign in here.

Sign In Now


×
×
  • Create New...