Jump to content
SAU Community

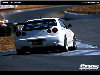
Bomberman's Rb26debt Build From Dmms Or Better Known As Dazmo


Recommended Posts

bigmike, i think kits can only get better. This nitto/je kit is a recent addition. Dont forget, although the japanese stuff is very good. The kits were designed a long time ago. You'll find probably a lot of the japanese manufacturers are slowing down or have stopped production on a lot of the RB26 stuff. Especially all the Hardcore stuff. The western world had a very late start on these cars(bar OZ) so i think with now with better understanding, technology and know how, things produced now could far surpass what the japanese had to offer at the time. I could be wrong though.

Link to comment
Share on other sites

OK..... Back to the build. Back in the day when RB26 heads and sumps were not easily accessible, I opted to get them from Japan. I know now that theyre a dime a dozen, but im talking quite a few years back now. Anyway, as the process goes, a bare head off an R33 gtr and a brand new (removed off new engine) R34 gtr sump arrived from Japan.

Once head arrived it went to Perth, to friend and ex X-Speed fabricator and i guess (im not sure of ones title who does port and polishing) "HEAD JOB GUY" Andre Veenendaal or better known as "Doctor Dre" who did a fantastic job of porting and polishing. If anyone would like his details, please PM me and I will pass you his details. He assures me he will look after anyone I refer!

BCNR33 Head. In fairly good condition. Never skimmed. Valves were straight. These are the BEFORE pics. AFTER pics to come later in the thread. (I have to take some!)

BCNR33-.jpg

BCNR33-b.jpg

beforeport.jpg

Newish (Removed off new engine) sump assembly from BNR34. This still had a new diff and the 3.545 diff gear inside.

BNR34SUMPANDDIFFC.jpg

BNR34SUMPANDDIFFB.jpg

BNR34SUMPANDDIFF.jpg

This was soon to be cut and mated up to a sump extension from Hi Octane Racing. I thought this was a better choice than the Trust sump extension. I chose this because of a few reasons. Most importantly more volume, and it utilized a trap door system rather relying on just extra volume alone. Overall finish (or lack of) of the HI Octane sump however, was only so-so. Casting was fairly rough, definitely not as pretty as the trust item. This is one of their new sumps too, which have HI-Octane cast into the front. If I had a choice, i probably would have gone without. the red stuff is a dye the put in to check for leaks. Ideally i would have liked to have gone the dry sump route like Darren and Matty. However when Daz gave me the breakdown of the dry sump system, i.e. 5 stage pump, modified sump, oil tank, breather tanks fittings and hoses etc I'll stick to old school for the time being thanks! Believe it or not, there is over 3k worth of JUST fittings and hoses in Daz's dry sump setup! I know i shouldnt be skimping on blood supply but not at the moment. Dazza on the other hand doesnt cut corners! Here, have a look at the pic i took under Daz's car. It pretty much speaks for itself. Sexy but hell exxy!

18012009021.jpg

Here is the sump extension. Its available pre welded or DIY. The pre-welded version is VERY expensive. And it is on an sump exchange basis only. Also the oil pickup needs to be extended too.

DSC02513.jpg

DSC02515.jpg

DSC02516.jpg

DSC02518.jpg

16022009072.jpg

15032009120.jpg

Edited by AtomicBomberMan
Link to comment
Share on other sites

Haha, phunky monkey, they do that to you. I hope they are worth what they weigh and cost for that matter! Ok, head is in Perth now with Andre, and the work commences. The head had all the standard bits removed, ie valves, springs retainers and buckets. Next it was bathed, checked for cracks, straightness and hardness. Before the porting could take place the standard valve guides were removed too. Here are some of the porting process pictures. (I only have a couple)

07042008264.jpg

02042008262.jpg

Andre showed me this picture and said he had to compensate for some core shift. Er.... ok......Can anyone explain this?

02042008259.jpg

15092008408.jpg

Intake ports...... getting there.....

15092008410.jpg

The piece between the throttles and the head was matched to a gasket (note red line) and ported as well.

02112008446.jpg

09112008451.jpg

Ok..... back to work...... more on the head job later......

Link to comment
Share on other sites

Agreed... not sure who's harder... My pen0r or those billet cranks!

Nice head job too.... Always love a good spit and polish!

Geez. This isn't even a fair game... Engine builds always makes it too easy to bring the conversation down into the gutter :D

I have a Hi-Octane sump as well, and it was leaking (porous casting!!!)... They had to take it back, weld it up and refinish the thing, but it's all good in the end and it was a no fuss remediation from Ian and his crew, so top marks and big thanks to them.

Link to comment
Share on other sites

Thanks merli, I'm definitely keeping a close eye on your build too. I'm so envious! Such an awesome build! There's just "something" about a tuff 32 isnt it! oooh.... goosebumps! hahaha I am really concerned about the sump as well! Did yours have the Red dye in it when you got it? Did you buy the whole thing from hi octane or did you DIY? It would be heartbreaking to see it leak, cos changing the sump is an engine out thing isnt it!?

Link to comment
Share on other sites

oh, and merli, i noticed that your sump seemed to be better finished too! Have a look at where the trap doors join to the sump on yours. at each end on yours is nice bolt. on mine however, its just a blob of weld! Whats the go!? Did yours leak from the Sump casting or did it leak from the welds?

Link to comment
Share on other sites

No, mine didn't have the red dye... I'm pretty sure that was introduced because they didn't want to go through the trouble of re-welding up leaking sumps like mine anymore!

Mine was leaking through the bottom of the sump (through the casting)... Obviously not the best casting process :D

I bought the sump by itself, and Just Jap welded it up beautifully for me. No leaks from the welds!

You can remove the sump with the engine in place, but it's a bitch of a job... You just need to support the engine somehow when you remove the front subframe to get at the sump (engine lift, or a custom support bracket).

As long as your trapdoors swing freely, and those weld blobs are secure and not in danger of falling off, I wouldn't worry... Looks like the same as mine (bolts) but with a weld to make sure the bolts stay in place.

In fact, it kind of makes me worried about MY sump! hahahaha...

Link to comment
Share on other sites

hahaha, so Andrew, from what i understand from reading your build thread, you are leaving your internals standard and trying to make as much power as you can from bolt on goodies? There is somthing youre not telling us right? You have a 50k cupboard somewhere dont you? hahahah

Link to comment
Share on other sites

yeah I considered local sump too but had heard a few leakage problems (not just hi octane, theirs is one of the best. I went trust. my only real criticism is that it may be a little low and perhaps could have better baffles, but the design is simple and apparently works well and it comes with a whole new pick-up to take away any problems with modding the stock one.

pics for reference. ;) I had it welded up at the shop in japan that did my build, prime garage. I also used a brand new R34 N1 Nur sump as it came on the crate motor I started with. I also remove the 34 gears and used R32 GTS4 gears in their place. if only we could get an aussie sump that is a good design and had a finish as good as the trust kit. the trust kit is quite cheap too. just a fair bit of labour to fit it and fit it properly.

I wont post any more pics in your lovely thread. I'll make one of my own soon. :D carry on bomber man!

2cimg0001tm4.jpg

4cimg0003ia0.jpg

5cimg0004hw4.jpg

Link to comment
Share on other sites

and you could always grind off the logo on the front if you wanted a more stealth look for your sump. just remove the lettering and leave the big oval and maybe get something engraved on that base?

Link to comment
Share on other sites

hahaha, so Andrew, from what i understand from reading your build thread, you are leaving your internals standard and trying to make as much power as you can from bolt on goodies? There is somthing youre not telling us right? You have a 50k cupboard somewhere dont you? hahahah

Hehehe... This engine is just a temporary one, so I can have fun with the car while I build the serious engine.

This way, I can work on tuning the suspension and brakes and get them right whilst going through a long engine build.

I don't want to go through a multi-year engine build and not be able to drive the car. I need to drive it to maintain motivation levels!

Current engine is just stock with lots of oil control mods to help it survive until it gets replaced with the "Big Angry Bastard™"

Link to comment
Share on other sites

Hi all, I've been reading up on all the nice builds here in the motorsport section, and although definitely mine is nowhere near as hardcore as the MERLI, MARK AND RUSS, NZMO32 and DAZMO builds, I still thought I'd post my little photo diary of my engine build for any of those who might be interested. A brief history, The car is a BNR32 V-SPEC model. I bought this car in 2003, imported from Japan by an appointed broker here in Brisbane. A fairly clean example, 35500kms on the clock, and totally stock except cat back exhaust and pod filters. I didnt fiddle much with the car except adding a few go fast bits of my own. items added were a blitz dsbc boost controller, a hks twin racing exhaust (one full length exhaust off each turbo) off the standard turbo outlets, a power fc and an ats twin plate carbon clutch. This setup running 13psi saw 299 all wheel hp. I was quite happy with this setup for quite some time, until mid 2006 i broke an oil pump heading down the strip. This is where my long time buddy/lifesaver DAZMO came to the rescue. Since the night she blew, the car has been sitting in Daz's shed in the backyard herein referred to as "Daz motorsport headquarters", for almost 3 years now. During that time, I've collected heaps of parts, changed my mind heaps of times, sold heaps of the parts i collected, and collected more parts because i had changed my mind! ANYWAY FINALLY, The engine build is in full swing now. I guess this thread is my way of saying THANKS to my very good friend Darren. Anyone that knows him knows that he is (apart from being a firey fu(ker and uses the F word in more ways than you can imagine) always there, willing to go out of his way to lend a helping hand to anyone that needs it. Cheers buddy!

This is also a good chance to show some of the awesome work Daz does. This engine was not built in an air conditioned, dust free dedicated engine building room, it was built by Darren at "Daz motorsport headquarters". After seeing some of the cars that have left "Daz motorsport headquarters", i wouldnt have it built any other way!

mygtr2.jpg

mygtr4.jpg

Chris....

You realise i'm just waiting for all the hard work to be done before I enforce the workshop rules. I've told you many times......if ur car is left in storage for more than 6 months it becomes property of the wifey :D

Link to comment
Share on other sites

Wow beer barron! look at those welds! Very nice! I had a trust sump also. but sold it for the very reasons you mentioned. The baffling could be better as you say. Im sure it works though. otherwise they wouldnt have sold so many units! Richard, I really dont mind your pics in my post! And that goes for everyone! As long as the pics are relevant PLEASE SHARE! I love to hear your ideas and to see what you guys are using! Pics tell a 1000 words so please TELL TELL TELL!

Merli, can you please give us a brief outline on "BIG ANGRY BASTARD" please? IE TELL US WHATS IN YOUR CUPBOARD!

People, meet MISS BNR32, Dazza's Missus. She also holds the reins...... Yes luv...... i know i know....... I'll hand you the keys after i take it round the block ok? I promise!

Edited by AtomicBomberMan
Link to comment
Share on other sites

and you could always grind off the logo on the front if you wanted a more stealth look for your sump. just remove the lettering and leave the big oval and maybe get something engraved on that base?

Something like this perhaps?

ford_sump.jpg

Link to comment
Share on other sites

wow WRXkiller was right must be lots of white R32 GTRs beig rebuilt in QLD at the moment, mine is going in very shortly to commence its rebuild so i will be following closely for ideas!

Link to comment
Share on other sites

I think my white 32 can be added to the list currently getting built in bris.

Atomicbomberman, mind if i post a pic of the tomei 2.8L crank I am using? Seeing as there's a nice collection of crank pics already.

From what I can see there so far, very nice build!!

Link to comment
Share on other sites

Create an account or sign in to comment

You need to be a member in order to leave a comment

Create an account

Sign up for a new account in our community. It's easy!

Register a new account

Sign in

Already have an account? Sign in here.

Sign In Now


×
×
  • Create New...