Jump to content
SAU Community

Recommended Posts

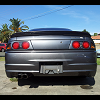
So this will be my build thread for my new 4 door R33 project. :)

Traveled up to Gympie and viewed the car in the night. Payed for her on Saturday 5th November in the morning and put her on a trailer back to my best mates fathers farm to be trailered down the coast on Tuesday 8th of November to arrive around 8PM.

Photos from when we picked it up:

20111105085604900x12001321265062.png

20111105085930900x12001321265062.png

20111105090103900x12001321265062.png

201111050909381200x3471321265062.png

201111050911211200x9001321265144.png

20111105091226900x12001321265144.png

20111105091339900x12001321265144.png

This is a list without any of the changes as i will be posting all changes in later posts on here:

Engine:

RB25DET SERIES 1

MANUAL

Exhaust:

"BITZA" IMPUL 3" SYSTEM WITH MUFFLER AND COMMODORE SPEC TWIN TIPS

Suspension:

TEIN SUPER STREETS (NON HEIGHT ADJUSTABLE :( BIT TOO LOW.. )

IMPUL STRUT TOWER BAR

Wheels:

GENUINE IMPUL RACING R33-R LIGHTWEIGHT 1 PIECE ALLOY RIMS (17x9)

235/45/ZR17 ALL ROUND

Modifications:

AUTO LOCK(?) IMMOBILISER

POWERFC (AFM VERSION :( )

SHORT SHIFTER

HD CLUTCH THAT SLIPS (CAR CAME WITH A BRAND NEW EXEDY HD SO JUST HAVE TO INSTALL IT)

VULTURE MOTORSPORTS GREDDY COPY PLENUM

HUGE MSPEC ALLOY RADIATOR

BIG SINGLE THERMO FAN

FMIC

WINDOW WASHER BOTTLE CUT ALMOST IN HALF TO ACCOMMODATE FRONT FACING PLENUM

HKS SSQV BOV

BLITZ OIL CAP

BLITZ SUSPOWER CORE TYPE LM POD FILTER

CALIPERS AND ROTORS PAINTED A BAD BLUE

Interior

GARAGE IMPUL FRONT BUCKET SEATS

AMS SEAT COVERS IN THE FRONT

IMPUL INTERNATIONAL MOTORSPORT GEAR KNOB

IMPUL STEERING WHEEL

IMPUL BLACK AND GREY THEMED INTERIOR ALL ROUND

GEUINE SKYLINE 5 PIECE FLOOR MAT SET

AUTOMETER SMOKE FACE OIL PRESSURE GAUGE

AUTOMETER SMOKE FACE BOOST GAUAGE

HKS TURBO TIMER

RED JETFIGHTER SWITCH FOR AERIAL (AND I DONT EVEN THINK ITS HOOKED UP TO THE HEADUNIT <_< )

POWERFC MOUNTED WITH VELCO JUST ACROSS FROM AIRCON UNIT

IMPUL R33-R "DIRECTED BY K. HOSHINO NUMBER 012 (OF 200)" PLATE AT TOP OF FIREWALL

Exterior

IMPUL R33-R SIDESKIRTS

IMPUL R33-R REAR BAR

IMPUL R33-R PODS

IMPUL R33-R REAR GUARDS FLARES CONNECTING REAR BAR TO SIDESKIRT

IMPUL R33-R REAR BOOT LID COVER BETWEEN TAIL LIGHTS

IMPUL R33-R TAILIGHT EYELID COVER

IMPUL R33-R STICKER ON REAR RIGHT

IMPUL R33-R BADGE IN PLACE OF OEM GT BADGE (ONLY ON RIGHT SIDE AS LEFT HAS OBVIOUSLY FALLEN OFF)

IMPUL R33-R BOOT LIP WING

NISMO CLEAR INDICATORS

400R FRONT BAR WITH GENUINE 400R BLINKERS

UNKNOWN BRAND/STYLE GRILL WITH OEM R33 GTS FRONT BADGE

Stereo Audio / Visual:

JVC 5.1 SURROUND SOUND DVD HEAD UNIT

CLARION SPLITS IN THE FRONT

NO SPEAKERS IN REAR

NO AMPS OR SUBS

The bad

CLEAR IS GOING BAD ALONG ROOF AND REALLY BAD ON BOOT

FEW PAINT SCRATCHES HERE AND THERE

DENT OR TWO

TUNE IS VERY BAD

Estimated Power:

PREVIOUS OWNER SAID IT MADE 195RWKW ON 11PSI BEFORE THE PLENUM WAS INSTALLED.

Future Plans

NOLATHANE BUSHES

HEIGHT ADJUSTABLE COILOVERS

BETTER RIMS

SERIES 2 TAIL LIGHTS

TUNE

JUST TO NAME A FEW..

Link to comment
https://www.sau.com.au/forums/topic/383173-my-impul-r33-r-project/
Share on other sites

  • Replies 84
  • Created
  • Last Reply

Top Posters In This Topic

As soon as the car came off the trailer i installed my Splitfire Coilpacks(did about 2000ks) from my old 4 door and then gave the car a bath.

201111091938101200x9001321267631.png

201111091938321200x9001321267631.png

201111091938471200x9001321267631.png

201111091939141200x9001321267631.png

201111091939431200x9001321267681.png

201111091939591200x9001321267681.png

201111091944151200x9001321267681.png

20111109194510900x12001321267681.png

Installed a spare window reg in left rear door from my old 4 door bits as it was no longer working and the window was sliding down on its own:

20111109213033900x12001321267681.png

All sealed up and done :)

20111109214426900x12001321267834.png

Installed the control unit from my old 4 door as the current one had a broken drivers window key

20111109220649900x12001321267834.png

Just some random photos in under and around the car:

201111102012191200x9001321284475.png

Commodore spec twin tips made for the right side of a car lol.

201111102013461200x9001321284475.png

201111102017071200x9001321284475.png

Bad paint on all rotors and calipers. Will also need atleast 1 wheel nut for front right but would like to buy some new fancy wheel nuts if anyone wants to reccomend some good ones :)

201111102017341200x9001321284475.png

201111102017531200x9001321284475.png

Genuine Skyline 5 piece floor mats done in the R33-R black and grey them.

201111102019171200x9001321284624.png

Impul International Motorsport gear knob feels really good to use :)

20111110211450900x12001321284624.png

Brought up a lot of Stuff i had in storage at parents place from my old 4 door, here are some photos of the sound system gear i have:

ALPINE TYPE R 50W

ALPINE TPYE R 100W

ALPINE 50W(NOT BEING USED)

ALPINE TWEETERS

CUSTOM SUB BOX WITH 3 12" SUBS (2 ALPINE TYPE S AND 1 RESPONSE PRECISION CARBON FIBRE DUAL COIL) (NOT BEING USED)

FUSION FLUX CAPACITOR

ALPINE 4 CHANNEL(?) V12 AMP

ALPINE MONOBLOCK V12 AMP

ALPINE HEADUNIT(NOT BEING USED)

AND JUST ALL THE WIRES AND CRAP

20111111171317900x12001321285971.png

20111111171452900x12001321285971.png

201111111725181200x9001321286262.png

My fuel flap is so JDM bro ;)

201111111721461200x9001321285971.png

Had to empty the fuel tank as it had half a tank of fuel that was 14 months old and from some searching

the best way apparently is to take the top off in the boot and take the pump out and syphon the fuel out with a hose.

201111111718551200x9001321285971.png

But my mate had a better idea as the power and earth cables from a previous subwoofer install were hooked up to the battery

he used them on the plugs to make the pump work and pump fuel through a hose we made from 3 pieces of hose, a Boost T piece and a screwdriver jammed in one hose :P

Afterwards we put fresh V-Power in with a bottle of injector cleaner

20111111174032900x12001321286262.png

20111111174531900x12001321286262.png

20111111180711900x12001321286354.png

Took pod and AFM off. Gave AFM a clean with some Contact cleaner and reinstalled it.

20111111195415900x12001321286354.png

Homebase.

201111112208441200x9001321286354.png

Installed new Fuel Filter.

201111121609241200x9001321288547.png

20111112162534900x12001321288547.png

Just a bit of carbon in the exhaust lol.

20111112162944900x12001321288547.png

Turned the intercooler piping around so the idle air hose could be fed through the hole down the bottom

instead of being squashed by the intercooler pipe in the hole to the top. Bov has now been set to "leafblower" position :P

20111112185731900x12001321288547.png

Out with the Clarion Speakers from the front and in with Alpine Type R 50w Speakers(still running the Clarion tweeters till proper install is done).

20111112192518900x12001321288685.png

Out with the back seats for rear speaker install.

20111112192533900x12001321288685.png

Type R 100w speakers installed

201111122005271200x9001321288685.png

201111122038481200x9001321288685.png

201111122040121200x9001321288685.png

This is why the front seats have covers on them. Will see how well they can be cleaned.

20111112212252900x12001321288999.png

Out with the subs as we wont be using this box and instead be making a new box for just the Response Precision sub.

201111122138521200x9001321288999.png

Off with the trims to see how well the box was made and such.

201111122141231200x9001321288999.png

Specimin A:POS sub box with moulting carpet :P

20111112214458900x12001321288999.png

Look what we have here :P

20111112215909900x12001321289066.png

Pumping! :thumbsup: Sides may have already slightly blown off :P LOL

20111112220035900x12001321289066.png

Did a compression test(Rough jotted figures) sunday morning, mate said it was decent for an engine with 170 or more kilometres on it and one that has probably had a good floggin in its day

20111113104801900x12001321290268.png

Bought a set of cheap copper spark plugs(just as good as fancy ones for now) to use for less than 500ks cost $29.95 for the lot.

20111113134732900x12001321290268.png

Random shot while i was undoing the bottom bolts on the dump pipe on the blue one.

BTW:The 4 doors dump install was f**kED. Someone used bolts from dump side in,no washers and one had an attempt at welding it in place done to it.

All came out but the top one which after 30 minutes of gently having at it with WD-40 and some serious elbow grease the bolt finally snapped

due to it being rusted into the turbo flange(as we expected anyway). Will see what an exhaust shop can do when it gets registered.

20111113151813900x12001321290268.png

They dance the same dance :hsdance: :rolleyes:

20111113170119900x12001321290268.png

20111113170138900x12001321290552.png

Exhausts off. This shows the actual length difference in 33s as i know they have same chassis and wheelbase but as it turns out

the ass is lengthened a bit on 4 doors so i will have to get the new exhaust lengthened.

20111113170915900x12001321290552.png

20111113170935900x12001321290552.png

Installed :)

201111131810081200x9001321290532.png

201111131816591200x9001321290532.png

Car when we got it would turn off at random on idle and ran like a complete dog on all fronts. everything was allover the place.

Now with new fuel,fuel filter,spark plugs,exhaust,clean AFM and a good condition 02 sensor from my old 4 door my mate did a bit of tweaking with the PowerFC hand controller(only so much can be done as the tune was done by APC a few years back and they locked the tune <_< ) we had the graph running 8 perfect straight lines across the screen (boost,ignition timing,knock,injector duty,airflow,revs,volts and water temp) :)

looking good mate, do you have big plans for her, of just to get her running nice and sweet?

No big plans set in stone just yet but yeah the goal right now is to get her running sweet. No point chasing dreams when you're base isnt in top form to start with ;)

Four door love!!

This isn't the one that was featured in HPI quite a few years back is it? If it is it sure has seen a bit of neglect since.

Keen on parting with that boot spoiler? :P

Mate i highly doubt it. in the past year ive seen about 3 or 4 of these in qld. There was 200 made all up and there is quite a few in Aus, never the less it could have been.

And of course im not keen on parting with my Genuine Boot spoiler bolted through my boot on my Genuine Impul R33-R but what i did do when i saw your comment was run out to the shed to bring something in to take a photo :P

impullipwing1321457563.png

I've Got 2!!! This one was from my first 4 door lol

:D

2338_1305433241823.png

Those Teins are height adjustable. You just need the tool. the bottom two rings come apart and then just adjust the top one up and then retighten. I had them on my VE.

How much did you pay for it???

4 Doors are awesome, would never buy a 2 door again.

Those Teins are height adjustable. You just need the tool. the bottom two rings come apart and then just adjust the top one up and then retighten. I had them on my VE.

How much did you pay for it???

4 Doors are awesome, would never buy a 2 door again.

Hey mate, They arent Height Adjustable. Only Spring Preload adjustable. Raising those rings will just compress the spring,make suspension stiff as all hell and mess up the shock absorbers real quick.

4 Doors RULE!!! !!

Edited by 045HOW

Hey mate, They arent Height Adjustable. Only Spring Preload adjustable. Raising those rings will just compress the spring,make suspension stiff as all hell and mess up the shock absorbers real quick.

4 Doors RULE!!! !!

Ahh Ok they just look the same as my previous teins.

So how much did you pay for it?

F**&^%g awesome purchase mate!!! Caught my attention in the 'Tough cefiros and other 4doors' thread.

Only ever seen photos of IMPUL 33 sedans in hyper rev mags, and shitty images online. All the IMPUL exterior parts look awesome; the only ever pictures I'd seen (in mags etc.) before yours really didn't do any justice.

Awesome to see one landed down under! Truly unique specimen :thumbsup:

Create an account or sign in to comment

You need to be a member in order to leave a comment

Create an account

Sign up for a new account in our community. It's easy!

Register a new account

Sign in

Already have an account? Sign in here.

Sign In Now


  • Similar Content

  • Latest Posts

    • Wow, thanks for your help guys 🙏. I really appreciate it. Thanks @Rezz, if i fail finding any new or used, full or partial set of original Stage carpets i will come back to you for sure 😉 Explenation is right there, i just missed it 🤦‍♂️. Thanks for pointing out. @soviet_merlin in the meantime, I received a reply from nengun, and i quote: "Thanks for your message and interest in Nengun. KG4900 is for the full set of floor mats, while KG4911 is only the Driver's Floor Mat. FR, RH means Front Right Hand Side. All the Full Set options are now discontinued. However, the Driver's Floor Mat options are still available according to the latest information available to us. We do not know what the differences would be, but if you only want the one mat, we can certainly see what we can find out for you". Interesting. It seems they still have some "new old stock" that Duncan mentioned 🤔. I wonder if they can provide any photos......And i also just realized that amayama have G4900 sets. I'm tempted too. 
    • Any update on this one? did you manage to get it fixed?    i'm having the same issue with my r34 and i believe its to do with the smart entry (keyless) control module but cant be sure without forking out to get a replacement  
    • So this being my first contribution to the SAU forums, I'd like to present and show how I had to solve probably one of the most annoying fixes on any car I've owned: replacing a speedometer (or "speedo") sensor on my newly acquired Series 1 Stagea 260RS Autech Version. I'm simply documenting how I went about to fix this issue, and as I understand it is relatively rare to happen to this generation of cars, it is a gigantic PITA so I hope this helps serve as reference to anyone else who may encounter this issue. NOTE: Although I say this is meant for the 260RS, because the gearbox/drivetrain is shared with the R33 GTR with the 5-speed manual, the application should be exactly the same. Background So after driving my new-to-me Stagea for about 1500km, one night while driving home the speedometer and odometer suddenly stopped working. No clunking noise, no indication something was broken, the speedometer would just stop reading anything and the odometer stopped going up. This is a huge worry for me, because my car is relatively low mileage (only 45k km when purchased) so although I plan to own the car for a long time, a mismatched odometer reading would be hugely detrimental to resale should the day come to sell the car. Thankfully this only occurred a mile or two from home so it wasn't extremely significant. Also, the OCD part of me would be extremely irked if the numbers that showed on my dash doesn't match the actual ageing of the car. Diagnosing I had been in communication with the well renown GTR shop in the USA, U.P.garage up near University Point in Washington state. After some back and forth they said it could be one of two things: 1) The speedometer sensor that goes into the transfer case is broken 2) The actual cluster has a component that went kaput. They said this is common in older Nissan gauge clusters and that would indicate a rebuild is necessary. As I tried to figure out if it was problem #1, I resolved problem #2 by sending my cluster over to Relentless Motorsports in Dallas, TX, whom is local to me and does cluster and ECU rebuilds. He is a one man operation who meticulously replaces every chip, resistor, capacitor, and electronic component on the PCB's on a wide variety of classic and modern cars. His specialty is Lexus and Toyota, but he came highly recommended by Erik of U.P.garage since he does the rebuilds for them on GTR clusters.  For those that don't know, on R32 and R33 GTR gearboxes, the speedometer sensor is mounted in the transfer case and is purely an analog mini "generator" (opposite of an alternator essentially). Based on the speed the sensor spins it generates an AC sine wave voltage up to 5V, and sends that via two wires up to the cluster which then interprets it via the speedometer dial. The signal does NOT go to the ECU first, the wiring goes to the cluster first then the ECU after (or so I'm told).  Problems/Roadblocks I first removed the part from the car on the underside of the transfer case (drain your transfer case fluid/ATF first, guess who found out that the hard way?), and noted the transfer case fluid was EXTREMELY black, most likely never changed on my car. When attempting to turn the gears it felt extremely gritty, as if something was binding the shaft from rotating properly. I got absolutely no voltage reading out of the sensor no matter how fast I turned the shaft. After having to reflow the solder on my AFM sensors based on another SAU guide here, I attempted to disassemble the silicone seal on the back of the sensor to see what happened inside the sensor; turns out, it basically disintegrated itself. Wonderful. Not only had the electrical components destroyed themselves, the magnetic portion on what I thought was on the shaft also chipped and was broken. Solution So solution: find a spare part right? Wrong. Nissan has long discontinued the proper sensor part number 32702-21U19, and it is no longer obtainable either through Nissan NSA or Nissan Japan. I was SOL without proper speed or mileage readings unless I figured out a way to replace this sensor. After tons of Googling and searching on SAU, I found that there IS however a sensor that looks almost exactly like the R33/260RS one: a sensor meant for the R33/R34 GTT and GTS-T with the 5 speed manual. The part number was 25010-21U00, and the body, plug, and shaft all looked exactly the same. The gear was different at the end, but knowing the sensor's gear is held on with a circlip, I figured I could just order the part and swap the gears. Cue me ordering a new part from JustJap down in Kirrawee, NSW, then waiting almost 3 weeks for shipping and customs clearing. The part finally arrives and what did I find? The freaking shaft lengths don't match. $&%* I discussed with Erik how to proceed, and figuring that I basically destroyed the sensor trying to get the shaft out of the damaged sensor from my car. we deemed it too dangerous to try and attempt to swap shafts to the correct length. I had to find a local CNC machinist to help me cut and notch down the shaft. After tons of frantic calling on a Friday afternoon, I managed to get hold of someone and he said he'd be able to do it over half a week. I sent him photos and had him take measurements to match not only the correct length and notch fitment, but also a groove to machine out to hold the retentive circlip. And the end result? *chef's kiss* Perfect. Since I didn't have pliers with me when I picked up the items, I tested the old gear and circlip on. Perfect fit. After that it was simply swapping out the plug bracket to the new sensor, mount it on the transfer case, refill with ATF/Nissan Matic Fluid D, then test out function. Thankfully with the rebuilt cluster and the new sensor, both the speedometer and odometer and now working properly!   And there you have it. About 5-6 weeks of headaches wrapped up in a 15 minute photo essay. As I was told it is rare for sensors of this generation to die so dramatically, but you never know what could go wrong with a 25+ year old car. I HOPE that no one else has to go through this problem like I did, so with my take on a solution I hope it helps others who may encounter this issue in the future. For the TL;DR: 1) Sensor breaks. 2) Find a replacement GTT/GTS-T sensor. 3) Find a CNC machinist to have you cut it down to proper specs. 4) Reinstall then pray to the JDM gods.   Hope this guide/story helps anyone else encountering this problem!
    • So this being my first contribution to the SAU forums, I'd like to present and show how I had to solve probably one of the most annoying fixes on any car I've owned: replacing a speedometer (or "speedo") sensor on my newly acquired Series 1 Stagea 260RS Autech Version. I'm simply documenting how I went about to fix this issue, and as I understand it is relatively rare to happen to this generation of cars, it is a gigantic PITA so I hope this helps serve as reference to anyone else who may encounter this issue. NOTE: Although I say this is meant for the 260RS, because the gearbox/drivetrain is shared with the R33 GTR with the 5-speed manual, the application should be exactly the same. Background So after driving my new-to-me Stagea for about 1500km, one night while driving home the speedometer and odometer suddenly stopped working. No clunking noise, no indication something was broken, the speedometer would just stop reading anything and the odometer stopped going up. This is a huge worry for me, because my car is relatively low mileage (only 45k km when purchased) so although I plan to own the car for a long time, a mismatched odometer reading would be hugely detrimental to resale should the day come to sell the car. Thankfully this only occurred a mile or two from home so it wasn't extremely significant. Also, the OCD part of me would be extremely irked if the numbers that showed on my dash doesn't match the actual ageing of the car. Diagnosing I had been in communication with the well renown GTR shop in the USA, U.P.garage up near University Point in Washington state. After some back and forth they said it could be one of two things: 1) The speedometer sensor that goes into the transfer case is broken 2) The actual cluster has a component that went kaput. They said this is common in older Nissan gauge clusters and that would indicate a rebuild is necessary. As I tried to figure out if it was problem #1, I resolved problem #2 by sending my cluster over to Relentless Motorsports in Dallas, TX, whom is local to me and does cluster and ECU rebuilds. He is a one man operation who meticulously replaces every chip, resistor, capacitor, and electronic component on the PCB's on a wide variety of classic and modern cars. His specialty is Lexus and Toyota, but he came highly recommended by Erik of U.P.garage since he does the rebuilds for them on GTR clusters.  For those that don't know, on R32 and R33 GTR gearboxes, the speedometer sensor is mounted in the transfer case and is purely an analog mini "generator" (opposite of an alternator essentially). Based on the speed the sensor spins it generates an AC sine wave voltage up to 5V, and sends that via two wires up to the cluster which then interprets it via the speedometer dial. The signal does NOT go to the ECU first, the wiring goes to the cluster first then the ECU after (or so I'm told).  Problems/Roadblocks I first removed the part from the car on the underside of the transfer case (drain your transfer case fluid/ATF first, guess who found out that the hard way?), and noted the transfer case fluid was EXTREMELY black, most likely never changed on my car. When attempting to turn the gears it felt extremely gritty, as if shttps://imgur.com/6TQCG3xomething was binding the shaft from rotating properly. After having to reflow the solder on my AFM sensors based on another SAU guide here, I attempted to disassemble the silicone seal on the back of the sensor to see what happened inside the sensor; turns out, it basically disintegrated itself. Wonderful. Not only had the electrical components destroyed themselves, the magnetic portion on what I thought was on the shaft also chipped and was broken. Solution So solution: find a spare part right? Wrong. Nissan has long discontinued the proper sensor part number 32702-21U19, and it is no longer obtainable either through Nissan NSA or Nissan Japan. I was SOL without proper speed or mileage readings unless I figured out a way to replace this sensor. After tons of Googling and searching on SAU, I found that there IS however a sensor that looks almost exactly like the R33/260RS one: a sensor meant for the R33/R34 GTT and GTS-T with the 5 speed manual. The part number was 25010-21U00, and the body, plug, and shaft all looked exactly the same. The gear was different at the end, but knowing the sensor's gear is held on with a circlip, I figured I could just order the part and swap the gears. Cue me ordering a new part from JustJap down in Kirrawee, NSW, then waiting almost 3 weeks for shipping and customs clearing. The part finally arrives and what did I find? The freaking shaft lengths don't match. $&%* I discussed with Erik how to proceed, and figuring that I basically destroyed the sensor trying to get the shaft out of the damaged sensor from my car. we deemed it too dangerous to try and attempt to swap shafts to the correct length. I had to find a local CNC machinist to help me cut and notch down the shaft. After tons of frantic calling on a Friday afternoon, I managed to get hold of someone and he said he'd be able to do it over half a week. I sent him photos and had him take measurements to match not only the correct length and notch fitment, but also a groove to machine out to hold the retentive circlip. And the end result? *chef's kiss* Perfect. Since I didn't have pliers with me when I picked up the items, I tested the old gear and circlip on. Perfect fit. After that it was simply swapping out the plug bracket to the new sensor, mount it on the transfer case, refill with ATF/Nissan Matic Fluid D, then test out function. Thankfully with the rebuilt cluster and the new sensor, both the speedometer and odometer and now working properly!   And there you have it. About 5-6 weeks of headaches wrapped up in a 15 minute photo essay. As I was told it is rare for sensors of this generation to die so dramatically, but you never know what could go wrong with a 25+ year old car. I HOPE that no one else has to go through this problem like I did, so with my take on a solution I hope it helps others who may encounter this issue in the future. For the TL;DR: 1) Sensor breaks. 2) Find a replacement GTT/GTS-T sensor. 3) Find a CNC machinist to have you cut it down to proper specs. 4) Reinstall then pray to the JDM gods.   Hope this guide/story helps anyone else encountering this problem!
    • perhaps i should have mentioned, I plugged the unit in before i handed over to the electronics repair shop to see what damaged had been caused and the unit worked (ac controls, rear demister etc) bar the lights behind the lcd. i would assume that the diode was only to control lighting and didnt harm anything else i got the unit back from the electronics repair shop and all is well (to a point). The lights are back on and ac controls are working. im still paranoid as i beleive the repairer just put in any zener diode he could find and admitted asking chatgpt if its compatible   i do however have another issue... sometimes when i turn the ignition on, the climate control unit now goes through a diagnostics procedure which normally occurs when you disconnect and reconnect but this may be due to the below   to top everything off, and feel free to shoot me as im just about to do it myself anyway, while i was checking the newly repaired board by plugging in the climate control unit bare without the housing, i believe i may have shorted it on the headunit surround. Climate control unit still works but now the keyless entry doesnt work along with the dome light not turning on when you open the door. to add to this tricky situation, when you start the car and remove the key ( i have a turbo timer so car remains on) the keyless entry works. the dome light also works when you switch to the on position. fuses were checked and all ok ive deduced that the short somehow has messed with the smart entry control module as that is what controls the keyless entry and dome light on door opening   you guys wouldnt happen to have any experience with that topic lmao... im only laughing as its all i can do right now my self diagnosed adhd always gets me in a situation as i have no patience and want to get everything done in shortest amount of time as possible often ignoring crucial steps such as disconnecting battery when stuffing around with electronics or even placing a simple rag over the metallic headunit surround when placing a live pcb board on top of it   FML
×
×
  • Create New...