Jump to content
SAU Community

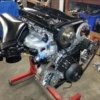
Rb25 Coolant Flow / Hose / Swirl Pot / Header Tank Setup


Recommended Posts

Hey all, this is a bit of a side step from this thread;

http://www.skylinesaustralia.com/forums/topic/422915-coolant-swirl-pot/

What i am trying to work out is the most logical way of properly setting up the cooling system for an RB25, in this case a NEO. This is for race use, so no heater core.

I am trying to get rid of any pipe work that is not necessary for cooling. For example, i no longer have the factory oil warmer, cold start coolant valve, throttle body heating or heater core. I will be fitting a coolant swirl pot and a header tank if deemed necessary. Obviously you do not want any point for coolant to become trapped and not able to flow. I will be avoiding this.

Below are some attached photos.

20130407_131628.jpg

20130407_131619.jpg

20130407_131637.jpg

20130407_135758.jpg

Here is a legend and the coolant flow path in the factory form of the NEO.

Point 1 - Return from heater core to thermostat housing, (return from oil warmer is also tee'd into this).

Point 2 - Return from front bleed valve to thermostat housing (The return from the throttle body and Point 7 (the front outlet of the runners) connects to this front bleed valve)

Point 3 - Feed to heater core

Point 4 - Feed to oil warmer (This can be completely ignored)

Point 5 - This goes up to the rear bleed valve (Point 8 also connects to this bleed valve and also the feed to the throttle body comes from this bleed valve)

Point 6 - Return From Turbo

Point 7 - Front runner outlet to front bleed point

Point 8 - Rear runner outlet to rear bleed point

NOTE - Both bleed valves will not be re-fitted, Hence the use of a swirl pot for bleeding.

What i am trying to work out, is what to do with the 8 points. How to correctly set them up. I have a few different ideas, but i'm trying to distinguish which one is most suitable, My latest thinking i have come up with:

Point 1 / Point 2 / Point 3 / Point 4 / Point 5 - Delete completely, Remove the fitting completely from the thermostat housing and blank up with a welch plug. Do the same at the rear of the block, remove the fitting in the block completely and blank off with a 3/4" NPT bung. This removes any pockets for coolant to get trapped.

Why delete both fittings completely? Well the original oil warming piping is not required nor do i need the fittings or piping for a heater core. Now most people would say just link the rear of the block to the thermostat housing. But, thinking about it if you retained the heater core as many people do, for 6 months of the year the heater tap is closed completely stopping coolant from flowing through to the heater core and back to the thermostat housing. Therefore i see no reason apart from 1 (Below) to retain those two fittings. If i did have a heater core, it would be shut for 6 months of the year which is the same thing as removing the fittings and blanking.

The only reason i can think to keep a fitting in the rear of the block and in the thermostat housing would be for bleeding purposes if required;

1. Tee the rear of the block to the rear runner; Point 5 to Point 6 - This tee point then runs to the swirl pot.

2. Tee the thermostat housing to the front runner, Point 2 to Point 7 - This also then runs to the swirl pot.

i am unsure if i need to bleed the rear of the block and the thermostat housing to the swirl pot? Or can i simply do as above and just run Point 7 and 8 to the top of the swirl pot? I have different theories on this. My current think is that i do not need to bleed the block.

If you look at an RB26 there is only a fitting in the thermostat housing for a return from the heater core, there is no piping to go to a bleed point. As for the rear i'm not sure what is done. But looking at other peoples swirl pots, i have not seen anyone take a bleed point from the block up to the swirl pot.

Sorry for the long thread, but any help would be appreciated and i hope this can help others.

Cheers.

Link to comment
Share on other sites

7,8,6 to the header tank 1 inch from the top of the tank.

All others blocked off at the block.

Swirl pot in the top of upper radiator hose with another point from its top to the header tank.

Base of the header tank minimum 3/4 hose to the bottom tank of the radiator.

With a swirl pot in top hose block all radiator points including cap.

Without a swirl pot, replace cap with fully sealed cap and use overflow fitting to run to header tank or block cap hole and run a fitting from top of top tank to the header tank.

Link to comment
Share on other sites

I was hoping you would see this thread Brad. Your very helpful with this sort of stuff.

1. Point 6 is the return from the turbo, you've said to run this to the header tank. Where do i run the turbo return line to now or have you mistakenly said to run point 6 to the header tank.

2. Ok so if i run a header tank and coolant swirl pot; The top of the swirl pot to a point on the header tank using -4 or -6?, Points 7, 8 and 6? To the header tank in -4 or -6, 1" from the top. Very bottom of swirl pot to the bottom radiator tank or can it be tee'd into hose? with a 3/4" minimum hose. Use a blanking cap to block of the radiator fill neck and also block off original overflow point - does the neck need to welded shut or can i do what i stated? New overflow point is from the header tank.

If i dont use a swirl pot i think its pretty self explanatory. it was what to do with the block fittings which was doing my head in. I assume you do this regularly with RB's brad, do you block the thermostat housing with a welch plug and just put a bung in the rear fitting like i suggested?

I saw in the other thread that you manufacture swirl pots to suit RB's. Are they made in such a way that you simply cut an OEM hose to suit, insert the swirl pot and your done? Do they clear clutch fans with no issues?

Thanks mate.

Link to comment
Share on other sites

Use the turbo water line as a turbo waterline and just run the two from the inlet manifold to the header tank.

I normally use -6an for the header tank lines from the engine and -4an from the radiator or swirl pot.

You can block off the radiator filler either way. I usually cut the filler off and weld on a round 3mm plate.

You can T the header into the lower radiator hose but its easier to run a designated fitting in the radiator.

I've also done the bottom of the header to the thermostats fitting.

It's not ideal as its on the wrong side of the thermostats but does work.

Usually welsh plug the block at the front and use an old diff filler plug to block the rear fitting off

Yeah they fit with a cut factory hose or two lengths of silicon hose

Link to comment
Share on other sites

OK no problems.

In your experience, is it much better to use a swirl pot?

I havn't got a radiator yet, so when i buy one maybe i'll look into something custom - with no filler cap and a -12 or -16 fitting in the bottom tank for the header tank return. I was looking at a racepace 42mm unit, maybe they can help me here.

The two bleed points from the runners to the top of the header tank are 1" from the top (The very top of the header tank, or the overflow nipple?) Where does the bleed point from the swirl pot feed into on the header tank? Same height or lower?

Is your swirl pot generic for all RB's, or do you change them around a bit between R32 / 33 / 34 / 20 / 25 / 26?

The only issue i can see with a swirl pot is trying to get the header tank a substantial amount higher than the top of the swirl pot.

Link to comment
Share on other sites

I don't always use a swirl pot.

I normally make my own radiators and leave the filler neck off.

Then run a -4an fitting off the corner of the top tank which runs to the header tank.

-12an is okay for the bottom of the header.

Rb20,25 &26 swirl pots are all different.

The header tanks are car specific too.

All entry's to the header tank should be an inch from the tanks top. Then the new radiator car above that

Link to comment
Share on other sites

This is an off the shelf PWR core which I've just put a modified cap on the filler next and welded a -4an fitting to the tank.

Also welded up the hole where the original overflow would have come out the filler neck.

Works fine but the swirl pot would give 100% confidence there is no air lock in the radiator as its bleed point is higher

post-20349-0-25529900-1365320129_thumb.jpg

Link to comment
Share on other sites

Ahh yeah no problem Nice work!

Yeah well i think i'll run a swirl pot. Why not. So long as it clears the clutch fan (Still yet work out if i can use a clutch fan).

I've heard a few people saying the PWR rad's arn't worth the money you pay for them.

The off the shelf 42mm rad to suit an R31 from them is well over $800 and is only single pass.

I'll have to make up a custom header tank as i've got things everywhere in the engine bay - Having tubs doesn't make this any easier either. I'll probably place it behind the drivers strut tower. That way it will be higher than the engine and the swirl pot.

Oh, do you remember what size welch plug you use for the thermostat housing off the top of your head? I've just pulled it out and measured the diameter - 18.4mm approximately.

Link to comment
Share on other sites

Just keep in mind that Risking has posted a cross flow radiator. If you are running a traditional radiator its probably a good idea to run a non pressure cap and bleed to the top tank to your header tank. The wide top tank vs narrow cross flow tank means the raised section for the radiator cap is a pretty opportunistic place to bleed to your header tank

Link to comment
Share on other sites

Troy is correct. Even get the top tank tapered if its a custom radiator.

Im doing a tube front end on an RX7 currently that's getting a laid down radiator and fairly elaborate header/swirl pot system to cope with the air and cavitation problems.

Find the pro fabrication race engineering face book page if you want to see a lot of the cooling system going together. Everything I do gets put up on there

Link to comment
Share on other sites

heres mine... some feedback would be good. it seems to work well, Car still gets hot after multiple hard laps but does not boil.

72646_490729934309448_704663237_n.jpg

cap on rad and swirl pot are not pressure caps. the canister at the back of the engine is the highest part of the cooling system and has pressure cap on it.

3x fittings welded onto the rb26 coolant rail to remove any localised boiling points.

bottom of swirl pot goes to top of the radiator tank.. so the idea is to remove any air bubbles.

Link to comment
Share on other sites

Just keep in mind that Risking has posted a cross flow radiator. If you are running a traditional radiator its probably a good idea to run a non pressure cap and bleed to the top tank to your header tank. The wide top tank vs narrow cross flow tank means the raised section for the radiator cap is a pretty opportunistic place to bleed to your header tank

Sorry mate, not fully sure what you mean? Do you mean if i have a down flow radiator that i must bleed from the top tank to the header tank? This of course would be done. I would just do it from the filler neck. But if i have a swirl pot this shouldn't be needed as the fitting at the top of the swirl pot back to the header tank should be higher than the radiator top tank.

Just had a geez at your facebook page Brad. I'm guessing you havn't uploaded any photos of cooling setups yet - can't seem to find any.

Link to comment
Share on other sites

Nice work Brad! The swirl pots do look good!

I'll grab one of your swirl pots when i'm ready!

Simon, i could only suggest that maybe you bleed from that buldge section as well as the radiator neck on the rad.

Link to comment
Share on other sites

since we have a thread up may as well chime in.

i'm running a header set up on a rb20 with no swirl pot and i only fill up from the header tank thats mounted next to the brake booster , rad cap isn't pressurized but header cap is of course.

i have a standard 8/10mm hose from the highest point on the header tank going to the rad cap nipple and then the hoses from the intake manifold join up to the header tank.

my main problem is i always have to do a water flush if i've drained the rad to get the thermostat to open other wise car will just over heat and bottom of rad will be ambient temp. my thinking is theres a pocket of air or something near the thermostat and somehow a water flush helps?

other then that works fine

so open to opinions

Edited by Dan_J
Link to comment
Share on other sites

More details of how you've plumbed up the header tank?

Is the base of the header tank linked to the bottom rad hose?

So the radiator filler neck is connected to the top area of the header tank?

How exactly have you connected the top of the engine to the header tank? You should simply run a line from the original bleed point to the header tank.

Link to comment
Share on other sites

Re the Hypertune swirpot Risking posted. I am 99% sure it works fine and there is absolutely F. all difference but technically you shoud try (space permitting) to have the inlet tangent to the circumference of the swirl pot about half way up. You should then run the outlet from the centreline of the swirl pot from a lower point then the inlet. Ideally the bottom but not going to happen on an RB so lower is generally acceptable.

Link to comment
Share on other sites

More details of how you've plumbed up the header tank?

Is the base of the header tank linked to the bottom rad hose?

So the radiator filler neck is connected to the top area of the header tank?

How exactly have you connected the top of the engine to the header tank? You should simply run a line from the original bleed point to the header tank.

no the bottom of the header tank is connected to the heater joiner near the block

( might be the one that goes to the thermostat or the one right off the block, need a closer look)

and yes the radiator filler neck nipple is connected to the highest point (below the cap) on the H/tank.

i'm not running any coolant on the top half of the intake manifold so no bleed point

pic below for a rough idea of my set up

headertank_zpsb568b299.jpg

Edited by Dan_J
Link to comment
Share on other sites

You are correct Troy. For cavitation purposes that's the best way to do them.

Ill post up some photos of the Supercar swirl pots which are done the same way you mentioned.

Couple of issues with the setup above.

Bottom of header needs to go to the radiator side of the thermostat housing preferably as low was possible

You must have a bleed from the inlet manifold or cylinder head. It's a cavity for air locks, even it's a drilled and taped 1/8th npt thread with a 5/16ths nipple and hose.

Link to comment
Share on other sites

could i get some advice on if mine is correct?

72646490729934309448704.jpg

as per pic... swirl pot one has a blank cap on it and has 3 bleeder lines from coolant rail. the red hose goes to the top of the radiator outlet and the cap is blank off, the blue line goes to a 2nd swirl pot canister from the top of the swirl pot. Shown in purple is a 10mm hose half way up the canister which is joined to the bottom radiator hose. the 2nd canister has a 1.1 bar pressure cap with a pipe going to over flow.

feedback appreciated

  • Like 1
Link to comment
Share on other sites

Create an account or sign in to comment

You need to be a member in order to leave a comment

Create an account

Sign up for a new account in our community. It's easy!

Register a new account

Sign in

Already have an account? Sign in here.

Sign In Now
 Share


  • Similar Content

  • Latest Posts

    • Yep sure does . Comes on primes and cuts off as a factory pump would 
    • And I hope the relay receives the trigger signal from the ECU and not the ignition power. It should prime and stop if the motor isn't running.
    • I disconnected before the fuel pump and restriction still there. Disconnected at turbosmart fpr and also after ethanol sensor and pressure dropped. No kinks in line but I found one spot above diff that I can hear the fuel flowing while running so I'm wondering if there is built up corrosion  from 10 years of sitting.  I had injectors cleaned and tested and one was dead but rest were fine. Was never an issue when I owned the car previously but I'll talk to jez about his thoughts on if they should be changed to newer tech. Thx guys at least I know the setup should work again. Pump is wired directly to relay and not using factory plug any  more 
    • Nice work on the shroud/ducting.  
    • Hi and best of luck with your car. Its a bit hard to tell how low the car is all round from that pic or if its been lowered or not. 90mm is a bit low on the front apron but it depends on the shocks & springs condition & whether or not its been lowered. Going to 19” wheels will give you 15-20mm depending on rubber but you might need new shocks. Mine -2005 are weeping fluid slightly but have lasted 19years!!. So if yours are original they need replacing anyway if they havent been touched before.
×
×
  • Create New...