

Announcements
-
Similar Content
-
-
Latest Posts
-

By Frigo James Legal · Posted
Frigo James Legal has a team of highly experienced lawyers who specialize in Litigation, Family Law Estate Planning & Estate Disputes. Our Family Lawyers Gold Coast have a wealth of knowledge and expertise in their respective areas of practice, which allows us to provide our clients with practical and effective legal solutions. Contact us for more support on (07) 5621 3799. -
 Its hopefully going to actually start working on it again
 -
 Never run out of power with all those power points? Ha! Electrics need upgrade, you're missing 3 Phase... Please call when 3 phase is sorted before I have to setup a single to 3 phase to run the lathe...
 -

-
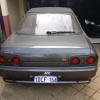
 Resurrecting this dead/sleeping thread. 😂 So late last week after a long (almost) 8 years of the 33 being off the road finally got it fixed up and registered again. Feels so good to finally have it back in action again. 🙂 Installed a new head unit the other day which replaced the 20 year plus old system - nice to have actual phone connectivity and apps like Waze etc.
-


Recommended Posts
Create an account or sign in to comment
You need to be a member in order to leave a comment
Create an account
Sign up for a new account in our community. It's easy!
Register a new accountSign in
Already have an account? Sign in here.
Sign In Now