

samos69
-
Posts
101 -
Joined
-
Last visited
-
Feedback
0%
Content Type
Profiles
Forums
Events
Gallery
Media Demo
Store
Posts posted by samos69
-
-
Well its unfortunately irrelevant now... the guy claimed someone else had text him and phone broke or something so he gave him first option (after we had already agreed on a deal) and sold it to him as he showed up with cash (I'm not local so was going to get it picked up during the week)...
That said there is another motor local, rb25det series 1, FFP, 750cc injectors and some china turbo. Problem is its on a stand so I can't verify it runs..
-
Thanks for the feedback, I was getting my hopes up as getting so close.... but now I'm gonna be pulling the motor as I've just sealed the deal on a series 2 RB25DET, completely stock bar a link g4 making 224kw (for now
 )
)So fit motor, bit of wiring, make new seat rails, wheel alignment = hit the track!
-
 1
1
-
-
Yeah I'm torn...these are the current options in NZ:
China #1
http://www.trademe.co.nz/motors/car-parts-accessories/nissan/accessories/auction-621857178.htm
China#2
http://www.trademe.co.nz/motors/car-parts-accessories/performance/turbos/auction-622137243.htm
Rebuild a 20 Turbo (I have a dead one around here somewhere)
http://www.trademe.co.nz/motors/car-parts-accessories/performance/turbos/auction-623295578.htm
Or I can get another RB25 of unknown kms for about $250NZD.
Or the nuclear ($$$$$) option... buy an RB25 complete and pillage the turbo for this motor (this motor is destined for the road shell) and then work on getting a big turbo for the 25 motor...
-
Pulled out the old rubber bungs that had been covering where the wiper was. Put some tape on the underside and filled the hole with silicon.. will slap some cheesy sticker over the silicon once I find one..
Now I'm going to show you some dodgy stuff (no not that sort of dodgy stuff
). Bear in mind this was done when I was much younger, broke, had few tools and even less experience.Check out this outstanding wiring for my fans.. yup the relay just hangs free.
Oh look, this one has almost worn through
Sweet connection, it runs off the overtemp sensor in the bottom of the rad, kicks in at about 90 IIRC.
Some $10 fans from the local wreckers... fix em in with tek screws
Jacked up the front and a heap of water came out the exhaust (much more than is shown) - the trailer has been chocked on my steepish driveway and we had a few big storms so guess it was filling the exhaust up..
Tierods are farked...
So got these ages back for a good price 2nd hand..
But they are for 12mm tierods... so they need to be sold and some 14mm ones procured.
Interestingly, these were brand new 2 months ago when they went onto the car then onto the trailer... all the other china arms seem fine but these..
Then onto replacing my mismatched intercooler piping with a some new stuff. Oh wait, whats this.
Pull more pipes off
Bugger. To be fair I suspected as much as it had started smoking when I pulled it out of storage.... thats turbo number 3 on this car for those keeping count (1xRB20, 2xRB25).
Will need to find a replacement but don't want to spend much as I'm pretty certain this motor will be heaved for a 25 so anything bought now would be a bit small...
My pile of mismatched piping
Started pulling the turbo
It escalated quickly...
Gave it a bit of clean as the power steering had leaked all over that area a few times after boiling on track...
Turns out I was running a single core radiator, I have a twin core floating about but its outlet is broken.. Despite the horror setup shown above I've never had any heating / cooling issues with this car on or off track.
That was today.. tomorrow need to head out for some parts then into it some more while I'm off work for the week
-
We now resume regular programming... (and thank f@ck we now have a kitchen, all those weeks washing the dishes in the bath >
)First up, as it was such a prick to get on the trailer it needed to be raised up a touch, and the wicked toe-out from the longer LCAs fixed.
(these are with the wheel straight)
As with everything on this car, it wasn't a simple job. The tie rod ends seemed to be fused on with rust... gave it a good while with some penetrating oil and still no luck so out with the fire
About 3-4 minutes of heating and it was pretty easy to remove.Then raised it up enough to let me get full lock so I could drive it into the garage.
Good enough to get going
Loving the current camber / fitment but its only by eye. Will go in for a real alignment once the rest of the car is ready (some bad toe in on the rear too from the looks)
Cos I'm lazy and hadn't primed the arches they had gone rusty out in the weather so the 3m stripper on the drill got a workout followed by some rust killer.
Gave it some zinc primer
Did the same for the underbody where the cage is attached (had forgot to do this previously) here it is pre-treatment. It got some por15 later on.
Then made these brackets up to temporarily hold the window controls (not that they work at the moment). They are notched either end so it cant slip out and attached to the door using rivnuts. This is before I trimmed the excess that you can see.
That was a few days ago...
-
Loving the build.. heaps of good ideas to steal and use..
Do you find the engine damper actually does much? Are you still on factory engine mounts?
-
Right so a mad dash to get the car running and onto its trailer.Harness eyelets inWiring harness temporarily tied backBecause the dash bar was cut for the cage, had to remount the fuse board, almost looks factory!Templating cutting the dash, what a pain in the ass.. dremel + jigsaw actionThis turned out a bit rough even though I started out all careful I was over it and have a spare dash so zero f%^Ks were givenNo photos of the following..Then it was time to put it on its wheels, what a disaster.. too much castor and the wheels were hitting the back of the arch, and the car has never been on its coilovers so the height hasn't been set and it was too low to get the jacks out...So jack it up, wood under the wheels, wind out some castor and jack it down.Hmm somethings not right, masssive toe out - doh fitting the R33 LCAs has thrown the toe out. No time to fix so into the car, car starts fine after my wiring massacre but the windows no longer wish to go up or down.. so using the jumper pack we manually power up the windows and I get to backing out of the very tight garage.. again problems.. at lock the tyres are hitting the front of the side skirts (they are a bit ratty anyway but cracked it some more) and trying to eat the corner of the front bumper..Soldier on and put it on the trailer but not without some louds bangs that scared the crap out of me. Turns out the increased track + toe means the tyres clip either side of the trailer bed..Thats it for now, will get some photos of the mad toe and trailer fitment sometime this weekend..Now onto some demolition!
-
Lots done today, a few disasters but nothing I can't fix
First up I refitted the boot on the tierod and decided to leave that to another day as time is short.
Next I fitted the drivers side swaybar bracket, unfortunately the nut that is inside the chassis rail was partially stripped from my first attempt at fitting the swaybar with factory brackets, and it just let go when fitting my new improved bracket today. Its an M12 fine thread which I do not have a tap or die for so I'm going to try and re-thread it with M12 medium or coarse (which I have)when the car is back in the garage, or I'll have to buy a bigger tap, drill it and tap it.
Fitted the castor arm on this side, it seems to be much easier to get more castor so I hope nothing is bent on the other side.... But went to tighten the lock nut and found one is stripped, I can move it back and forth by hand. >
Pity I bought these so long ago... but it has to come out for the swaybar bracket anyway so will replace it then.Someone on SAU asked about the caliper brackets so here are some more detailed photos
Fitted up the drivers side and noticed it wasn't square..hmmm
The supplied washers are a bit too big.. they aren't doing anything anyway so removed them and all is good. Jumped back to the passenger side and same issue so removed it all to remove the washers as well.
Removed old rear shocks, fitted shiny new
Noticed rust under the car where the cage footplates were welded in... will kill it and POR15 tomorrow..
Refitted boot seal and boot latch - first time in a year the boot hasn't been held down with a bungy (garage door hits it if up)
Plan is to ditch the boot springs and just pin the boot - the black skyline has already had this done so will be swapping boots (and refitting springs into the black one) at a later date.
Also checked all rear suspension bolts and reconnected the rear swaybar.
All in all not a bad day. Onto cutting and fitting the dash, refit factory gauges, refit loom and hopefully start it tomorrow. Then bleed brakes and hopefully on its wheels to go to a new home for a few months on Monday while we do some house renos..
-
Right, laid some POR15 down on the cage
Ran into an issue on the drivers side, cage is too tight for the eyelet to wind in... bugger
Bit of zinc primer on the back
And laid some plain white on top, it's pretty rough as I'm in a rush to get the car out of the garage and well race car /= show car..
Bit of fisheye going on in the drivers footwell, must have missed a bit with the wax and grease remover..
Front legs done in matt black (less reflective)
Test fit 17x9 +22 wheel with 255 tyre and a 15mm spacer (so +7 effective spacing) just for shits and giggles
Heh. They should fit the other car with a bit of a guard roll, 245 tyre and no spacer..
A photo of what looks like rust but is actually baked on brake dust... much scrubbing to be done once the hose ban is lifted.
Went to tighten up the passenger side and realised the wheel was sitting funny
Pulled the castor rod and whoops had it a bit short.
Tried to wind it out and refit but that was never going to work. So reinstalled and started cranking it but can't seem to get it as far as I think it should go... still it's nearly the same length as the factory one so good enough for now.
Attacked the tie rods but this locking collar doesn't want to move... doesn't seem like a disposable item, but ran out of time so will have to leave it for now.
and that was all for now
-
Joyous
Thanks, I guess I'm in for a hard days scrubbing...
-
New wheels! These are for the black road car, though may find their way onto the track car... 2 piece Blitz Racing Type 01s. GTR fitment 17x9 ET22 all round. Tyres are shot so plan to run a 235 or 245 on them (current 255) as fitment will be tight even with a guard massage.
In very average condition so will need to split them and do a refurb at some point when I have time.. probably do a black centre.
Looks like rust around the dish, but these are alloy so I'm thinking it may be brake dust embedded in the clear..
-
Hi all, just looking for some advice on what is the best (read least work) product to remove the white adhesive / sealant that is under the plastic sheet attached to the doors once you have removed the door cards? I'm going alloy sheet (because race car!) and want to clean it up..
thanks
-
Great write up, I haven't seen that sort of detail on the baffling before. I assume that as its alloy you used a TIG to attach your baffles?
-
I have a solid puk clutch, very off/on but not that bad that I can't do the tight 3 point turn and clutch slip to get in and out of the garage. I reckon it has been hard on the driveline though, gearbox and diff both a bit noisy now (car is drifted / tracked so may just be normal wear).
-
Noltecs.. seem sturdy as and heaps of adjustment.
-
Prepped the surface rust around the place... (partway through, left side has been treated) and gave all of the cage a going over as well
MAsked up, removed dash bar and everything except the heater setup and front part of the loom
Got onto flaring the passenger side front guard, had to undo the bottom of the guard to remove the guard liner and discovered half of Manfeild racetrack in there from 6 years ago when I last had a few big offs into the kitty litter
Test fit, not flared enough but had to pack so up back to it tomorrow
Also pro-tip - ensure you have refitted the bolts for the bottom of the guard before flaring commences. Much swearing was heard in the garage when I realised that I had not done this and trying to line the guard up was not going well..
-
Ah i see you havent painted the cage yet, just undercoated my half cage today. Might be an idea while wiring is out pull dash pad out give her a few coats
would be painfull to cover all the wiring before spraying lol.Dash is out, need to cut it to go around the front legs of the cage. Will be primering and probably top coating while its masked up soon. Flat white except for cage front legs will be flat black (and maybe parcel tray to minimise reflection)
-
Awesome work, looks great in factory form.
One thing I'd add is there was a factory option for a rear strut brace (matching in red) and I reckon they improve the R32's handling no end.
-
Yeah I ditched the iridiums and put in NGK R5671A-8 this time, copper and change them often is the motto.
For oil I was going to run something in a 10w-60 normally but for the shakedown test day I figured the 25w would be ok, might sap a bit of power. Otherwise the oil might sit in the garage for another year
-
Did some regular maintenance, 6 years of the same oil and plugs... hmm.
Plugs came out, pic is blurry but cylinders 5 and 6 the tips were worn away quite badly. Bear in mind this car has done probably 2000kms on those plugs (almost all track use) so not great for the iridiums.
Swapped the fuel filter out, no pics
Remembered that years ago I had sheared off the two screws that secure the j-pipe so drilled and extracted
Tried to start it following this and no luck, weird starting troubleshooting everything, had spark etc. Checked tank and turns out there had been enough fuel to start it last week, but not this week...doh.
Fired up and warmed up, gave it a rev and *BANG* then running like a bag of crap. Was devastated until I looked under the bonnet and saw that the intercooler pipe clamp had snapped and a pipe had just popped off
Dumped the oil.
Heres a few tarty bits I had on the shelf..
HKS filler cap
DW magnetic sump plug
DW Braided clutch line
DW Steering bush replacement
Should get to fitting all the clutch line and alloy bush sometime this year.
This is the only oil I have in the shed... might be a bit thick for the old RB20... will only be for a few test days on track shaking the car down, no extended thrashing.
thoughts??
I've always hated pulling the fuel pump in the skyline, trying to get the fuel lines back on is a right #@%^, soooo
Gave the boot a lick of primer to stop and rust.. only had a rattle can so took ages, must pick up some for the spraygun this weekend..
Back onto the wiring loom, this had been abandoned when the car went in for it's cage so time to crack on with it.
All a bit of a mess
Anyone know what this door lock timer box does?
The blue tape made me think someone has had a crack at the loom before, but it's everywhere so seems factory.
Under the dash by the drivers knee you can undo some 10mm bolts and unplug the body loom.
Flathead screwdriver and the plugs pop out as well
Nice day out in Wellington so chucked a seat in the drive and went to work in the sun
Couple of different types of connector in the plug, you can remove them using a jewellers flathead, it can be a prick and ruined one of the plug holes on my second one. Remove the blue and black locking mechanisms (part out in this pic)
See the lug that holds it in
You go in via the back (calm down)
You want to push it in on the thin part of the H (bottom of each plug in this pic)
Lots of crap shares a common ground or power..
this plug traces back to the HICAS plugs so off it goes
I'm removing almost everything, next time I will probably just run 7 core trailer wire back for the brakes / indicators and a fat pair for the fuel pump, would take less time.
Can;t remember what these do (not labelled so must not have been plugged in before) but they are on the part of the loom that goes over to the passenger side so maybe handbrake light and some other stuff?
And that was it for the night... progress at least
-
Did you have to machine away any of the dust cover or caliper bolts to get them to bolt on properly. Please add pics. Awesome build btw
Thanks, I ditched the stone guards ages ago, nothing else needed removing or machining to bolt these up. Will do the drivers side this week and take more detailed pics for you.
Good too see its still coming along! Goodluck with the rest of it, looks good
Thanks
I've got another post to write but the pics are sitting at home so have to wait... I've got 4 weeks before it has to be drivable onto a trailer as the garage is needed to store furniture during our house renovations... so the pace will pick up. -
I've got the older (2008) ML Mitsubishi Triton - 3.2L auto with factory chip 132kw and 420nm 2300kg tow rating. Happily pulls the skyline on a tandem trailer with full steel deck (i.e. heavy ass trailer) at any speed required. Only gripe is the 4 speed auto isn't quite geared right for hilly NZ roads, sometimes seems like it wants another gear between 3rd and 4th up hills.
Can be had pretty cheap these days with reasonable kms on the clock.
-
So where I left off the swaybar was being a right #$%^ and whiteline sent me some universal mounts. Unfortunately they were the wrong size.
So rather than wait for replacements I decided to mod the original brackets so that the bushes weren't distorting when tight. I only had a few scraps of 1.7mm steel floating about so this will look a bit, err, grassroots... but I'm confident it will be strong enough.
Grind the bracket for a good contact surface
A few scraps cut to size
Should look like this
Welded up (I ended up adding a few extra pieces to make that side taller again later on)
Installed with the bush fitted snugly with only a small bit of squash, I might pull it out and add a few mm of steel to make it perfect but for now I'm happy.
Some new end links to complete the install
Onto suspension, for years I ran on 150,000km shocks and one way adjustable springs (via the angle grinder
) luckily these were lying in the corner of the garageThe fronts come with a small ring attached as so
This faces in towards the hub, if you install it facing out the body of the shock hits the hub before you can do the nut up tight.
New adjustable castor arms, 3 bolts easy as. I recommend getting a cheap air rattle gun when doing suspension, makes taking all these bolts off much easier as most have been cranked up tight since coming of the production line.
Cleaned up and painted another set of calipers, these are R32 ones so will work with my adaptors.
Adaptors on
Comparison of the non M-Spec brakes to the 324mm discs.
And installed
I had to remove these twice, first time the pads weren't spread enough
so off to spread them, then fitting the do-luck braided lines the caliper end is not a swivel type so they really need to be installed in the caliper before mounting.One thing I'm not happy about is that the original line has two mounting points, the braided lines have one, and upon checking other brands of braided line they also have one.
The bracket where the second clip would go will rub so I'm going to have to do something to secure it... this bloody car fights me every step nothing is plug and play like they claim
-
Awesome build man!
What has become of the car now?
Racing pictures??
Unfortunately family (having a toddler soaks up an amazing amount of time!) comes first so progress has been slow, but there is progress - I'm just writing a new post
nice man, love the detail in the cage and all the extra painted bits, all the extra time pays off. One day my 32 will get the extra love
Thanks mate, this is the first go - a nice-ish track car. Then I'll have another go on the black one as time permits but as a road only car.


 ) luckily these were lying in the corner of the garage


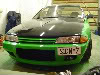
R32 Gts-T Track Build
in Projects, Overhauls and Build-ups
Posted
Only 1 RB25DET I've found in NZ for under $2k and its done 195,000km
Most of the import motors are $2300 for a complete engine with startup warranty...
The above motor with all the china add-ons is being offered for $2k flat..
Currently weighing up building a 30.... its actually the cheapest way to do a rebuild as the 30 block (running motor) and 25 head can be had for $700ish... can't find any 25 or 26s even needing a rebuild for that price..