

trustr32
-
Posts
406 -
Joined
-
Last visited
-
Feedback
0%
Content Type
Profiles
Forums
Events
Gallery
Media Demo
Store
Posts posted by trustr32
-
-
Good stuff mate. Its coming along really nicely. I can relate to the "nervous wreck" etc... as I will be in the same boat once mine is ready.
But after all the hard work and hours spent on the car I think you have the right to be nervous / ecstatic about finally driving it.
Keep it up and look forward to more progress.
Cheers A.
Cheers man I was at this point 9 months ago before I found the oil pump problem so it's like having to go through the whole thing twice! I've already organized to have the whole day off cause I don't think I'd be able to concentrate at work.
Anyway should go smoothly and by the end of the month it should be on the road if all goes to plan. Now I just need to start looking at insurance which 3 years ago wasn't much fun and I doubt it's gotten much more enjoyable since lol.
Anyway keep up the good work and loving the progress of yours. Shouldn't be far off either.
-
Well I didn't know where to put this as it's more of a big head/self indulgence and I didn't want to start a new thread for something so lame but I was mucking around with a few different methods for a Black bare metal respray I've got to do and thought I'd chuck a few pics up of a test panel I did for the guy. I just painted my old boot with black Standox basecoat and put 2 coats of their Crystal Pro clear on.
Once it was Dry I wet sanded (colour sanded if your American) with 1200 then 2000 with a soft rubber block to remove all the peel. Then Farecla G3 with 150mm foam pad, Juice Swirl Remover with the green Gelson pad finished with a coat of T57 blaxk liquid polish.
He was stoked and for a job painted outside I'm positive he'll be over the moon with the actual job.
I'm going to do a few more test sections on the boot with various flowcoating methods so he can see the difference and I might chuck some better comparison photos up if anyone's interested. Anyway here's some pics.

-
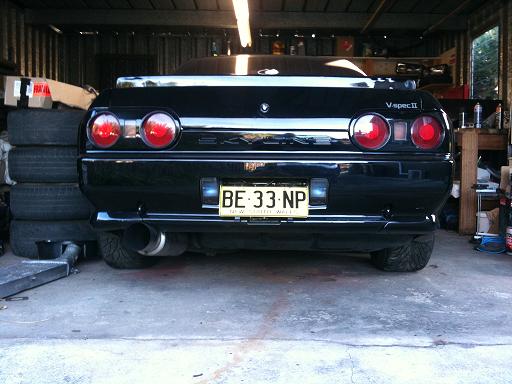
Well had a bit more progress over the last few weeks I got the old girl a present about 6 months ago but only just got around to fitting it. I love the look and feel of the new wheel because it's not too far gone from the stock wheel but unfortunately it is smaller which will take a bit of getting used to.
Got my exhaust all back on.
I said in my last post that I had taught myself to tig weld stainless and was having a go at an ally catch can but that didn't quite go to plan so I Started again and called in a mate to do the welding for me which we started today and got it all tacked up and he'll finish it for me this week sometime.
Original can
New can.
I changed the shape to just a simple rectangle and will retain my stock rad overflow bottle. I was also gonna put baffling in the can but after talking to my mate we agreed to just run with Stainless steel wool so should work fine. I'll measure the contents once it's finished but it looks like it should hold 2-3 litres so if it fills that I've got bigger problems to worry about.
I've also got a mates black series 7 FD RX7 that he wants me to bare metal respray so I just knocked up a few different options for painting on my spare boot to show him and thought I'd take a few photo's just for fun.
And lastly the important stuff. Got a mates mate who's a mechanic and does RWC checks to come check out the car last week and with a few minor changes he said he's happy to pass it so rego should be a breeze and it's booked in for it's run in tune on Thursday the 11th of July so less than 2 weeks!!
Heaps excited but absolutely shitting myself at the same time not sure what I'm gonna do that day might need a few Valium or something cause I'll be a nervous wreck lol.
-
Yeah in and running just need jack to weld up my catch can this weekend and its ready to tune.
-
Well i dropped into pro auto today only to find that they're closed till Thursday!!! So i hope he won't be too busy when he's back and can fit me in cause im keen to get on the track!
-
Keep me posted man as im def keen. im going in to see kutzie today so if he can fit me in before then fingers crossed ill be there.
-
That's exactly what i said. Take it for a day out at basky and you will forget about selling it pretty quickly. On that note i am hopefully going to have my car tuned next month and will be organizing a quiet track day for a bit of a "run in/learn how to drive your car again" session if anyone is interested. ie. jack lol.
-
No good man sounds like he had a party around the car while you were away. As Jack said I'd be wary of random backyarders as most will be happy to charge you f**k all but give you the same. Are most of the scratches really bad or would a good cut and polish tidy most of it up? If it's not scratched through the paint to the actual primer then you'd be amazed what can polish out. Shame your not down south or I'd be interested in having a look and giving you a quote.
-
not going too bad for a homosexual, round 2 of the catch can next weekend! just gotta show the ally who's boss lol
Calling me a homosexual? I'm not the one who's thinking about selling my skyline because I'm too gay to drive it anymore!
-
Yeah unfortunately he has caught the ghey. Not sure I can be friends with him any longer.
-
Hmmm I thought we discussed this last night...........
-
 1
1
-
-
Well it's been a while have been pretty busy with work lately and it looks like this month is going to be much the same. But I have had a chance to do a few small things over the last week or so. I had to replace the crappy old 3 inch de-cat pipe so I bought a 3.5 inch 100 cell High flow of the net only problem was I couldn't find any long enough with flanges already welded so bought some 2 bolt flanges and considering I also had a custom catch can to make I decided to borrow my mates Tig and teach myself to Tig weld.
I had to cut the 3 inch flange off the rear section of the exhaust and change it to a 3.5 to match the Cat but once I had done that I had to extend the cat because it wasn't long enough which meant finding a 50mm length of 3.5 inch stainless pipe which was an absolute mission. Ended up having to buy a mandrel 45 degree bend and use the end off of that.
Lets just say Tig welding stainless steel is an absolute breeze thought it was going to be a lot harder than it was............ unfortunately it doesn't transfer over to Aluminium lol. I have half done the catch can but was too embarrassed to take photo's lol. I'll get some pics when I finish it off.
I also changed over the air filters for some better ones once I finish the catch can and put my new oil pressure sender in I can get it tuned so I'll hopefully have that done by the end of the month.
-
Anyone that causes others grief should get testicular cancer
While I agree with this statement 100% I dont think that said scumbags obviously have balls otherwise they wouldn't be creeping round at night stealing other peoples hard earned stuff. dream boats.
Sorry to hear about this Ant and I doubt the would've been following this or as said the midori pipes would've been the first thing they stole. Just sounds like they had no idea and grabbed what ever they could get there hands on cause what good are 3 injectors lol. Dumbasses.
And thank f**k said Tomei engine is still safe and sound. Hope all moves swiftly with the insurance and this build gets back on track real quick.
-
Yeah I would love to know what the price would be too. I bought a just jap kit and haven't had any problems lol but my car hasn't ran more that 20 minutes so not a great help to you. I think the Samco kits are supposed to be pretty good and they're not too expensive other than that get a just jap kit but buy all the little under plenum hoses from nissan and just use the easy to get to hoses from just jap. Thats what I would've done if I had my time around (and the price wasn't too prohibitive)
-
Apparently VN Commodore rear window rubber fits a 32.
-
Man nothing better looking than a black 32GTR. Epitome of TUFF!
-
Na the four screws hold the wing together when they are first made. They have a top and bottom half that they glue together and the screws hold them in position. Other than that they serve no purpose.
Thats the inside
And yeah heavy as hell. Carbon copy of the OEM looks good though.
-
Yeah like I said I've got to mould it in two pieces so I'll take a mould of the top as it is and then smooth it out and see what I think. I have a picture of the finished product in my head which I think will look good but I'll just have to see if I can make it into reality and if it will work in reality lol.
-
FU CK ING AWESOME man! Cant wait to see what this will do.
-
Cheers man yeah I did think about that. Just not sure if it will look too far gone from the GTR wing then. I might still do it not sure. I have to make the mould in a top and bottom half anyway so I might take a mould of it how it is atm and then modify the top and if it looks any good take a mould of that too then I can make up both blades and decide which one I like better. At the end of the day though it's purely a cosmetic thing for me and I'm not too fussed about getting every bit of extra areodynamic advantage I can. Not yet anyway lol.
-
Well I was going to keep it hush hush until I'd made some decent progress on it and you could get a good idea on how it was going to turn out but I'm not gonna get a chance to touch it for a while now so I'll show you where it's currently at.
I was looking at the spoiler after I'd got it to the shape I was happy with and I had a thought......... R33 GTR spiolers look pretty cool how they have the adjustable blade............. Man this thing is pretty heavy............ How can I drop the weight and also make the centre adjustable?
After pondering this question for the best solution I thought f**k it I'll just cut it apart and deal with it from there lol. So I did!
Once I had done that I decided that I really needed a bootlid to mount the two end plates to so that I can work out exactly where I need to put in the shafts at the front of the blade so it will swivel properly and also so I can ensure it is all the right length with nice even gaps.
I didn't want to drill holes in my existing lid as it doesnt have any and I know how hard it is to find them without holes so I found a mint lid off a guy on here that had the right spoiler holes already including the N1 lip holes so that was a big score.
Anyway I initially was going to get the centre to the exact shape I want and take fiberglass moulds of it so I could make a carbon fibre copy of the blade but I have now decided to just make a fiberglass one and paint it either satin to match my wheels or maybe gloss. Either way the whole centre section will be remade from fiberglass.
I have also been trying to work out how to make it adjustable and how to pin it or lock it off in each position. I originally thought of using stainless turnbuckles fron the boot up to the bottom of the spoiler which I think would look tough in an industrial sort of way but wouldn't quite suit the direction of the car so now I think I'm going to make provisions so I can flush mount end plates of 4mm aluminium between the blade and the mounts and have that protrude out of the bottom just enough to have a hex bolt into a nut to lock it in place. Then when I raise the spoiler I can screw the bolt into another hole further up thats normally covered.
Anyway I'm sure that alot of people will say why are you wasting so much time and effort when you could just buy an extension or a whole new wing but I really dont mind. At the end of the day I will have a one off spoiler just the way I have pictured it in my head.
-
Only exterior on most cars. When you put that into a paint programme on the computer it usually has associated colours that come up with it for interior/engine bay colours etc. Usually older cars had a code on the vin for interior but that was for the trim like blue grey green brown etc
-
Yeah it is recommended as the solvents are still coming out of the paint for a few months even with 2 pack but it wont hurt to use a liquid polish we used to polish them 2 days after painting. Unfortunately you have to in the crash repair industry. Same as baking in an oven. it's better to let it cure naturally rather than force dry but you cant have each job sitting in the oven for a day or two and leave them a week before fitting them up.
-
I have no doubt you've seen them at it with the lambswool pads artz lol. when i was at tech the old workbooks even had them using cornflour and a dry pad to "finish" buffing lol. but nowdays most decent painters use foam pads with 3 step cut swirl remover and then polish all with different grade pads. i use liquid polish its much easier to use and has great results. like i said most "decent" painters will remove swirls most shit ones won't.


My R32 Gtr Vspec1 Project Car
in Projects, Overhauls and Build-ups
Posted
Yeah easier than complicated baffles and probably more effective. I imagine I'll still end up with some oil residue issues from the filters especially as i don't have cam cover baffles yet but for now until i track the car this should solve most of the problems. hopefully lol.