Jump to content
SAU Community

Recommended Posts

Hey people,

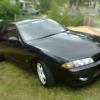
this is my mates silvia. his add is as follows:

I think the time has come for me to sell my car. Not that I want to, It's just mainly because i feel like ive accomplished nearly everything I wanted in my Silvia.

And am now looking to buy either an R32 GTR or a Series 6-8 RX7.

Factory

*1988 CA18DET S13 Silvia Club K's

*175,000kms

*Midnight Blue

*Sunroof

*Dual Projectors/Bigger Non Projector Foggies

*5-Speed Manual

*Digital Speedo Dash 100% working with HUD

*Factory LSD

*Hicas

Interior

*Blitz Boost gauge

*Autometer Stoich gauge (Both gauges mounted on A-Pillar)

*Alpine Deck (MP3)

*Kenwood 6x9's

*Alarm System with Turbo Timer

Exterior

*Nismo Letterbox Grill

*17"x7 Gold 5 Spoke Apache Dished rims (with good rubber)

*Canon (8inch Barrel 6inch tip)

*Current plates SID-3ON (side on) will be sold with the car for the right price..

Engine

*A.P Engineering Power FC with Handcommander

*600x300 FMIC with Custom stainless steel Piping

*Garrett GT2860RS .64 Disco Potato

*3" Turbo back exhaust

*SS Manifold

*K&N Airfilter

*Walbro 550HP Fuel Pump

*Sard Fuel Pressure Regulator

*Sard 800CC Injectors

*Q45 AFM (90MM)

*Catco High-Flow cat

*Justjap Catch Can

*Turbosmart Type III Bov

*Apexi AVC-R (Black)(3months old)

Or turbosmart boost tee (according to sale price)

*JJR Strut Brace

*Raizin Volt Stabilizer

Drivetrain

*Nismo Shocks (probly old S-tunes) Adjustable bound/rebound

*Lowered King Springs (roughly an inch above rubber)

*Cusco lightened flywheel (5kg's as oposed to 12kg's stock) (Changed DEC"06)

*Slotted rotors

*Exedy ceramic full faced clutch disc with Heavy Duty Pressure Plate (Changed DEC"06)

Car has been tuned and maintained @ Ricol Automotive in Peakhurst

(Enquiries can be made about maintenance on their filesystem)

Car made:

188kw@ 18.0 PSI (Dyno'd 16/1/07): This result was acheived using a set of bosch coil packs which were rather unsuccessful on my car.. the factory coils have since been re fitted and the original issue of them not working properly was fixed by replacing the EGI harness.

The car definately has a SIGNIFICANT increase in power since re fitting the standard coils and the new EGI harness and would definately make more power again.

This change also has allowed the car to run well on 20 psi for the past 3 months, although a followup dyno run is yet to be completed.

About the car/owner:

*Theres a few chips here and there on the exterior, but reasonable for a car of its age.

*Has a ripple on the rear 1/4 wheel arch. I bought the car like this and it didnt bother me to the extent where i felt like it needed to be fixed.

*Has beautiful Acceleration! Hits 20psi @ 3200 - 3800 rpm depending on what gear your in.

*Always warmed up in the mornings

*Always use BP Ultimate fuel

*Have used mostly Castrol GTX3 for the 1.5 years ive owned it and have serviced every 5k or less. (Bought on the 27/10/05)

*Have always taken pride and looked after my silvia, Not a P-Plater.

*Car had been originally AUTO but had been converted sometime in its life to manual.

*Arrived in Australia in 2001. Was originally a justjap import.

*Car is very reliable and has never failed me.

This car wont disapoint, come for a demo and bring a spare pair of undies. No test pilots.. sorry..

Located near Brighton or Hurstville

Rego Expires 26/SEP/07

Had no troubles insuring with JustCar

Asking Price : $12,000

Just ring 0421 835 965 and as for Steven

Enginebay.jpg

siltunnel.jpg

Park1.jpg

Nismo1.jpg

Carpark1.jpg

Link to comment
https://www.sau.com.au/forums/topic/166936--/
Share on other sites

Guest
This topic is now closed to further replies.


  • Latest Posts

    • Hi, is the HKS  Tower Bar still available ? negotiable ? 🤔
    • From there, it is really just test and assemble. Plug the adapter cables from the unit into the back of the screen, then the other side to the car harness. Don't forget all the other plugs too! Run the cables behind the unit and screw it back into place (4 screws) and you should now have 3 cables to run from the top screen to the android unit. I ran them along the DS of the other AV units in the gap between their backets and the console, and used some corrugated tubing on the sharp edges of the bracket so the wires were safe. Plug the centre console and lower screen in temporarily and turn the car to ACC, the AV should fire up as normal. Hold the back button for 3 sec and Android should appear on the top screen. You need to set the input to Aux for audio (more on that later). I put the unit under the AC duct in the centre console, with the wifi antenna on top of the AC duct near the shifter, the bluetooth antenna on the AC duct under the centre console The GPS unit on top of the DS to AC duct; they all seem to work OK there are are out of the way. Neat cable routing is a pain. For the drive recorder I mounted it near the rear view mirror and run the cable in the headlining, across the a pillar and then down the inside of the a pillar seal to the DS lower dash. From there it goes across and to one USB input for the unit. The second USB input is attached to the ECUtec OBD dongle and the 3rd goes to the USB bulkhead connected I added in the centre console. This is how the centre console looks "tidied" up Note I didn't install the provided speaker, didn't use the 2.5mm IPod in line or the piggyback loom for the Ipod or change any DIP switches; they seem to only be required if you need to use the Ipod input rather than the AUX input. That's it, install done, I'll follow up with a separate post on how the unit works, but in summary it retains all factory functions and inputs (so I still use my phone to the car for calls), reverse still works like factory etc.
    • Place the new daughterboard in the case and mount it using the 3 small black rivets provided, and reconnect the 3 factory ribbon cables to the new board Then, use the 3 piggyback cables from the daughterboard into the factory board on top (there are stand offs in the case to keep them apart. and remember to reconnect the antenna and rear cover fan wires. 1 screw to hold the motherboard in place. Before closing the case, make a hole in the sticker covering a hole in the case and run the cable for the android unit into the plug there. The video forgot this step, so did I, so will you probably. Then redo the 4 screws on back, 2 each top and bottom, 3 each side and put the 2 brackets back on.....all ready to go and not that tricky really.      
    • Onto the android unit. You need to remove the top screen because there is a daughterboard to put inside the case. Each side vent pops out from clips; start at the bottom and carefully remove upwards (use a trim remover tool to avoid breaking anything). Then the lower screen and controls come out, 4 screws, a couple of clips (including 3 flimsy ones at the top) and 3 plugs on the rear. Then the upper screen, 4 screws and a bunch of plugs and she is out. From there, remove the mounting brackets (2 screws each), 4 screws on the rear, 2 screws top and bottom and 3 screws holding in the small plates on each side. When you remove the back cover (tight fit), watch out for the power cable for the fan, I removed it so I could put the back aside. The mainboard is held in by 1 screw in the middle, 1 aerial at the top and 3 ribbon cables. If you've ever done any laptop stuff the ribbon cables are OK to work with, just pop up the retainer and they slide out. If you are not familiar just grab a 12 year old from an iphone factory, they will know how it works The case should now look like this:
    • Switching the console was tricky. First there were 6 screws to remove, and also the little adapter loom and its screws had to come out. Also don't forget to remove the 2 screws holding the central locking receiver. Then there are 4 clips on either side....these were very tight in this case and needed careful persuading with a long flat screw driver....some force required but not enough to break them...this was probably the fiddliest part of the whole job. In my case I needed both the wiring loom and the central locking receiver module to swap across to the new one. That was it for the console, so "assembly is the reverse of disassembly"
×
×
  • Create New...