


joemac
-
Posts
15 -
Joined
-
Last visited
-
Feedback
0%
Content Type
Profiles
Forums
Events
Gallery
Media Demo
Store
Everything posted by joemac
-
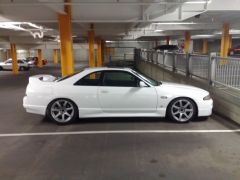 Great looking car with probably the best set of wheels i've ever seen on a skyline. Very nice.
 -
I got my suspension (whiteline/bilstein group buy) fitted yesterday at Centreline in Thomastown. I'd just like to say Glenn & Chris have done a fantastic job. I dont know much about suspension (I know more now than I did before) but the difference in ride and balance was amazin. My car is close to 180K mark now and I think the suspension was original as it was completely pooched - including a bent shocker. I will be going back to Centreline in future and can recommend them to anyone wanting to get any suspension work.
-

Differing Ride Height At Rear Of Car
joemac replied to joemac's topic in Suspension, braking and tyres
Got my suspension replaced today. Fixed the ride height issue. Suspension was completely pooched - including a bent shocker. -
Just got my package in the mail. All pieces arrived safe and sound. Very happy with the deal. Thanks for all your help Matt. If anything the only bit of "constructive criticism" I can add is that there was a definite lack of communication after the transaction. This is only a minor issue but would have been nice to be kept appraised of an ETA. Still, I suspect things have been quite busy. Now just need to get it fitted
-
Car is still stalling so will be cleaning AAC on weekend
-
It appears that changing the filter has also fixed my stalling at low revs problem. Maybe a bit early but looking good after 1 week.
-
Differing Ride Height At Rear Of Car
joemac replied to joemac's topic in Suspension, braking and tyres
Thanks to those that replied. Got 2 new rear tyres today. Wheel guy says it could be suspension as they looked quite shagged. I plan on getting the whiteline group buy when Sydney Kid gets back late Jan so will save my pennies for this. BTW, the wear was only bad on the tyre closest to the exhaust so problem is just affecting one tyre. -
Specifics; Car : 1996 R33 GTST Owned : 3.5 years Clock : 175,000k (purchased at 105,000k) Suspension : standard, 17 inch rims Funny how one thing leads to another.... I was measuring the ride height of my car today as I was thinking of getting the SydKid group buy and lowering it a tad. As I was doing this I noticed a screw sticking out of the rear tyre. I then preceeded to remove the screw hoping that it did not go in too deep. Not so! However, I was prepared and fitted the space saver (not a good look) while the tyre went flat. As I inspected the tyre I noticed that the inside of the tyre was quite worn (with an undulating pattern to the wear) while the outside was still fine. I checked the other rear tyre and same deal. Now, 6 months after purchasing the car I had a similar problem with the front tyres. I took the car to Pedders and gave them a lot of money to fix the problem. What I got; 1. Camber adjustment bushes 2. Caster adjustment bushes 3. Wheel alignment (all four) 4. Plus two new front tyres And to date the front has been sweet with no uneven wear on the tyres. So, I checked the forum and it could be many things but I'm leaning towards an incorrect toe adjustment. I thought I'd take it back to Pedders to check but I noticed something else. The ride height on the right rear (if your facing the front of the car) is 380mm but the ride height on the left rear is 370mm. The ride height for the right front is 370mm but 375mm for the left front. I'm measuring centre of hub to guard height. Now I'm not sure if this means anything but seems a little strange. And yes, the garage floor is pretty flat. Wondered if this could be a suspension issue (ie: shot shockies)? Or something worse? Anyway, I need to be mobile and will be getting 2 new tyres fitted to the back and then take it into a suspension specialist at first opportunity. Will post any conclusions once they become available but is anyone is able to shed any light on why ride height might be different?
-
Replacing the fuel filter on a 1996 R33 GTST This is my second post for replacing a filter. I've decided to repost as my last post for this was 2004 and all the pictures have been removed. And as usual do not attempt this unless you are confident in doing so. I accept no responsibility if you choose to follow these instructions. Things required: 1. Stubby or short philips head screwdriver. 2. I used a Ryco Z201 filter but yours might be different. See further down for additional comments. 3. Water may be required to wash any spilt fuel. Steps involved: 1. Ensure the engine is cold as you will lose some fuel in this process. The fuel filter is in a difficult location and will require some dextrous work to remove. If you are looking at the engine bay its located on the left hand side below and further back from the fuse box for those that dont know. 2. The engine manual suggests that you first need to reduce the fuel pressure (by removing a fuse). I skipped this part as I did not know which fuse to remove. I did however open the fuel cap (and hence reduce pressure) which substantially reduced the amount of leakage from the bottom pipe once the filter was removed. I have posted a picture of the fuse box below. Perhaps someone can indicate which fuse to remove for those that are interested? 3. The pipe that is attached to the fuel filter is significantly difficult to remove. My only suggestion is that you start at the bottom bracket where the hose seems to be easier to remove from the metal pipe. You have to try and break the seal so twisting and pulling is involved. Needless to say, you will probably lose some skin. Once the bottom hose is removed you can twist the fuel filter around to stop fuel leaking and then work on the top bracket. 4. Place the new filter on and fix the hoses in place. Ensure that there is enough of the hose over the lip on the stem of the fuel filter so you can re-tighten the clamp successfully. Also, there is an arrow on the fuel filter indicating the direction of flow. This should point up. 5. I then washed away any spilt fuel with some water 6. Started the engine and checked that there were no fuel leaks. Yes, the car may run a little rough for a minute but this is OK. Since my last posting I have racked up 55,000k between filters. My previous posting forcast of every 10,000k was therefore a little optimistic. However, when I removed the old filter and attempted to blow air through it (after draining the remaining fuel) it was quite difficult and I had trouble getting more that say a 10% flow. The new filter was quite easy to force air through. Not sure if this is an indication of the deterioration of the filter or just that the new filter was dry? A few other details; 1. The Ryco Z201 cost $22.00 from Autobarn 2. The guy at Autobarn told me you can also use the Ryco Z200 which retails for around $12.00 from memory. Below is a picture comparing the 2. I'll consider using the Z200 next time if it fits in the bracket OK (its a little slimmer than the Z201) unless someone can tell me why I shouldn't. 3. I've also read on the forum that you can use a Ryco Z387 but have not looked into this. 4. I opened up the old fuel filter (see pic) and it looked quite dirty so was probably doing its job.
-
Can anyone recommend someplace to service/tune an R33 GTST. Im a bit hesitant to take it to a garage that may do more damage then good. I live in western suburbs (Hoppers Crossing) and the closer the better.
-
The car did run a bit rough for the first minute after starting. How do you prime the fuel pump first?
-
The fuel filter was about $25 but its probably different to the one you want. Just go into Autobahn or Repco and do a search through the parts catalogue to find the specific type. Not sure what the price difference is to a genuine nissan filter. I plan to change mine about every 10,000k so the Ryco should be OK.
-
Replacing the fuel filter on an R33 This is probably suck eggs for most people but just thought I’d post any work I did on the car as it may make things easier for others when going through the same process. Things required: 1. Stubby philips head screwdriver. 2. I used a Ryco Z201 filter but yours might be different 3. Water Steps involved: 1. Ensure the engine is cold as you will lose some fuel in this process 2. The engine manual states that you first need to reduce the fuel pressure (by removing a fuse). I skipped this part. I found that there was not much fuel loss or pressure anyway. 3. At first, I could not remove when trying to loosen the hoses from around the filter as I could not twist the hose to break the seal. I then set about undoing the clip and removing the hose from the bottom where it joint the metal pipe (see first pic). The hose slips off a lot easier here. You will need the stubby screwdriver to access this area. Once this was off I removed the filter from the bracket (only lost a little bit of fuel) and twisted the hose around so I had a lot more access (see second pic). I then proceeded to remove the hoses from around the filter by loosening then twisting the hoses off. 4. Placed the new filter on and fixed the hoses in place. Don’t overtighted as you don’t want to break the plastic from around the filter. 5. I then washed away any spilt fuel with some water 6. Started the engine and checked that there were no fuel leaks
-
Dont know why I didnt find that before. I was after the bit about removing the fuse. Cheers.
-
Is anyone able to provide me with info on how to change a fuel filter in an R33. I've tried searching the forum but could not find anything on this. Seems like a simple procedure except for the first part. The manual says first to release pressure before removing but does not go on to explain how to do this? I was just going to remove anyway but thought there might be a some problems if I miss a step? I plan to do this over the weekend

