

GTRPSI
-
Posts
1,355 -
Joined
-
Last visited
-
Feedback
100%
Content Type
Profiles
Forums
Events
Gallery
Media Demo
Store
Posts posted by GTRPSI
-
-
Im in Melbourne (Bricks and mortar and online shop) and carry them.
Most shops dont hold them because they are expensive, however RDA/EBC deliver daily, most times twice a day so most shops dont carry them as they have no need to, ask they they are a few hours away.
-
Crankshaft or camshaft end float?
-
I had EBC Greenstuff on my old car and thought they were fine. They didn't last very long though. I've had the QFM HPX pads, very dusty and I could not get them to be quiet. I had squealing in all 4 corners. Remsa shut the noise up in 3 corners.
I'm leaning towards redstuff or Intima SS pads.
Remsa good for braking and noise but the dust is insane. I think my car was the cause of the dust storms Sydney had a couple years ago.
EBC Green stuff is for light kit cars around up to 850Kg and rated to 500 degrees.
I have spoken to EBC Australia about this, now you cant buy them in Aus anymore because of it.....Minimum is Red stuff now.
-
-
Man that belt is seriously loose.
My bets on belt slap on the lower cover or tensioners loose which would explain the knock sound.
-
E85 attracts a ton of water so cars running E85 tend to have a lot of condensatin, or possibly called "white smoke" coming out the exhaust when idling. Are you sure its not just a lot of condensation mixed in with normal car smells?
Maybe his E85 has absorbed a shit load of water in the tank and running as a steam engine.

-
 2
2
-
-
By pass your reg as a test, or in other words take it off the rail and use a fitting to connect the return line directly to the fuel rail.
Whats your fuel pressure now?
If low you need a bigger reg as the stocky cant flow enough out.
But if your smarts, you would try to blow through the return line first as its the most probable logical issue you may have.
-
Took the motor back out, and noticed that there was a row of inner welsh plugs on the exhaust side that were in. Apparently these are not meant to be in on a 26 and was restricting the flow of water in the block. I was told these were put in by the guy machining the block. But not here to play the blame game.
So took those plugs out, put the motor back together and perfect temps. Problem solved.
Inner welsh plugs in on the exhaust side that are not meant to be there?
What inner welsh plugs are there except for the one i pointed out under the thermostat on the intake side?
Pull all the welsh plugs out on the hot side and its just the inner block there, you cannot put inner plugs in if you tried as there is nowhere to fit them.
Unless he knocked to old plugs into the block when removing them and left them loose in there.
Id say you didn't get the whole truth........just the version of events that suited whoever told you.
-
i have a brand new carbon spoiler blade if you get stuck... pm me for pricing.
-
Holy crap that sounds bad.
Remove the cas and front timing cover, take a look around something funky happening there.
-
I just moved mine for a catch can with radiator overflow.
-
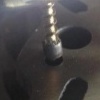
Are you sure its 1.25 pitch into the block? It would provide real torque when tightening down.
Whats the final torque on them? A lot less than 100ft/lb?
ARP's studs for 25's and 26's are 1.5 pitch into the block but (i think) 1.25 on the heads nut face end. (Much finer)
-
Is it just me or is that intercooler uber skew
Id say shadows, and the fact that the left and right end tanks are diff shapes.
-
1
-
-
Do you have the length Pete? I want to compare to the VQ bolts I have here. (Not that I really want to go cutting L19's down, but I will if I have to.
)I was just down at Barrys and he gave me a set of RB26 ARP2000 stud kit to measure up as im still waiting for my studs to arrive.
Complete length of the whole stud is 124.37mm end to end.
Threaded section that enters the block is 23mm
74.27mm un-threaded shaft length.
Threaded section that nuts go on is 27.1mm.
So 23mm into block, 74.27mm shaft length, 27.1mm threaded for nuts and washer=124.37mm total length.
Hope that helps you.
-
There are many types of smoke.
Black smoke is rich.
Blue smoke is oil.
White steam is water evaporating from inside the exhaust when its warming up.
What color is it? (not smell)
Id say its black and running rich while in the warm up circuit.
Stem seals will smoke blue for a few seconds till it gets burned up if its the stem seals.....
-
I did something similar to a old 3 piece OZ Racing wheel set, only difference was they were clear coated which was peeling and really corroded.
I ended up sanding the outers to get the clear coat off, working my way to 1200 grit, with each sand removing the sand marks from the last grit.
Then buffed with a wool buff and cutting compound on a drill, final finish was done with Autosol, they came up mirrored like chrome.
You may be spending too much time on them because you are not sanding through the corrosion.
Those inners with the rough cast are best sanded smooth first to remove the rough casting, then polished.
-
2
-
-
Im waiting on 12mm CA625+ studs to arrive and a i have a set of 11mm studs but the box is sealed and i dont want to open it as im selling them.
A stock RB26 head bolt with washer fitted is 99.91mm long from under the washer head to the very end of the bolt including the threaded section that enters the block.
Remove the washer and from under the bolt head to the end of the threads its 102.72 mm.
Washer is 3.10mm thick exactly. (so im a few 0.00mm out somewhere)
Threaded section entering the block from the lengths above is around 27.5mm.
From there you will just need to add what you need to protrude out of the head to get the nut full on when working out stud lengths.
-
I have an RB30 with Nitto pump and use 2 x 1mm restrictors, no blank, by blanking one off you creat a air pocket under it
With the 26 head used, the 26 block has the rear one plugged factory so on 30 blocks using the 26 head you plug the rear one, Nissan sell the solid plug for around $5.
I never put the new restricor over the old one on a rebuild, in most cases the engine may have a history of a spun bearing, crud collects under the factory restictor so i run a self tapped screw into it and used a shifter under the head of the screw and knock it out so i can clean under the stock restrictor.
You would be surprised how much crap is under it.
-
2
-
-
To be more exact its actually M11 X 1.5 (pitch) for RB25's and RB30's.
RB26's are M12 X 1.5 pitch.
Reason i know is because im about to convert a RB30 block to RB26 head bolt sizes tomorrow for fun.
Make sure you get the bottoming out tap so yo can reach the end of the threaded hole if cleaning threads, the next one back is the plug tap and will be short 3-5 turns from the bottom, the starter tap will be 5-8 turns short.
-
Put it simply the rotors are the issue for the shudder. My rotors and my mates rotors both fitted at roughly the same time are now shuddering. Two separate cars. I can put my old DBA rotors on and the shudder goes away.
No the rotor shudder is the end result of a issue, as said before they get like that for a reason.
As pointed out earlier in the RDA TSB's i linked you to, if you take a moment to read through them, its mentioned that rotors get like that for a reason and the shudder is the end result, that is the rotors are damaged due to a outside influence, not the rotor physically themselves.
If you get a fouled spark plug, do you say the spark plugs are crap?
-
To the two points I've highlighted in red;
I did a factory tour last year with Members of SAU NSW for one of our most excellent Tech Arvo's organised by the Club Execs.
1; According to DBA; ALL 4000 Series and 5000 Series are cast in a proprietary grade of cast iron in a foundry based in Sydney. This is to guarantee the quality & consistency of their flagship product.
2; In the standard R33 GTS-t rotor size; there is no DBA 2 piece rotor available, so you are left with the 1 piece 4000 series T3 slotted rotor OP has quite reasonably decided to use for trackwork on what I'd assume is a modified STREET CAR, not a dedicated track car.
6 track days and 2000km of street use doesn't "seem" like a great deal of time, and the nature of the failure isn't something that you'd expect; and even DBA suggest that an amount of radial surface cracking in tracked rotors is perfectly normal, and to be expected (as you have also pointed out).
I'd definitely be approaching DBA, and asking for their guidance, and possible ways to move forward; they are (in my experience) excellent to deal with, and are very understanding of enthusiasts who use their product as it was designed.
Simply telling people that they have misused the product and that they should suck eggs is hardly helpful.
Cheers, Dale.
Well being a large account in the brake game i have some DBA senior management on my speed dial....so i made a quick call for clarification from higher up the food chain.
I was told "partially" what i posted over the phone, its all made here and O/S regardless of range...yep i initially thought maybe what i was told in the industry was wrong after what you posted and was preparing to apologize about my post.
So i thought id get some proof for you in writing, obviously having seen the plant, you may have "assumed" its all made here as the senior management pointed out to me.
So i emailed their team anonymously to get it in writing.....i have sent you a copy in your inbox of that whole email ping pong.
Certainly not all made in Australia, as you will see in your message i even tried to weed it down to the T3 or club spec or 2 piece range to say its 100% Australian made, apparently not so.
Not taking away from the brand, they make some good stuff, just clarifying what you didn't know or miss interpreted.
OR maybe senior management and sales team dont know the upper end all made here.
In case you want the china ones direct......
-
1
-
-
Rotors were around 2 years old and have done about 6 track days and around 2000km of street driving. The rotors actually have very minimal wear, but started to get hairline cracks which is pretty common for tracked rotors.
Using Project Mu HC+ pads with ATE Super Blue fluid and semi slicks.
I did two warm up laps at around 60% of normal pace, then 80%, so they would have been pretty warm by the time I hit the brakes.
Not really confident that DBA will get back to me with any sort of resolution in my favour, but I've written the rotors off and will go for something else in the future. The 4000 series are too expensive to run for such a short time. I'd rather go for a cheaper RDA and swap them out more often after they start to get hairline cracks.
Those earlier hair line cracks you had are usually just surface deep.
We see a lot of track day rotors like this, quite often a fine marbling of the braking surface where the cracks are very shallow, a simple light skim will remove them.
However, not machining the rotors (you mention 6 track days) "may" (something ive always suspected in the early days and after watching had seen) lead to these cracks growing, or lead to a larger full crack developing due to the weakness from the earlier cracks.
Just like how once a part is cracked, the crack will continue to grow along the current one.
Most rotors with the surface marbling that ive watched, progressively got worse with the cracks growing in width and depth the longer they were used, the rotor heating and cooling (expanding and contracting) aggravating the issue.
Its one of the reasons i now tell people doing track days to keep an eye on 1 piece rotors for any cracks developing, if they see a surface craze finish to simply lightly machine the rotors to remove it before driving on them.
You can never be too safe, then again, using the right rotor in the first place may have been more appropriate however the costs of the good stuff is pretty much out of range of the average person doing the odd track day.
You mentioned you used HC pads, what is the temp rating of the pads? I know the HC800 are rated to 800 degrees.
I piece rotors shouldn't be subjected to over 600 reliably, once you go over that your looking for issues.
-
I wasn't actually suggesting that he make a claim. My intention was that DBA could look at the failure and see if there was anything they could learn from it. Sometimes there are hidden manufacturing faults (basically just casting defects) that will survive years of use on a road car that will break on track usage, exactly as you say. They never learn from the ones that don't break on the street, but they should be given every opportunity to see the ones that do.
An old example is the habit of Holden 6s to break timing gears and occasionally snap the front end off the camshaft. I reckon that Holden learnt something about castings because it eventually stopped happening.
Unfortunately most of their rotors are cast in China to keep cost down through a number of plants, part numbers come from different casters, not just 1 plant.
They warranty them for street use, knowing they will work safely within those parameters, they have been proven to be well made in that environment.
If customers want to take things to the next level DBA have a range of proper 2 piece track rotors designed to take that abuse, now if they cracked, id suggest taking them in for research and development and to see what they would say and if they could improve the product.
I doubt they will look to improve whats currently a price point product, that currently works well for what its designed to take, ATM the brake rotor game is extremely competitive in pricing, both RDA and DBA both have a good performance street range which works well while holding prices down to keep customers happy.
Just like you wouldn't build a highly strung engine with stock rod bolts and then take the broken rod bolts to the engine manufacturer to show them what happens when you push a part beyond its recommended usage, im sure the engineer looking at it could have told you it would have happened before you did it.
-
You need to get that rotor in front of a DBA failure/claims engineer ASAP.
Unfortunately DBA (and RDA) wont cover them, only warrantied under normal street use, the moment you hit track any warranty you had is out the window.
Quite a common thing to happen when shocked into heat, they crack from the rapid heat expansion, cast iron needs to be warmed up gradually to avoid cracking it.
You can actually see its riddled with cracks all the way around from rapid heating......
Easily identified by the radiating lines outwards from the hub center all the way around.
When hitting a track, you should use the first lap to build heat into the brakes, that way they are reasonably warm when you start your flying lap, then the differences in temp change are far less and the rotor expands less from running hard cold and running hard hot.
Take a off the shelf rotor from stone cold and hit the straight with a high enough temp rating pad, slam on the brakes with everything you have and bingo, great chance of getting a cracked rotor.
-
1
-


Excessive End Float In Rb26 Camshaft
in Drivetrain and transmission
Posted
For the crank thrust, i mod the thrust bearings for extra oiling on the thrust face (pull needs the mod on the oil pump facing side, push type clutches need the mod on the flywheel facing side).
ACL bearings sort of already have it done, when using ACL bearings i usually open the mod up for more oiling.
The mod is a channel filed into the parting line of the bearings so extra oil can travel to the thrust bearing face.
Yes never start the engine with the clutch down and dont sit at lights with your foot on the clutch, our clutch is a Jim berry 5800lb cover pressure pull type, you know what that baby will be doing to the thrust bearing.....