Jump to content
SAU Community

Recommended Posts

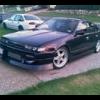
Yes its official. My Cefiro is POSSESSED! :P

Indicators dont work: in the process of fixing that...

Cluster gauges dont work: fixed (loose plugs at ecu)

Interior light: works sometimes but not lately

Wiper aways intermediate and stops half way: fixed (loose plug at ECU)

Almost stalls at idle after a good flogging: ???

Almost stalls when turning steering wheel at idle or parking: ???

No REV LIMITER: ECU decides to forget this feature after many times set by my tuner

And most of all... Hates to idle: no vacuum leaks (probably something to do with the tune or cold start valve)

GetAttachment.jpg

IMAGE_058.jpg

Mods List:

RB20DET Stock bottom end

Pod

Garrett GT30XX

Hi flowed exhaust manifold

3inch exhaust

3inch dump pipe

FMIC

Turbosmart BOV

ARP head studs

Cometic Multi layer head gasket

Rebuilt head

Unknown cam shafts

Adjustable cam gears

Triple core radiatior

Nismo raditator cap

Nismo 600cc injectors

GTR fuel pump

Turbosmart fuel pres reg

Braided lines to the turbo

Custom head oil drain line

19 row oil cooler and filter relocation

MicroTech LT10

Battery in boot relocation

RB20 gearbox

Unknown clutch

Unknown LSD

JIC coilovers-front(leaking)

Tien coilovers-rear

JIC castor rods

Cusco strut brace

Rays Volk 17x7.5 +32 front

17x8.5 +38 rear

Federals 595s

Monkey house URAS kit

Custom paint called blurple (black/purple)

Bucket seats

KKR deep dish steering wheel

Nismo gear knob

Apexi auto timer

HDi-SBC-D-Evolution

Stuff to be fitted:

Oil catch can

Water and oil temp gauges

Battery clamp

Fire extingusher

Wish list:

Tein super streets w/tops

or ISC N1 coilovers

Rear camber arms

HID 6000k

Cage

I bought it out of the spare of the moment last year after wanting one for about 4 years and had to have a sunroof, but it leaks :P

Been adding a few bits here and there, i had the head rebuilt when i blew a radiator hose at mach 2.1 on the highway and got the new radiator (old one was cracked) and put the GT30 on.

Trying atm to legally get it back on the street but it is my drift car and gets trailered to willowbank drifts. Needs another tune with the new laggy turbo and adjustment made to the cams to reduce it (i was running it of the actuator which was even more laggy, ebc made a big difference) but it makes around 250kws atw on 16psi

Cheers

Link to comment
https://www.sau.com.au/forums/topic/270172-the-devils-cef/
Share on other sites

  • Replies 57
  • Created
  • Last Reply

Top Posters In This Topic

Top Posters In This Topic

Posted Images

  • 1 month later...
  • 1 month later...

UPDATE:

Saved up some cash while away with work then bought some goodies...

Buddy Clubs P1 f17x8 r17x9

IMG_0010.jpg

IMG_0012.jpg

IMG_0015.jpg

Volks will become my drift rims...

Silk Road Coilovers ordered

rm-a8-image-600.jpg

Got BIGGER calipers for the front and some DIN gauges as well.

Thinking of coloured rims, possibly powder coating in some ridiculous colour. Rims will get 8mm spaces on them so they will hug the guards, bolted on with rays engineering lug nuts anodized red...

Link to comment
https://www.sau.com.au/forums/topic/270172-the-devils-cef/#findComment-4743449
Share on other sites

  • 2 weeks later...
  • 2 weeks later...

***Update***

Z32/R33 brakes are on with GTS slotted rotors and EBC Green Stuff pads. Cleaned them all up, took for ever with copper wheel on my drill, but came up sweet after spraying them in Hi Temp Paint...

IMG_0457.jpg

Before and After cleaning and paint stirping

IMG_0459.jpg

IMG_0462.jpg

IMG_0463.jpg

After a brake bleed, well actually several, there still seems like there is air in the system, not sure if its my proceedure bleeding it or my mater cylinder cant keep up with having bigger brakes. They came of a mates 180sx and worked fine plus he had no spongy brake pedal. They do pull up a hell of a lot better. Gonna look in to it more...

Also bled the clutch, had heaps of gunk in it, now clutch engagment is right at the end of the pedal travel(top). This is now 1cm high then what it used to be, so gotta get used to it...

Buddy Club wheels on the car, photo taken from my phone, but I added a red pin strip to give it that RAYS Volk Racing CE28N's look. Old volks are now my drift rims but need to buy some 25mm bolt on spacer as it scrubs the chassis rail even with 8mm spacers....

IMG_0466.jpg

IMG_0468.jpg

This is how it sits atm, collecting dust in my car port, hasnt had a wash in 6 weeks now, been real lazy on it, so hard to get motivated when its been defected and no street driving argh...

Gauges are fitted and wired up, very important oil pres, oil temp and water temp. Cleened up some wiring under the dash, found heaps of scotch locks, hate thoughs damn things and removed some of the old sound system. Noticed after a few drives especially at night the oil temp got below 40C thanks to my oil cooler but it is damn too cold and kept a high oil pressure, but all drives were with no front bar, so might see if it makes any difference with it on and if it doesnt make any sort of change, I will probably make a cover for it so it so it doesnt stay so cold...

Still waiting on the Silkroad Coilovers, in the mail atm. Will have a write up on them before, going in and after install...

After coilovers are in, gonna get an engineering cert, then back on the streets and drive it to QR...

Will post new gauges and more wheel pics this w/e....

Cheers, Matt

Link to comment
https://www.sau.com.au/forums/topic/270172-the-devils-cef/#findComment-4779828
Share on other sites

Were the brakes a direct fit? or did you need to change hubs, nuckles etc?

As for painting the rotors, wont that kind of just get stripped away pretty quickly .... ??

GTS Rotors ??

Looks mint man.

How much were your Coilies, and whats the specs?

I'm trying to find a street friendly set for mine, Tein dont make them, and I've been told to keep clear of H2s, and not to use S13's.

Link to comment
https://www.sau.com.au/forums/topic/270172-the-devils-cef/#findComment-4780682
Share on other sites

Were the brakes a direct fit? or did you need to change hubs, nuckles etc?

As for painting the rotors, wont that kind of just get stripped away pretty quickly .... ??

GTS Rotors ??

Looks mint man.

How much were your Coilies, and whats the specs?

I'm trying to find a street friendly set for mine, Tein dont make them, and I've been told to keep clear of H2s, and not to use S13's.

Brakes were a direct fit, no changing hubs, or nuckles. Only thing I did extra was add a washer to space out the banjo fitting in the brake line to the caliper. If your going to do this I recommend removing the dust shield behind the rotor.

I only want to paint the centre part and outside of the rotor, after a few applications of the brakes the part were the pad is touching will be stripped away. I sprayed them back because im fitting bolt on spacers and black on black is hard to spot for the inspecting officer to see if you know what I mean...

GTS rotors, the are from a R32/R33 GTS Skyline non-turbo which uses 4 stud instead of 5, but you can use any rotor that will fit.

Coilovers were cheap, not bad cheap but good cheap. I source them from J-land and got them shipped over to Aus for a good price.

When buying coilovers you get what you pay for, if your gonna buy something cheap/average quality dont expect to much. S13 coilovers are fine, just as long as you get heavier springs to suit the RB20 motor. I think I went for 8kg front and 6kg in the rear, but it all depends on what you want and what you are gonna use it for. ie street or drift...

Link to comment
https://www.sau.com.au/forums/topic/270172-the-devils-cef/#findComment-4781343
Share on other sites

Were the brakes a direct fit? or did you need to change hubs, nuckles etc?

As for painting the rotors, wont that kind of just get stripped away pretty quickly .... ??

GTS Rotors ??

Looks mint man.

How much were your Coilies, and whats the specs?

I'm trying to find a street friendly set for mine, Tein dont make them, and I've been told to keep clear of H2s, and not to use S13's.

Brakes were a direct fit, no changing hubs, or nuckles. Only thing I did extra was add a washer to space out the banjo fitting in the brake line to the caliper. If your going to do this I recommend removing the dust shield behind the rotor.

I only want to paint the centre part and outside of the rotor, after a few applications of the brakes the part were the pad is touching will be stripped away. I sprayed them back because im fitting bolt on spacers and black on black is hard to spot for the inspecting officer to see if you know what I mean...

GTS rotors, the are from a R32/R33 GTS Skyline non-turbo which uses 4 stud instead of 5, but you can use any rotor that will fit.

Coilovers were cheap, not bad cheap but good cheap. I source them from J-land and got them shipped over to Aus for a good price.

When buying coilovers you get what you pay for, if your gonna buy something cheap/average quality dont expect to much. S13 coilovers are fine, just as long as you get heavier springs to suit the RB20 motor. I think I went for 8kg front and 6kg in the rear, but it all depends on what you want and what you are gonna use it for. ie street or drift...

Link to comment
https://www.sau.com.au/forums/topic/270172-the-devils-cef/#findComment-4781345
Share on other sites

Hey dude are you still having your brake troubles? cause in the photo of the caliper close up you can see the bleed nipple for the caliper is on the bottom of the caliper, this should be on the top so when you bleed it all the air comes to the top. so swap your calipers side to side and this should fix the spongy pedal

Link to comment
https://www.sau.com.au/forums/topic/270172-the-devils-cef/#findComment-4786329
Share on other sites

Hey dude are you still having your brake troubles? cause in the photo of the caliper close up you can see the bleed nipple for the caliper is on the bottom of the caliper, this should be on the top so when you bleed it all the air comes to the top. so swap your calipers side to side and this should fix the spongy pedal

Haha yea, a mate noticed that just after that photo was taken, it was only a trail fit at that stage. The brakes werent on till I got the brake dust covers off first which involved getting the hubs off that were rattle gunned on so tight I broke 2 breaker bars.

Will do another brake bleed when I get my coilovers.

Good pick up, cheers.

Link to comment
https://www.sau.com.au/forums/topic/270172-the-devils-cef/#findComment-4788322
Share on other sites

  • 3 weeks later...
i ended up changing my master / booster with r33 items to fix the spongy brakes , requires a tiny bit of modification , but nothing a decent backyard mech can't do :D

I might look into it if I find problems on the track. What did you have to do to make it fit? Ultimately I would like to get a Non Turbo 300ZX brake master/booster as they have more rear brake bias. A mate fitted one from a Nissan Partol and said it worked well but he had a bias adjuster in his 180SX...

Also, fitted the bolt on spacers which I'll be using for the track. Looks phat and no more chassis rail rub, yay...

DSCF0160-Copy.jpgDSCF0165.jpg

DSCF0161.jpgDSCF0164.jpg

DSCF0163.jpgDSCF0162.jpg

Cheers...

Link to comment
https://www.sau.com.au/forums/topic/270172-the-devils-cef/#findComment-4842642
Share on other sites

Create an account or sign in to comment

You need to be a member in order to leave a comment

Create an account

Sign up for a new account in our community. It's easy!

Register a new account

Sign in

Already have an account? Sign in here.

Sign In Now


  • Latest Posts

    • For DBA, check out their guide table here. https://dba.com.au/wp-content/uploads/2023/01/Direct_Replacement-Guide-2021.2.pdf   Additionally they have some other guides and info on how to make sure you choose the right pad.
    • Sorry, just assumed that talk of coloured pads meant EBC red/green/yellow/shit stuff. I don't know the DBA pads, but it's a reasonable bet that they will be OK. DBA make good stuff generally. Those 4000 series rotors I linked to are very good. I may well replace the RDA rotors I have with those when required.
    • The average previous owner for these cars were basically S-chassis owners in the US. Teenagers or teenager-adjacent. I often tell people that neglect is easier to fix than something that was actively "repaired" by previous owners.
    • Update 3: Hi all It's been a while. Quite a lot of things happened in the meantime, among other things the car is (almost) back together and ready to be started again. Things that I fixed or changed: Full turbo removal, fitting back the OEM turbo oil hardlines. Had to do quite a bit of research and parts shopping to get every last piece that I need and make it work with the GT2860 turbos, but it does work and is not hard to do. Proves that the previous owner(s) just did not want to. While I was there I set the preload for the wastegates to 0,9bar to hopefully make it easier for the tuner to hit the 370hp I need for the legal inspections that will follow later on. Boost can always go up if necessary. Fitted a AN10 line from the catch can to the intake hose to make the catchcan and hopefully the cam covers a slight vacuum to have less restrictive oil returns from the head and not have mud build up as harshly in the lines and catch can. Removed the entire front interior just shy of the dashboard itself to clean up some of the absolutely horrendous wiring, (hopefully) fix the bumpy tacho and put in LED bulbs while I was there. Also put in bulbs where there was none before, like the airbag one. I also used that chance to remove the LED rpm gauge on the steering column, which was also wired in absolute horror show fashion. Moved the 4in1 Prosport gauge from sitting in front of the OEM oil pressure gauge to the center console vents, I used a 3D printed vent piece to hold that gauge there. The HKB steering wheel boss was likely on incorrectly as I sometimes noticed the indicator reset being uneven for left vs. right. In the meantime also installed an airbag delete resistor, as one should. Installed Cube Speed premium short shifter. Feels pretty nice, hope it'll work great too when I actually get to drive. Also put on a fancy Dragon Ball shift knob, cause why not. My buddy was kind enough to weld the rust hole in the back, it was basically rusted through in the lowermost corner of the passenger side trunk area where the wheel arch, trunk panel and rear quarter all meet. Obviously there is still a lot of crustiness in various areas but as long as it's not rusted out I'll just treat and isolate the corrosion and pretend it's not there. Also had to put down a new ground wire for the rear subframe as the original one was BARELY there. Probably a bit controversial depending on who you ask about this... but I ended up just covering the crack in the side of the engine block, the one above the oil feed, with JB Weld. I used a generous amount and roughed up the whole area with a Dremel before, so I hope this will hold the coolant where it should be for the foreseeable future. Did a cam cover gasket job as the half moons were a bit leaky, and there too one could see the people who worked on this car before me were absolute tools. The same half moons were probably used like 3 times without even cleaning the old RTV off. Dremeled out the inside of the flange where the turbine housing mates onto the exhaust manifolds so the diameter matches, as the OEM exhaust manifolds are even narrower than the turbine housings as we all know. Even if this doesn't do much, I had them out anyways, so can't harm. Ideally one would port-match both the turbo and the manifold to the gasket size but I really didn't feel up to disassembling the turbine housings. Wrapped turbo outlet dumps in heat wrap band. Will do the frontpipe again as well as now the oil leak which promted me to tear apart half the engine in the first place is hopefully fixed. Fitted an ATI super damper to get rid of the worn old harmonic balancer. Surely one of the easiest and most worth to do mods. But torquing that ARP bolt to spec was a bitch without being able to lock the flywheel. Did some minor adjustments in the ECU tables to change some things I didn't like, like the launch control that was ALWAYS active. Treated rusty spots and surface corrosion on places I could get to and on many spots under the car, not pretty or ideal but good enough for now. Removed the N1 rear spats and the carbon surrounding for the tailpipe to put them back on with new adhesive as the old one was lifting in many spots, not pretty. Took out the passenger rear lamp housing... what do you know. Amateur work screwed me again here as they were glued in hard and removing it took a lot of force, so I broke one of the housing bolts off. And when removing the adhesive from the chassis the paint came right off too. Thankfully all the damaged area won't be visible later, but whoever did the very limited bodywork on this car needs to have their limbs chopped off piece by piece.   Quite a list if I do say so myself, but a lot of time was spent just discovering new shit that is wrong with the car and finding a solution or parts to fix it. My last problem that I now have the headache of dealing with is that the exhaust studs on the turbo outlets are M10x1.25 threaded, but the previous owner already put on regular M10 nuts so the threads are... weird. I only found this out the hard way. So now I will just try if I can in any way fit the front pipe regardless, if not I'll have to redo the studs with the turbos installed. Lesson learned for the future: Redo ALL studs you put your hands on, especially if they are old and the previous owners were inept maniacs. Thanks for reading if you did, will update when the engine runs again. Hope nothing breaks or leaks and I can do a test drive.
×
×
  • Create New...