Jump to content
SAU Community

Recommended Posts

Thought I'd start a new topic regarding my transplant as I'll update this as it all happens. So far I have the Supra box, CRS housing and now a 308 from a VB commodore that has a rear bowl sump. It has been rebuilt fairly stock apart from 40 thou bore. I've also purchased some L34 heads and a 286 cam from a friend who is doing an upgrade on his 308. I'll get it engineered with the stock motor first then bang on some extra goodies afterwards. I was thinking I'd have to use a forward bowl sump(VK style) but after a bit of measuring it looks like if I shift the motor back 40mm I'll clear the steering arm that runs parallel with the crossmember. Once my motor is out I'll have a better understading of this.

Any valuable info appreciated.

Link to comment
https://www.sau.com.au/forums/topic/310942-c210-308-transplant/
Share on other sites

The motor has arrived. 308 bored 40 thou, other than that pretty stock. But only untill it's engineered. I've already purchased some L34 heads and a 286 cam. In the next couple of days I'll purchase a 600 Holley Vac Secondaries and a set of HDT block hugger extractors.post-44326-1268297012_thumb.jpg

No FKN around, this I am guilty of. When i get an idea in my head I go like a bull at a red handkerchief party. I was going to take my time over the next 6 months, but WTF. I got a 650 holley Vac secondries today and the HDT extractors so the motor is really taking shape. Need to rip the L6 out now and have a trial fit.

Bty the way I really need some cheap arts. #1 being a oil switch( bit that screws into the left side of the block and # 2 being the thermostat sender thing just below the thermostat and has wires going to it which is for temp gauge. I have to adapt to the 308 and mine are sold with motor. Please help

You might struggle to fit any decent extractors in the engine bay with the steering box in there. A R&P conversion might make life easier.

I had a C110 with a P76 donk fitted, and it had some funky 3 piece header on the RH side to clear the steering box and extended sump (sump was heavily modded to clear the Xmember). It was a total pain to try and remove the exhaust. I started going down a twin turbo conversion for it, but sold the car before I actually did any fabrication.

That's cool - will be keen to see the finished product. I've seen other 240K's with v8's so obviously it's doable.

Thinking back it may have been the huge winged sump that made life difficult and not so much the steering box location.

  • 2 weeks later...
  • 2 weeks later...

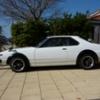
Had a trial fitment today, and all looks good. Extracyors will fit neatly but I will have to get a forward facing sump. I may take mine to work and get it sliced and turned around, nuless I can find a VK one on the cheappost-44326-1270453041_thumb.jpg

  • 2 weeks later...

Naaa not that lucky. The 308 mounts are going to be custom and the gearbox mounts also custom. Iv'e adapted my alternator, temp sender and oil pressure sender so i can use my original wiring. Block hugger exhausts fit nicely and over motor fitment is like a factory made as my mechanic put it.

Motor and box are now a fixed item. Tail shaft will be done next week along with clutch assembly. Getting there. Overall it was an excellent fit. No probs with extractors, the gear shifter is about 1 1/2'' more forward than what the L series was but I may bend the stick a wee bit. Sits nice and low and bulk wieght is towards the fire wall.post-44326-1272018913_thumb.jpg

How long till she's a goer mate? Nice work buddy.

I will say sorry for the lack of faith and pushing you for an rb conversion. After recent thought, i have faith. This will be a beast! Bring on the youtube vids :-)

what will the rest of the exhaust be?

Datsun gear sticks come in an array of shapes. When I went to Z shop last I saw some of the sticks were straight, and some had bends in them. I don't know which model has which shape though... Hope you find something that suits.

post-44326-1272108197_thumb.jpg this pic is with the motor and box in. The front hasn't dropped any lower than when the L6 and webers were in it. I wieghed the motor on way bridge, 190kg without flywheel, carb and extractors. I'm hoping to have it running in about 3-5 weeks. Depends on the engineering and pits test. Better be off now as I'm of to see the Hudugurus, oh yeah!

Things done: Motor and box in. Tail shaft ( shortened and balanced in), new rear shoes and a new handbrake cable in, new dizzy in, all exhaust done. What's left to do i hear you thinking, yeah not much.

Radiator support needs doin, accelerator cable, hook up the MSD 6AL, heater hoses,windscreen squirty bottle, fuel line. Put oil and plugs in, "" THEN LIGHT FIRE"" Of course there is still to big red tapes to cut through, being the engineering and the pits ( test station). But the end is nigh.

Create an account or sign in to comment

You need to be a member in order to leave a comment

Create an account

Sign up for a new account in our community. It's easy!

Register a new account

Sign in

Already have an account? Sign in here.

Sign In Now


  • Latest Posts

    • Did this end up working? Did you take some pictures?
    • And finally, the front lower mount. It was doubly weird. Firstly, the lower mount is held in with a bracket that has 3 bolts (it also acts as the steering lock stop), and then a nut on the shock lower mount itself. So, remove the 3x 14mm head bolts , then the 17mm nut that holds the shock in. From there, you can't actually remove the shock from the lower mount bolt (took me a while to work that out....) Sadly I don't have a pic of the other side, but the swaybar mounts to the same bolt that holds the shock in. You need to push that swaybar mount/bolt back so the shock can be pulled out past the lower control arm.  In this pic you can see the bolt partly pushed back, but it had to go further than that to release the shock. Once the shock is out, putting the new one in is "reverse of disassembly". Put the top of the shock through at least one hole and put a nut on loosely to hold it in place. Put the lower end in place and push the swaybar mount / shock bolt back in place, then loosely attach the other 2 top nuts. Bolt the bracket back in place with the 14mm head bolts and finally put the nut onto the lower bolt. Done....you have new suspension on your v37!
    • And now to the front.  No pics of the 3 nuts holding the front struts on, they are easy to spot. Undo 2 and leave the closest one on loosely. Underneath we have to deal with the wiring again, but this time its worse because the plug is behind the guard liner. You'll have to decide how much of the guard liner to remove, I undid the lower liner's top, inside and lower clips, but didn't pull it full off the guard. Same issue undoing the plug as at the rear, you need to firmly push the release clip from below while equally firmly gripping the plug body and pulling it out of  the socket. I used my fancy electrical disconnect pliers to get in there There is also one clip for the wiring, unlike at the rear I could not get behind it so just had to lever it up and out.....not in great condition to re-use in future.
    • Onto the rear lower shock mount. It's worth starting with a decent degrease to remove 10+ years of road grime, and perhaps also spray a penetrating oil on the shock lower nut. Don't forget to include the shock wiring and plug in the clean.... Deal with the wiring first; you need to release 2 clips where the wiring goes into the bracket (use long nose pliers behind the bracket to compress the clip so you can reuse it), and the rubber mount slides out, then release the plug.  I found it very hard to unplug, from underneath you can compress the tab with a screwdriver or similar, and gently but firmly pull the plug out of the socket (regular pliers may help but don't put too much pressure on the plastic. The lower mount is straightforward, 17mm nut and you can pull the shock out. As I wasn't putting a standard shock back in, I gave the car side wiring socket a generous gob of dialectric grease to keep crap out in the future. Putting the new shock in is straightforward, feed it into at least 1 of the bolt holes at the top and reach around to put a nut on it to hold it up. Then put on the other 2 top nuts loosely and put the shock onto the lower mounting bolt (you may need to lift the hub a little if the new shock is shorter). Tighten the lower nut and 3 upper nuts and you are done. In my case the BC Racing shocks came assembled for the fronts, but the rears needed to re-use the factory strut tops. For that you need spring compressors to take the pressure off the top nut (they are compressed enough when the spring can move between the top and bottom spring seats. Then a 17mm ring spanner to undo the nut while using an 8mm open spanner to stop the shaft turning (or, if you are really lucky you might get it off with a rattle gun).
    • You will now be able to lift the parcel shelf trim enough to get to the shock cover bolts; if you need to full remove the parcel shelf trim for some reason you also remove the escutcheons around the rear seat release and you will have to unplug the high stop light wiring from the boot. Next up is removal of the bracket; 6 nuts and a bolt Good news, you've finally got to the strut top! Remove the dust cover and the 3 shock mount nuts (perhaps leave 1 on lightly for now....) Same on the other side, but easier now you've done it all before
×
×
  • Create New...