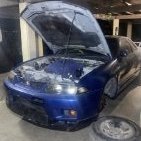
button290 Posted December 20, 2004 Share Posted December 20, 2004 for sale 93 gtr show condition. featuring in magazine very soon. 272kw at the wheels on 13psi Engine built by Gavin Wood in QLD who is one of Australia's best GTR Tuners. approx 3000Kms old never ran over 13psi. 68000km on clock. Custom cooler and intake piping by dysons rotary in QLD Fresh Paint work by DMD the Image in QLD. (includes engine bay) see pics at (http://www.platinumcarclub.com/html/chris_..._s_r32_gtr.html) (offers $30000 and above) email [email protected] or call 0403615225 :flamed: ENGINE MODS :flamed: Fresh engine with 3000km 96 GTR engine Power fc and hand controller JUN cams N1 pistons Genuine N1 oil pump Genuine N1 water pump Genuine N1 bearings NISMO Bearings NISMO 2 way LSD Hydraulic 4wd 96 GTR turbo’s New ported and machined head Machined valve guides Woodruff keys New crankshaft Full drag exhaust Fully Balanced Engine Valve guides Oil catch can Custom polished oversized cooler piping Custom intake pipes Larger airflow meters Re-plumed oil pipes Fuel pressure gauge Boost gauge Twin HKS air pods SARD BOV EXTERIOR MODS New custom purple paint Electronic 4wd torque controller Polished jimmy head wheels TEIN suspension coil overs Flared guards Oversized cross drilled front disks Carbon eyelids Aftermarket Head lights N1 Front bar Removed Rear wing INTERIOR MODS Carbon dial background White AXS WRX seat covers Pillar mounted Boost gauge Autotecnica gear knob Autotecnica steering wheel STEREO Sony mp3 player 6” splits Link to comment https://www.sau.com.au/forums/topic/59204-93-gtr/ Share on other sites More sharing options...
SkyGTRline Posted December 21, 2004 Share Posted December 21, 2004 Interested in trading????? R32 Gtst. Link to comment https://www.sau.com.au/forums/topic/59204-93-gtr/#findComment-1130943 Share on other sites More sharing options...
twoquik Posted December 21, 2004 Share Posted December 21, 2004 are you in brisbane or hobart, im sure i saw this car in auchenflower last sunday?would that have been the car. Link to comment https://www.sau.com.au/forums/topic/59204-93-gtr/#findComment-1130976 Share on other sites More sharing options...
SkyGTRline Posted December 21, 2004 Share Posted December 21, 2004 none.... Canberra.... Nah.. me car has been in the garage getting polished up for the last week... But if there is something overly special about that car you saw... maybe it was me Link to comment https://www.sau.com.au/forums/topic/59204-93-gtr/#findComment-1131130 Share on other sites More sharing options...
SkyGTRline Posted December 21, 2004 Share Posted December 21, 2004 oops..... Wrong post.. :S sorry Link to comment https://www.sau.com.au/forums/topic/59204-93-gtr/#findComment-1131131 Share on other sites More sharing options...
button290 Posted December 21, 2004 Author Share Posted December 21, 2004 in hobart, i would consider trading, depending on what the trade is etc. but would definately prefer cash upfront. Link to comment https://www.sau.com.au/forums/topic/59204-93-gtr/#findComment-1131135 Share on other sites More sharing options...
SkyGTRline Posted December 21, 2004 Share Posted December 21, 2004 http://www.carsales.com.au/pls/carsales/!c...rch_distance=25 Would you consider trading with this??? Cheers Link to comment https://www.sau.com.au/forums/topic/59204-93-gtr/#findComment-1131768 Share on other sites More sharing options...
button290 Posted December 21, 2004 Author Share Posted December 21, 2004 http://www.carsales.com.au/pls/carsales/!c...rch_distance=25Would you consider trading with this??? Cheers sorry mate that would be hard for me to sell down here. but let me knw if you get rid of it. thanks, chris :flamed: Link to comment https://www.sau.com.au/forums/topic/59204-93-gtr/#findComment-1131818 Share on other sites More sharing options...


Recommended Posts
Create an account or sign in to comment
You need to be a member in order to leave a comment
Create an account
Sign up for a new account in our community. It's easy!
Register a new accountSign in
Already have an account? Sign in here.
Sign In Now