

samos69
-
Posts
101 -
Joined
-
Last visited
-
Feedback
0%
Content Type
Profiles
Forums
Events
Gallery
Media Demo
Store
Everything posted by samos69
-

R32 Gts-T Track Build
samos69 replied to samos69's topic in Members Cars, Project Overhauls & Restorations
Ok some small progress. Finished cleaning up the cusco braces, I'm not going for show quality but I like having a good standard of finish on the car. Started labelling the loom and stripping the boot completely. Masking tape to label all wires so when I strip the loom back to the dash I know whats not needed. Another strange box behind the boot panel, I think this one is part of the fuel pump system but haven't had a good look at it yet. All done except the fuel pump cover, that'll come off last. Handily you can unplug most of the boot loom here, but there's a strange two core wire cable-tied to the loom which I'll need to strip back to find out what it does. I'm fairly certain it's a direct power feed I ran to give the fuel pump a true 14V instead of letting the ecu vary the voltage. -
R32 Gts-T Track Build
samos69 replied to samos69's topic in Members Cars, Project Overhauls & Restorations
Last thing for the evening, I have no need for my turbo timer anymore so I'll remove it ready for sale. It's a greddy with skyline specific loom for super easy installation (and removal!) It's mounted with some very sticky double sided tape to a bracket I made. To get to where it plugs into the loom I need to remove the lower part of the dash. 6 screws all can be seen in the next two photos, plus two 10mm screws holding the bonnet release on. Then just pull it towards you to release the clip near the vent and we can see my awesome cable tie job holding it all against the steering column. Once the ties are off you can see how easily this turbo timer plugs into the loom (can you feel the sales pitch ) Unplugged and just plug the ignition loom back together. Aside from unscrewing the earth wire that's all it takes to remove. Thats it for the evening, hopefully I'll get more time tomorrow. -
R32 Gts-T Track Build
samos69 replied to samos69's topic in Members Cars, Project Overhauls & Restorations
Not much to report today, I slept in and the weather is too nice to be in the garage! Here is under the rear windscreen trim, one little bit of surface rust. And here is the bit I am dreading stripping back... Having a look at yesterdays handiwork I realized I had put the calipers on the wrong sides :homer: Luckily it only took 10 minutes to pull them off and swap them over so the bleeder is on the top If you recall the strut brace I removed back on page 1, it had some oxidation on it and generally looked a bit tatty. The ends were off and being painted so I hit the alloy bar with some wet and dry. Working from 320 grit all the way up to 1000 grit (local Repco doesnt have anything higher so I'll have to go searching before I start painting stuff) Then hit it with Meguiars metal polish and reassemble. If you look really closely some of the oxidation lines are visible but it looks really good overall. This is now in the for sale section as I'll be using the Cusco ones I bought. I also spent about an hour practicing welding on some spare panels... was blowing quite a few holes so more practice needed before I go anywhere near the car! Also might ditch the flux core wire and rent a bottle of c02 from BOC as I'm getting heaps of spatter. Here's a bit of practice... crap I know! I've never used a MIG before and only stick welded once so hopefully I get better! That's it for the day, time for a few quiet beers - no big new years this year as the other half is still suffering from morning sickness. Happy new year all. -
R32 Gts-T Track Build
samos69 replied to samos69's topic in Members Cars, Project Overhauls & Restorations
Fitted finally: And lets see what these might look like A bit blingy for a race car but they are possibly made by work from my research and they weigh about 9kgs per rim so not overly heavy (not as light as buddyclub p1's either but beggars can't be choosers!). 17x8 front and 17x9 rear 35p offset. I may need to fit some spacers to get a bit more track but will wait and see once tyres are on and it's on the ground. Now onto the fronts! I got these in a box when I bought the car, and the condition of them put me off doing anything with them for ages. After a lot of stripping and scraping they ended up like this: I knew the seals would be shot so I ordered some in and followed this guide to fit them: http://www.240sxforu...rebuilding.html I also had a couple of pistons that couldn't be saved, someone had tried to get them out without a compressor obviously! So a few new pistons to the rescue, but not too many as they are $40 each! Trying to get the stuck old brake line out: And now they are taped up to get a bit paint tomorrow: -
R32 Gts-T Track Build
samos69 replied to samos69's topic in Members Cars, Project Overhauls & Restorations
Now onto the calipers, refitting the pads and shims is easy with these brakes it all slots in the top! Now once I'm done the brakes will be a massive improvement over what I had, and should be an upgrade over stock once the correct rotors and pads are fitted. The master cylinder stopper shown above will help to stop the firewall flexing when I stomp on the brakes which will mean a much better feeling on the pedal. I still need something else, like these Do-luck braided brakelines And fitted up: In reality that took ages, I bloody hate the fittings on the factory hardlines. Even with the correct tool they try to round off as soon as you look at them. After a dose of penetrating oil I ended up putting a small set of vicegrips on and whacking it with a mallet The correct tool: I should note that when refitting any bolts or nuts I put a small amount of copper grease on the threads as an anti-seize. Makes life much easier when you need to remove something next time and it makes assembly so much easier as well. Looks snazzy too -
R32 Gts-T Track Build
samos69 replied to samos69's topic in Members Cars, Project Overhauls & Restorations
Todays progress! I decided to do something different as I really hate rust and panel work. As I said earlier the donor was not an m-spec and the brakes were to put it lightly.... terrifying. The cheapest solution is to upgrade to some m-spec brakes, which I happen to have had sitting in a box for 5 years :dozey: Since the rear is in the air might as well start there. The calipers are in really good condition, I got these the week before I moved overseas as the price was right! A lick of paint is in order, might as well tart them up a bit. The red may not be to everyones taste but I like it. Now on to removing the old kit. A pair of bolts holds the caliper onto the hub, undo them and the caliper can be put aside. Then the disc just pulls off (make sure the handbrake isn't on!) Here's the old disc alongside my "new" disc. The discs were given to me and the pads came in the calipers, they are purely there for getting the car setup and rolling then a new set will be purchased! The problem here is the backing plate, it's too small... here's a chance to use my new air cutting wheel AAAnnndddd turns out my compressor isn't man enough to run the cutting tool for more than 15 seconds... bugger. Onto the grinder! The backing plate is attached at several spots around the hub carrier, I don't have any cold chisels so my trust wood punch will have to do. Basically you just locate the spots and use the punch to seperate the backing plate. It takes a while. All done! You can see I caught the handbrake shoe with the hammer a couple of times :dozey: The remnants: -
R32 Gts-T Track Build
samos69 replied to samos69's topic in Members Cars, Project Overhauls & Restorations
I still had a bit of time so I thought I'd work on another bolt-on upgrade. The R32's aren't the stiffest of chassis and I'm told they benefit greatly from a rear strut brace. I've always put front strut braces on my cars and they make a noticeable difference so seems logical. Here's the existing front brace, a few years ago I missed out on a matching rear one on Trademe and I haven't seen one since. No idea on the brand but it's built really well so doesnt seem like a cheap china job. I bought a rear cusco brace from a forum member and once night while browsing trademe I found a front one for a good price, turns out it wasn't labelled and the seller thought it was a no namer! I had also picked up a Cusco master cylinder stopper second hand So I thought I might as well give everything a lick of paint to tidy it all up. Scuffed it with some 180 grit wet and dry and gave it a coat of metal primer (no where to hang it at the moment so on the ground it is) And that was about the time I decided it was beer o'clock! -
R32 Gts-T Track Build
samos69 replied to samos69's topic in Members Cars, Project Overhauls & Restorations
One of my biggest dislikes of the car was the handling, it would step out and slide fairly easily but it was a *** to control and was impossible to transition between corners at any decent speed. No doubt my lack of skill was also a large contributing factor but I'll stick with blaming the car Of course the cut springs and decades old shocks are probably the main culprit but I have replacements for them to be fitted a bit closer to track time. Here's some subframe locking collars I had lying around, lucky eh. These are really easy to fit, first place a jack and block of wood under one side of the subframe like so Mmm surface rust! I'm going to refurb a second subframe with adjustable arms at a later date so I'm turning a blind eye to the condition of this one Loosen the 17mm nuts at the back and front of the subframe and lower the jack until you can slide in the C locking collar on top of the subframe On the front you need to undo these two 14mm bolts completely and remove the bracket to get the lower collar on. Put the lower collar on Bolt it all up tight then do the other side. Done! -
R32 Gts-T Track Build
samos69 replied to samos69's topic in Members Cars, Project Overhauls & Restorations
So today I opened the bonnet and saw what 4 years of sitting in a disused cow shed in Taranaki does to a car.... damn salt spray The plan is work from the back forward, I'll give it a good going over to ensure any surface rust is put to bed before it becomes major and then probably pull the motor as I'm teaching myself to weld and I want to stitch weld the engine bay so it's as good an excuse as any (plus I have the required tools so it's not too hard as long as it's not raining!) Bumper off: I spy rust! Nothing a flap disc and some rust dissolver can't care of! Also should give the arches a tickle up while I'm here, the R32s are prone to rusting there and my previous attempts at lipping the guards left a bit of exposed metal no doubt. Looks bad but it's actually minor, here's partway through stripping And that's about it for now. I've got until the 5th before I go back to work so there should be some good progress. I'll also get a few pics together of the goodies I've assembled -
R32 Gts-T Track Build
samos69 replied to samos69's topic in Members Cars, Project Overhauls & Restorations
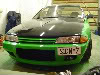
Woo, approval Next up I decided white was too bland for a drift car so it rolled into a mates garage and over the course of a weekend it came out looking like this: So I did some of this: (yes I heading off the track, no I didnt save it) Which promptly fried the clutch, so I got this: Basic final spec on the car was the following: 3.25 inch tanabe exhaust (stock dump, front and 2.5 inch decat) Greddy Profec 2 Apexi Pod R32 GTR Intercooler Bride Fixed back drivers sear GTR rear swaybar Cut springs and million mile shocks Locked diff Z32 TT fuel pump 22 R32 and R33 turbo rims RB25 Turbo This all made 154rwkw at Speedtech on 13psi which I was quite disappointed about! It also handled like a bag of crap and couldnt stop to save itself (or me!). But it was all built on a budget, from start to finish including purchase of the shell, paint, etc, it owed me about $5k. The other half was making noises about doing the big OE so I had been putting money towards that and when we decided to go to the Uk for a year it made sense to put the car in storage with my parents and rebuild it bigger and better when we come back. Fast forward and 4 years later we land back in Wellington and after what seems like an age we find a house we like, but apparently I have to make some concessions on the garage I had been dreaming of.... "ah well if it keeps you happy I guess so" I have been regretting that particular concession as it's taken over 6 months to stop the water flooding through the garage every time it rains, do some small excavation to gain space for a work bench, run power everywhere, install lighting and build enough storage to make it usable! Plus the roof is about 6 foot 1 so it feels a touch cramped! -
Not me, but when I removed my balljoints / HICAS I did a bit of searching and came across this setup:
-
Rear Toe Arm Bushings
samos69 replied to zoomzoom's topic in Suspension, braking, tyres and drivetrain
Not sure if this will help - driftworks sell only 2 sizes of bushing for the rear, this pic shows which ones are all the same (orange dots) but they don't show the inner toe arm as they are picturing it with aftermarket toe arms -
Hi All, I'm currently in the process of building my R32 GTS-T coupe up as a track car. I've owned the car for about 9 years though its been in storage for 5 of those while I was overseas. Previously it was used as a very cheap drift hack but now I'm trying to have a more serious go at it. It's being done on a smallish budget so plenty of DIY but hopefully with money spent in the right places. I had started this build thread on another forum but there is a much stronger motorsport focus on here and after spending hours days reading all the great track car build threads getting inspiration I thought I'd put mine up here to get some advice and criticism Once (if) approved I'll put up the last year and a bit's progress since the car was pulled from storage on my parents farm and I embarked on an ambitious rebuild.. Here's a few pics of the car when I bought it as a rolling shell, unfortunately a hard drive crash and poor backup discipline means photos from this time are rare.. I soon found a suitable donor car in Blenheim where the owner had decided he hated power poles and attempted to destroy one by means of wrapping his car around it! So at about 6.30am some very helpful fellows at the ferry terminal used a forklift and dumped this on my trailer: GTS-T - not an m-spec though it had m-spec wheels (3 of which were usable!) Progress from here was quick, motor in and source a few panels suddenly it's on the road with a WOF few upgrades so it would skid better: Locked Diff - turns out it was an open diff in a lsd diff casing GTR Swaybar Shielded K&N Pod + Cold Air Feed That's the first post plenty more to come, currently the car is in getting its cage fitted. Hopefully I have it back in a week or two then on the track in September / October. Cheers Sam
-
4 Door Fever ~ Rb26 R32
samos69 replied to NZDRIFTER's topic in Members Cars, Project Overhauls & Restorations
Interesting, what turbo is that? I have one of those wastegate spacers sitting on the shelf - does it clear the strut tower with the turbo on? -
4 Door Fever ~ Rb26 R32
samos69 replied to NZDRIFTER's topic in Members Cars, Project Overhauls & Restorations
Nice build mate, had to laugh seeing your "un-compliable" GTR rocking some plates. Quick spin down the road was it -
The dropping relay is a silver box in the boot hidden in the rear guard behind the filler cap. The fuel pump relay is green and located on the back of the boot in between the boot latch and the drivers side tail light. If you do a search there is a tutorial on earthing the pump to run 14.4v all the time, takes all of 5 minutes to do.
-
Rust Inside Diff - Advice Needed!
samos69 replied to samos69's topic in Suspension, braking, tyres and drivetrain
After a scuff up there didn't seem to be any debris that could come loose so I just went ahead and sealed it up. The backing plate has a metal gasket on it which I've never seen before... just put some high temp RTV over it and torqued it up. Will fill it with oil in the morning and see if it leaks! -
Rust Inside Diff - Advice Needed!
samos69 replied to samos69's topic in Suspension, braking, tyres and drivetrain
Thanks for the replies, good to know it's not too bad. I'll have a crack at it today... -
Hi All, A while back I bought a 2 way nismo LSD for my R32. It's sat in my garage with the backing plate on and wrapped in shipping plastic on a pallet. Unfortunately my garage is very damp and any bare metal does rust rather quickly. I finally got around to pulling the backing plate and found there is some rust on the diff As far as I can tell it's only on a couple of bolts on the crownwheel (?) and the two caps that hold the diff in the housing, all the important bits had a coating of oil and seem fine. My question is do I pull these parts out and give them a wirebrush then reinstall? Or do I need to pull apart an old open diff I have that is full of oil and will have no-rusted parts (are the caps interchangable?) Do I ignore it and just fill it up with oil then go racing? Here's a pic, the rust is very crumbly and would come off easily. Also, how clean do I need to get the backing plate of old gasket goo? Completely clean, or just all major lumps taken off? And how much do I use to seal it? Any advice is much appreciated, I'm no expert on these matters! Cheers Sam
-
R32 Gts4 - Restoration/rebuild
samos69 replied to Chris Rogers's topic in Members Cars, Project Overhauls & Restorations
Awesome work, it's gonna be mint when you're done! Can you shed some light on how you removed the rear screen - I'm going to have to do mine in the near future and I really don't want to shatter it! -
I went late last year with some mates and hired a suzuki swift from rent-racecar.de. The car was amazingly fun to drive and handled everything we threw at it (upto 200kmph on the straights and was able to hound a wrx and focus rs through the corners though the'd get a lead on the straights). I think it worked out about $600 eur for my 8 laps incl fuel. The thing to watch is insurance - your excess on the car is $5000, and you're not covered for track damage or track closure which is charged by the minute I think. A good stack can set you back thousands, and there were plenty of crashes (and one death from a motorcyclist) on the day. Seriously amazing track to drive, I'd do it again for twice the price....
-
I'd be keen to see this, especially the Extreme version as I am not looking forward to wiring it in - you may have just saved me a heap of time. Legend!
-
S14 Brakes For An R32
samos69 replied to Sonny Jim's topic in Suspension, braking, tyres and drivetrain
It's a non-mspec GTS-T, I've got one too, 5 stud with the puny gts brakes... how are you connecting the calipers (hard-lines, flexis, etc?) as I'm doing the same upgrade in a while and it's always good to hear from someone who's done it already.. Sam -
RB20 RB25 RB25 box is much bigger.. Sam
-
Hicas Removal Question About P/s Pump
samos69 replied to luker's topic in Suspension, braking, tyres and drivetrain
The block is a clutch damper, it's rubbish and can be binned. I just connected a flexi from the hardline directly to the clutch slave. Sam