Jump to content
SAU Community

Recommended Posts

Silverwater Automotive will be tuning the car. I was sold on the Autronic SM4 when i saw my friends 1100Kw twin turbo V8 idle and drive like a road car.

The head has just been reconditioned without any porting etc. I figured that the tyres will fry without head work anyway! Ill see what the result is with standard cams and adjustable cam gears for the moment. Things will change in the future i suppose; such is the nature of the beast.

Shaun.

Thanks for the pics Shaun...i now have a new desktop background

Hey Shaun, nice work, i was always curious what you were doing when i bought those injectors off you... ps had them cleaned and flowed and they were spot on.

Can you tell me where you got that Orange heat wrap stuff from? i need a few metres of it

Silverwater Automotive will be tuning the car. I was sold on the Autronic SM4 when i saw my friends 1100Kw twin turbo V8 idle and drive like a road car.

The head has just been reconditioned without any porting etc. I figured that the tyres will fry without head work anyway! Ill see what the result is with standard cams and adjustable cam gears for the moment. Things will change in the future i suppose; such is the nature of the beast.

Shaun.

i think you'll find reasonable success with std cams but looking at the turbo size and ecu i think you won't be happy with the results until you fit some cams as normally i haven't seen much over mid to low 400's rwhp with std cams and i would have thought you would be aiming a bit higher than that? But ha best of luck and keep us all informed as it great to people trying different style combos.

pete

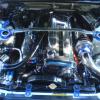
Id just like to comment on your sheilding that you have over the PS pump and over the manifold... I think it looks tops! I also think the cover over the manifold will do a shitload for keeping engine bay temps down. Looks the goods man... very nicely done!

JK

Hey Shaun, nice work, i was always curious what you were doing when i bought those injectors off you... ps had them cleaned and flowed and they were spot on.

Can you tell me where you got that Orange heat wrap stuff from? i need a few metres of it

You can get the orange 'Flame Guard' from Earls in Silverwater. When you see it, its obviously a sh1t load better than other stuff around; but for $50/m it would want to be!

Im not too worried about the cams at the moment. Theyre an easy fix later on, but yeah, im aiming for about 330ishrwkw. To be honest, i really dont care as the tyres will spin anyway. I just hope its nice to drive.

Paul, ive decided to take your advice and use teflon lined braided hose from the surge tank in the boot. I really dont want that fuel smell, and it'll only cost $100 more. Earls must love me at the moment!

I made all the heat shielding out of stainless. I spend alot of time on the shield above the exhaust manifold because i really want the package to be thermally efficient; hence all the ceramic coating and exhaust wrap. There's alot of surface area to radiate heat there! I sandwiched some woven heat guard in between the double layer manifold heat shield too; its really intricate and took for ever. Luckily ive got access to some benders etc at my dads high school!

Ill keep you guys posted and put up some more detailed pics when im done in a few months. Im stoked to see some interest about my car!

WOW, holy chrome-age batman! I needed my sun glasses. B)

;)

Only kidding man, I think it looks fuzin sweet. You did a hell of a lot of work there and I'm sure the end result will surpass even what you've thought up till this point. The work is so professional and done properly. I really can't say enough, honestly.

Now as for your turbo being close to the shock tower, there's 2 options.

1. Bang in the tower for more clearence. - I'm pretty sure based on the work to the engine bay, paint and what not that your not gona do this. :P :lol:

2. Either buy or fabricate your own engine dampner. - Believe it or not I used a trunk shock from a wrecked 240 hatch and it worked PERFECTLY. The motor only moved a couple of millimeter's and that was while using stock OE engine mounts. Solid bars do work but it puts a lot more stress on the mounts and does'nt really allow ANY movement which is'nt always good. When there's absolutely no give, thats usually when things break. Sometimes stiffer is'nt always better and I think it applys in your case. You did so much nice work that I'd hate to see you have any problems.

Anyway just a thought for ya and for sure keep those pic's coming. I will eventually do a 26 in to my R32 GTS once I've finished having fun with the 20.

(DAM YOU, YOU BEAT ME TO IT!!!!!! :) ) :)

Hey man, thanks for the tips. I think ill definately get an engine damper before i start leaning on it.

There's no chrome in those pics! Its all polished! There's about 200 hours of polishing on an 8 inch super cheap bench polisher. I bought the engine with terrible white powder coat on the cam covers, so i had to get it off!

Shaun.

I made the mistake of getting some paint stripping place to get the powder coat off because the alloy surface ended up really rough. But i just used a medium 3M sanding wheel (actually, i went thru about 10) on my power drill to get rid of the rough stuff. Then i used a fine wheel, then i hit it with cutting compound on a stitched buffing wheel on an 8 inch bench polisher, then i used finer compound on a loose leaf buffing wheel. Finally, i protect the surface with some autosol super duper fine sh1t thats gotta be ordered from Germany. I get in the cracks by hand or with a dremel. Thats the cast alloy cam covers etc; the stainless is another story! That stuff is really difficult because it work hardens if you heat it up too much and it becomes really difficult to polish.

Polishing is addictive! Once you polish one thing, youve gotta polish the next because it sticks out like dogs nuts! I even replaced nuts, bolts and washers with stainless items that i polished. Its stupid.

Edited by Shaun

polishing is fun, and like u said its addictive haha, makes everything not polished look dull in comparision :angry:

i did my old vl engine bay and every single nut and bolt also, but god damn is was worth it in the end, 99% of engine bays i see with big dollar engines look like poxy dirty shittas and i cant stand dirty engine bays.

vl26baypic.jpg

looks better than my stagea bay, but the stagea bay will be better one day :(

Edited by CruiseLiner
Quick question, where did you get that engine decal on the spark plug cover from?, Engine looks good, nice work.

I got the decal with the engine. Ive seen them on Nengan or Greenline for $120 + postage! I'd actually rather the standard one (off an R34 preferably), as i dont have any HKS gear at all. Anyone wanna swap theirs?

Cruiseliner, your VL engine bay looks great. Only people who polish realise how much time and effort it takes. How hard is it polishing stainless steel washers!!

Shaun.

Hey Shaun I just have a couple of questions for ya that's actually regarding the swap and not your swell polishing job :lol:

1. Outside of needing the motor, tranny (or RB25 tranny), drive shaft, ecu and wire harness was there anything else required to make it fit or was it a direct drop in?

I'm asking b/c as I stated before I am really considering doing this swap in the near future.

Thanks a lot and again, VERY SWEET SWAP! :P

Cheers B)

Create an account or sign in to comment

You need to be a member in order to leave a comment

Create an account

Sign up for a new account in our community. It's easy!

Register a new account

Sign in

Already have an account? Sign in here.

Sign In Now


  • Similar Content

  • Latest Posts

    • Even more fun, leave all the ADAS stuff plugged in, but in different locations, hopefully avoid any codes!   And honestly, all these new cars with their weird electronics. Pull all the electronics out Duncan, and just shove an aftermarket ECU and if needed a trans controller in, along with a PDM. Make it run basic but race car styled!
    • To follow up a question from earlier too since I had the front bar off again (fking!) This is what is between the bumper and the drivers side wheel And this is the navigator side, only one thing but its a biggy! So basically....no putting coolers in the wheel arches without a lot of moving other stuff. Assuming I move to properly race prepping this car I'll take that job on and see how the computers respond to removing a whole bunch of ADAS modules
    • So I prepped the car for another track day on Wednesday (will be interesting to see coolant temps post flushing out and the larger reservoir, with a forecast of 3-14 being 20o cooler than last time I took it out). Couple of things to mention; since I am just driving the car and not taking a support vehicle, I took the rear seats out and just loaded the back up Team Trackday style. Look at all that space! To cover off removing the rear seat....it is weird (note the hybrid is probably different because it wouldn't have folding rear seats) Basically, you remove the lower seat base, very similar to a r series but it is a clip that pulls forward to release the base rather than it being bolted down. Easy Then, you need to remove the side section of the rear seat on each side. There is a 14mm head nut at the bottom of the side piece, the it slides upwards off a hook at the top to release; you also need to unhook the seatbelt from the loop at the top. Then the centre piece is weird. You need to release/fold the seats forward with the tab in the boot on each side From there, there are 2,x12mm headed bolts holding the rear of each seat to the folding bracket, under the trim between the rear seat and the boot (4x christmas tree clips there, they suck). The seat is out but you can see where the bolts attach to the bracket
    • As discussed in the previous post, the bushes in the 110 needed replacing. I took this opportunity to replace the castor bushes, the front lower control arm, lower the car and get the alignment dialled in with new tyres. I took it down to Alignment Motorsports on the GC to get this work done and also get more out of the Shockworks as I felt like I wasn't getting the full use out of them.  To cut a very long story short, it ended up being the case the passenger side castor arm wouldn't accept the brand new bush as the sleeve had worn badly enough to the point you could push the new bush in by hand and completely through. Trying a pair of TRD bushes didn't fix the issue either (I had originally gone with Hardrace bushes). We needed to urgently source another castor arm, and thankfully this was sourced and the guys at the shop worked on my car until 7pm on a Saturday to get everything done. The car rides a lot nicer now with the suspension dialled in properly. Lowered the car a little as well to suit the lower profile front tyres, and just bring the car down generally. Eternally thankful for the guys down at the shop to get the car sorted, we both pulled big favours from our contacts to get it done on the Saturday.  Also plugged in the new Stedi foglights into the S15, and even from a quick test in the garage I'm keen to see how they look out on the road. I had some concerns about the length of the LED body and whether it'd fit in the foglight housing but it's fine.  I've got a small window coming up next month where I'll likely get a little paint work done on the 110 to remove the rear wing, add a boot wing and roof wing, get the side skirt fixed up and colour match the little panel on the tail lights so that I can install some badges that I've kept in storage. I'm also tempted to put in a new pair of headlights on the 110.  Until then, here's some more pictures from Easter this year. 
    • I would put a fuel pressure gauge between the filter and the fuel rail, see if it's maintaining good fuel pressure at idle going up to the point when it stalls. Do you see any strange behavior in commanded fuel leading up to the point when it stalls? You might have to start going through the service manual and doing a long list of sensor tests if it's not the fuel system for whatever reason.
×
×
  • Create New...