Jump to content
SAU Community

Recommended Posts

With exhaust manifolds the studs don't like the heat - whenever I work on diesels etc they aren't the best - getting heated and cooled to 500+ degrees 1000's of times takes it's toll I spose.

Yeah goto nissan or holden - vl commo studs are the same too.

Yeah will do tomoz. Fark all was open today, pain in the arse. Will start taking progress pics as of tomorrow. All my lines are on bar the oil drain coz i can't cut it to size till my turbs is on. Still haven't cut the other ones to size but got the hard ends on lol so all happening. This stud shit just farked things up though.

Just a quick question. Been searching around and found some pics of peoples water line set ups. Now i thought the line coming from back of head went into block side of turbo and the other line from side of motor went to strut side as per factory (i think? lol). Does it matter which water line goes where on the turbo? Was gonna run from back of head up to block side of the garrett but others pics show different i think

get new studs!! they cost roughtly $2 each at nissan! or get the stud guy to replace them.. i bought all new studs, yolks, washers and nuts when i did mine... surprisingly the washers were the most expensive :S... id also do the half moon cam cover gaskets and the rocker cover gaskets while there out. and also the little things that the screws that hold the rocker covers on.. the new ones are like 70 or so mm high.. mine were like 20 haha.. (squashed).. just spend the money and do it right.

Just a quick question. Been searching around and found some pics of peoples water line set ups. Now i thought the line coming from back of head went into block side of turbo and the other line from side of motor went to strut side as per factory (i think? lol). Does it matter which water line goes where on the turbo? Was gonna run from back of head up to block side of the garrett but others pics show different i think

Yes it does - make sure the water feed and return and oil feed and return go where they are designed to go. If you get stuck I can have a look at my HKS2835 - it should be similar or the same.

Cheers

Yeah will be going down to Nissan today to pick up all my stuff. Spewin theres no thread guy round here or even anywhere near. Blokes coming from Birrong.

About the lines, yeah i got the oil done thats the easy part. Just the water lines i'm wondering about, yeah could you have a look and tell me which one goes where? Wouldn't it be the same as a stock turbo ie line closest to block goes to back of the head? Thats how i was gonna put it back together. Thanks anyways guys :(

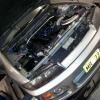
Hmm will be goin to nissan very shortly to get my stuff. Spent 10mins on the phone with this prick in service/parts who wouldn't give me prices coz i wouldn't give him my VIN!!! I was like, man i'm telling you what i want why do you need my vin, he said because there's heaps of different cars!? What a f**k wit, can't wait till i get down there. Heres some teaser photos anyways :D

post-28625-1203908353_thumb.jpg

And heres over 5g in stuff (inc my dogs fat arse lol)

post-28625-1203908433_thumb.jpg

Weeeeell i got all my stuff from Nissan today. $225 later!! $29 for studs, $33 for nuts, $34 for the washers and i bought two large yokes to replace the two that came out, they were around $2 each. Plus $112 for the gasket. At least it'll have all fresh stuff in there now :)

Edited by MR 33

Ok been searching everywhere to no avail. I'm half way through installing my gt30r and just had my snapped manifold studs removed and replaced etc. Now, i've pulled the four studs out that joins turbo to manifold to replace with the longer ones supplied by GCG. Now what is the preferred method of screwing these four studs in? I tried the usual doublenut method but all that done was strip the shit out of the studs as the nuts are a K-Lock design. Wish i new this before i started. Now i have to get 4 new studs. So yeah, how do i screw these bastards in without damaging them?? Do i need one of them stud socket thingoes or is there another way? One little problem after another, was told manifold would need machining by thread removal bloke then went to get it done and was told it doesn't! Threw another week on my install. Bloody doing my head in with all this. Thanks guys.

Weeell Brett (GCG) fixed my manifold studs for me. Now i have an even more frustrating problem. I cannot get the manifold back onto the head. I've tried for two days now and it will not go back on. I drilled the centre four holes out a bit but didn't really help much. Any reason as to why it won't go back on now? Someone wanna come round and work their magic? lol thanks guys

Yeah that was the only thing i could think of but how could that happen? I seem to be having trouble with the first stud at the top, that was snapped since i bought the car so i'm guessing all the other manifold holes have 'warped' over time except that one? Might go dig the hammer out. Really frustrating trying to get the bastard back on when i only just took it off! Thanks mate

Hrm ok got the hammer out and smacked the studs round a bit to no avail. This manifold is NOT going on. What a head ache. Any suggestions peoples? I need heeeelp, my gt30r is just staring at me begging to be boosted :/

Woo hoo, thanks to all the help from SAU :(

Manifold problem turned out to be the first stud, smashed the sh|t out of it with the hammer and eventually worked the manifold on. Then it sat there till i got off my arse and borrowed a torque wrench lol. Today i cracked at it and to my surpise had it actually running. Had some issues with air pockets and what not, sorted that out and took it for a lap round the block. Coming straight out of the turbo, sounded farken crazy. Boosted up to .45 bar, seemed nice. Running rich as all fark though. Get dump pipe made up this weekend hopefully then clutch in, then off to tuners where i'll install my injectors and z32 in his car park then roll er up on the dyno. Ooh yeah, can't wait. Will chuck some pics up soon. :)

Edited by MR 33

Yeah bit of stuff around but has to be done. Yes pfc.

Bled the coolant properly today and took it for another lap. Squeezed about 5psi into it and it dropped a cylinder (or maybe 2) for like 2 mins then kicked back in. Thinking i fouled a plug/s due to having no O2 sensor and stuff. Didn't think they could 'unfoul' though lol. Hopefully all tuned by next week possibly. Should be all ready for when i get my licence back :blink:

Create an account or sign in to comment

You need to be a member in order to leave a comment

Create an account

Sign up for a new account in our community. It's easy!

Register a new account

Sign in

Already have an account? Sign in here.

Sign In Now


  • Similar Content

  • Latest Posts

    • Hi, is the HKS  Tower Bar still available ? negotiable ? 馃
    • From there, it is really just test and assemble. Plug the adapter cables from the unit into the back of the screen, then the other side to the car harness. Don't forget all the other plugs too! Run the cables behind the unit and screw it back into place (4 screws) and you should now have 3 cables to run from the top screen to the android unit. I ran them along the DS of the other AV units in the gap between their backets and the console, and used some corrugated tubing on the sharp edges of the bracket so the wires were safe. Plug the centre console and lower screen in temporarily and turn the car to ACC, the AV should fire up as normal. Hold the back button for 3 sec and Android should appear on the top screen. You need to set the input to Aux for audio (more on that later). I put the unit under the AC duct in the centre console, with the wifi antenna on top of the AC duct near the shifter, the bluetooth antenna on the AC duct under the centre console The GPS unit on top of the DS to AC duct; they all seem to work OK there are are out of the way. Neat cable routing is a pain. For the drive recorder I mounted it near the rear view mirror and run the cable in the headlining, across the a pillar and then down the inside of the a pillar seal to the DS lower dash. From there it goes across and to one USB input for the unit. The second USB input is attached to the ECUtec OBD dongle and the 3rd goes to the USB bulkhead connected I added in the centre console. This is how the centre console looks "tidied" up Note I didn't install the provided speaker, didn't use the 2.5mm IPod in line or the piggyback loom for the Ipod or change any DIP switches; they seem to only be required if you need to use the Ipod input rather than the AUX input. That's it, install done, I'll follow up with a separate post on how the unit works, but in summary it retains all factory functions and inputs (so I still use my phone to the car for calls), reverse still works like factory etc.
    • Place the new daughterboard in the case and mount it using the 3 small black rivets provided, and reconnect the 3 factory ribbon cables to the new board Then, use the 3 piggyback cables from the daughterboard into the factory board on top (there are stand offs in the case to keep them apart. and remember to reconnect the antenna and rear cover fan wires. 1 screw to hold the motherboard in place. Before closing the case, make a hole in the sticker covering a hole in the case and run the cable for the android unit into the plug there. The video forgot this step, so did I, so will you probably. Then redo the 4 screws on back, 2 each top and bottom, 3 each side and put the 2 brackets back on.....all ready to go and not that tricky really.      
    • Onto the android unit. You need to remove the top screen because there is a daughterboard to put inside the case. Each side vent pops out from clips; start at the bottom and carefully remove upwards (use a trim remover tool to avoid breaking anything). Then the lower screen and controls come out, 4 screws, a couple of clips (including 3 flimsy ones at the top) and 3 plugs on the rear. Then the upper screen, 4 screws and a bunch of plugs and she is out. From there, remove the mounting brackets (2 screws each), 4 screws on the rear, 2 screws top and bottom and 3 screws holding in the small plates on each side. When you remove the back cover (tight fit), watch out for the power cable for the fan, I removed it so I could put the back aside. The mainboard is held in by 1 screw in the middle, 1 aerial at the top and 3 ribbon cables. If you've ever done any laptop stuff the ribbon cables are OK to work with, just pop up the retainer and they slide out. If you are not familiar just grab a 12 year old from an iphone factory, they will know how it works The case should now look like this:
    • Switching the console was tricky. First there were 6 screws to remove, and also the little adapter loom and its screws had to come out. Also don't forget to remove the 2 screws holding the central locking receiver. Then there are 4 clips on either side....these were very tight in this case and needed careful persuading with a long flat screw driver....some force required but not enough to break them...this was probably the fiddliest part of the whole job. In my case I needed both the wiring loom and the central locking receiver module to swap across to the new one. That was it for the console, so "assembly is the reverse of disassembly"
  • Create New...