
Inner West Crew Whoretown (toowong/st Lucia/kenmore/indooroopilly And Sometimes Sunnybank?)

By
funkymonkey,
in Queensland
Announcements
-
Latest Posts
-
By MissMintyR33 · Posted
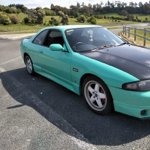
Hopefully this video loads, this was a month ago, it isn't as bad now (with the back fire) it's more of a hesitation at certain RPMs Snapchat-1404613580.mp4 -
By MissMintyR33 · Posted
I had splitfires before the rebuild, however I was looking at an issue spark related and put another lot in (savage performance) but it ended up being my piggy back ecu + the coil module, so I still have the splitfires laying around -
 Gap your plugs down to 0.8mm What coil packs are in it? I assume they weren't replaced when the engine was rebuilt.
 -
By MissMintyR33 · Posted
1.1 Denso Iridium It's random really, I can go to a high rpm okay one time and then it'll lag/hesitate .. it's hard to explain what it does. It's not a backfire, I think I'm gonna have to try and video it when I fix my steering issue. sometimes it'll do it taking off from lights at a lower RPM -
By MissMintyR33 · Posted
It's a direct aftermarket from NSW, my factory Nissan one shit the bed. Are aftermarket no good for them? Was splitfires removed to see if they were causing a seperate issue and had some savage performance from NZ ones I put in
-

Recommended Posts
Create an account or sign in to comment
You need to be a member in order to leave a comment
Create an account
Sign up for a new account in our community. It's easy!
Register a new accountSign in
Already have an account? Sign in here.
Sign In Now