
Announcements
-
Similar Content
-
-
Latest Posts
-
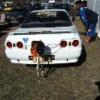
 Thanks @jtha7 I will have a look around tomorrow but it is a prick of a spot. These are some photos i tried taking
 -
 I take it that the knock retard is from bearings tapping a little tune? Thicker oil is a fragile bandaid. You need a much bigger oil cooler and probably the bigger pump being discussed.
 -
 Hi @Chupapy i had several leaks from coolant pipes being corroded, i also had one leak on back of the head onto transmission. For me that leak was from the turbo water line. Follow the line to the back of the head The hose and metal pipe had perished these are the best pics I took of it at the time
 -
Hey mate, do you have any photos of your coolant leak? Im having this issue on mine leaking at the transmission housing
-
Hey all, Have found a leak coming under the transmission housing. Can see coolant leak from around the firewall but cant see exactly where its coming from. Has anyone had this happen? Car is a r33 gtr.
-


Recommended Posts