Jump to content
SAU Community

Recommended Posts

  • Replies 98
  • Created
  • Last Reply

Top Posters In This Topic

Wasn't the bumper itself, it was the black under guard thingy that was making a horrible noise along Wanneroo rd... I fear I've left great chunks of plastic along the road just past Marangaroo drv... :w00t:

Mum told me about that, thats real bush mechanics spec there :w00t:

I know... My old man would be chuffed with my effort...

Go on fibrevision, match THAT using only twine, electrical tape and a pair of scissors! :rofl:

Lol. Yeh, i was thinking about the splash guard 2day, how it mite drop down. Sorry, I completely over looked it today! As long as you can drive it, and you'll be the laughing stock at the mechanics now.

Mum told me all about your visit, including running out of petrol... :w00t:

Hey all, Andrew got Yellowed on the Anti-Lag cruise last Friday night, and had til today to get rid of it. Last night He (Fei-Sti Rex), Mark (Marko_R34GTT) and yours truly (NA_Goodness) had to do some work to get it ready for the pits today, which he thankfully past, and the yellow is no more!!

In the 5 hours we were on my front verge, we managed to change his brake pads (the indicators had been grinding for 2 months before we realised what the noise was), swapped Mark's and Andrew's front bars, removed the side skirts, and changed his park lights (blew about 3 of them as well :ermm: )

Anyhoo, I'm just throughing some pics up for your entertainment. It isnt the best garage (on the side of the road in the pitch black ;)) but his car wouldnt go into my garage cos the front bar scrapes... Wonder why we're removing it? :P And it doesnt usually take me 5 hours to do brakes, but with no light, shit tools, no hoist, and two guys who keep distracting me... It took a while.

Enjoy!

The route of all evil:

gallery_43966_2333_7597.jpg

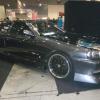
The beast (minus front bar :no:) - note the crappy R33 rimz

gallery_43966_2333_13601.jpg

Taking the bar off - Dori Dori spec :P

gallery_43966_2333_4640.jpg

No bar

gallery_43966_2333_11115.jpg

Again, no bar

gallery_43966_2333_28748.jpg

Stripped :D

gallery_43966_2333_9617.jpg

Slight surgery to the bar...

The plate has been moved to the front bar now... Held on with wool :D Not my idea...

gallery_43966_2333_7390.jpg

Close up on repairs

gallery_43966_2333_17969.jpg

Gaffa tape isnt dodgy...

gallery_43966_2333_6333.jpg

Donor recipient

gallery_43966_2333_10335.jpg

"New" stock bar:

gallery_43966_2333_24363.jpg

Finished product:

gallery_43966_2333_36263.jpg

And we had just put the wheel on, tightened it up, removed the jack, stood back to admire a job well done with the brakes, and...

gallery_43966_2333_15840.jpg

Yes, we forgot to take the light out :P

Mark... I'm blaming you for that one!! Still looks cool...

The boyz... Mark is the wog, Andrew is the asian guy

gallery_43966_2333_30406.jpg

Muscle man...

gallery_43966_2333_31317.jpg

Yes, he was posing :P

And thats about it for now. Andrew and I put his new Enkei rims on tonight and the side skirts are back on, the front bar is going back on tomorrow, and the car is ready to be defected again!!

I'll post up some more photos of that tomorrow, I need my sleep now

oh my god i look hideous in that photo...

for those that have met me, please vouch that i don't look that bad... i wasn't in a good mood so trying to be happy was hard okay!

yeah, new rims are a bit too big for my liking now...

thanks Rhys and Mark and all you other guys out there for the support!

couldn't do it without you guys, hope you enjoy the photos, i think there are some more with my new rims etc. post them up Rhys

cheers,

Andrew :P

oh my god i look hideous in that photo...

for those that have met me, please vouch that i don't look that bad... i wasn't in a good mood so trying to be happy was hard okay!

hahahah don't u always look like that? hahaha

j/ks man j/ks

doens't look too bad on marcos car hey

dammit forgot u didn't have intercooler

i got stock series 2 front bar in bayside blue tho hahaha

white on blue hell yeah!

nice work guys sorry couodln't come by to help out hey

lol sorry steven...

okay everyone, i think steven is inviting us all to his house for next backyard job...

and ALL OF SAUWA IS INVITED!!! :ermm:

don't worry dude, you can come for the drinks (whenever i decide that may be)

haha Andrew :P

nice work guys sorry couodln't come by to help out hey

bullsh*t you're sorry, you just wanted to go fishing instead of hanging out with us

go play with your fishies and see if they'd want to go for cruises and fast eddy's and sh*t with you, i'll see you running back to us boys then won't i? :P

and everyone...

NEXT BACKYARD JOB AFTER STEVEN'S PLACE IS AT BRENDAN'S... HE HAS A HOIST!!!

Yeh, the side skirts had a bit of double sided sticky tape, but didnt affect it at all. The hardest part was getting Marko's bumper off... Andrew's was held on with 4 screws :)

I have a large garage with plenty of lighting, except Andrew's car won't get in cos the front bar scrapes... Slight problem.

Cheers Ryan, I have more, but they're pretty shit.

Brendan, you have a hoist at your house??? Your not looking for a housemate who cant afford the rent... are you? (Please say yes, please say yes, please say yes...) I want a hoist :banana: Or at least a trolley jack, or a garage we can get cars into ;)

Mark, do you have any pics of your dodgy front bar? Didnt get any of the "paint" and I want to see this number plate mount :D

Guest
This topic is now closed to further replies.


  • Similar Content

  • Latest Posts

    • Surely somebody has one in VIC. Have you asked at any shops?  Is this the yearly inspection or did you get a canary?
    • This is where I share pain with you, @Duncan. The move to change so many cooling system pieces to plastic is a killer! Plastic end tanks and a few plastic hose flanges on my car's fail after so little time.  Curious about the need for a bigger rad, is that just for long sessions in the summer or because the car generally needs more cooling?
    • So, that is it! It is a pretty expensive process with the ATF costing 50-100 per 5 litres, and a mechanic will probably charge plenty because they don't want to do it. Still, considering how dirty my fluid was at 120,000klm I think it would be worth doing more like every 80,000 to keep the trans happy, they are very expensive to replace. The job is not that hard if you have the specialist tools so you can save a bit of money and do it yourself!
    • OK, onto filling. So I don't really have any pics, but will describe the process as best I can. The USDM workshop manual also covers it from TM-285 onwards. First, make sure the drain plug (17mm) is snug. Not too tight yet because it is coming off again. Note it does have a copper washer that you could replace or anneal (heat up with a blow torch) to seal nicely. Remove the fill plug, which has an inhex (I think it was 6mm but didn't check). Then, screw in the fill fitting, making sure it has a suitable o-ring (mine came without but I think it is meant to be supplied). It is important that you only screw it in hand tight. I didn't get a good pic of it, but the fill plug leads to a tube about 70mm long inside the transmission. This sets the factory level for fluid in the trans (above the join line for the pan!) and will take about 3l to fill. You then need to connect your fluid pump to the fitting via a hose, and pump in whatever amount of fluid you removed (maybe 3 litres, in my case 7 litres). If you put in more than 3l, it will spill out when you remove the fitting, so do quickly and with a drain pan underneath. Once you have pumped in the required amount of clean ATF, you start the engine and run it for 3 minutes to let the fluid circulate. Don't run it longer and if possible check the fluid temp is under 40oC (Ecutek shows Auto Trans Fluid temp now, or you could use an infrared temp gun on the bottom of the pan). The manual stresses the bit about fluid temperature because it expands when hot an might result in an underfil. So from here, the factory manual says to do the "spill and fill" again, and I did. That is, put an oil pan under the drain plug and undo it with a 17mm spanner, then watch your expensive fluid fall back out again, you should get about 3 litres.  Then, put the drain plug back in, pump 3 litres back in through the fill plug with the fitting and pump, disconnect the fill fitting and replace the fill plug, start the car and run for another 3 minutes (making sure the temp is still under 40oC). The manual then asks for a 3rd "spill and fill" just like above. I also did that and so had put 13l in by now.  This time they want you to keep the engine running and run the transmission through R and D (I hope the wheels are still off the ground!) for a while, and allow the trans temp to get to 40oC, then engine off. Finally, back under the car and undo the fill plug to let the overfill drain out; it will stop running when fluid is at the top of the levelling tube. According to the factory, that is job done! Post that, I reconnected the fill fitting and pumped in an extra 0.5l. AMS says 1.5l overfill is safe, but I started with less to see how it goes, I will add another 1.0 litres later if I'm still not happy with the hot shifts.
    • OK, so regardless of whether you did Step 1 - Spill Step 2 - Trans pan removal Step 3 - TCM removal we are on to the clean and refill. First, have a good look at the oil pan. While you might see dirty oil and some carbony build up (I did), what you don't want to see is any metal particles on the magnets, or sparkles in the oil (thankfully not). Give it all a good clean, particularly the magnets, and put the new gasket on if you have one (or, just cross your fingers) Replacement of the Valve body (if you removed it) is the "reverse of assembly". Thread the electrical socket back up through the trans case, hold the valve body up and put in the bolts you removed, with the correct lengths in the correct locations Torque for the bolts in 8Nm only so I hope you have that torque wrench handy (it feels really loose). Plug the output speed sensor back in and clip the wiring into the 2 clips, replace the spring clip on the TCM socket and plug it back into the car loom. For the pan, the workshop manual states the following order: Again, the torque is 8Nm only.
×
×
  • Create New...