Jump to content
SAU Community

Recommended Posts

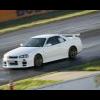
Some pics

http://www.skylinesaustralia.com/forums/Ju...Ca-t254990.html

Carsales add

http://www.carsales.com.au/all-cars/privat...r&trecs=463

Here it is again with more information (again). I can't remember everything but the main points are listed below.

Before you read any further, I am looking 95K.

It's a killer beast and I totally love it but I use it more for charging my kids RC batteries than I drive it these days.

The new rules in the bitumen rallies allowing Z-Tunes means this car now qualifies if you wanted to cage it up.

So, here we go...

1999 model VSpec with around 40,000 genuine ks on it.

Engine has less than 3000 ks on it. Most just driving around town. It was built this year (last year now) with the following parts:

New N1 block

HKS 2.8L Kit Step 2 Rated 588kW(800ps) includes the following

Forged piston kit (nickel plated & piston surface has a final molybdenum coating).

- Fully forged & balanced counter crankshaft.

-H cross section connecting rods.

PISTONS

Piston material is specially forged to HKS specifications. This ensures high strength, durability, reliability, and produced to high dimensional accuracy. As a result, this forged piston enjoys tremendous weight savings, and a well balanced part.

The piston crown has a balanced & symetrical concave section design which ensures higher engine response. Any larger concave section will result in a drop in compression ratio, and will affect engine response.

To reduce abrasion resistance, and to improve performance, the top piston ring is titanium coated.

In order to acheive an overall low piston height, piston design with two thin piston oil rings is adopted by HKS. This ensures minimum friction, and a low tension type piston.

CONNECTING ROD

With the use of high pressure forging for the material, the part does not requires much secondary operations except for the mating bearing surfaces.

High tensile bolts are used to prevent cap opening during high inertial forces generated at high RPM loads.

CRANKSHAFT

The strength of the crankshaft is ensured when the metal fiber flow is not affected during the forging process.

It is a full counter form, balanced to high tolerances where smooth revolutions are ensured. This results in loads being evenly distributed onto the metal surface, and reduces frictional loads.

It is extremely light and strong compared to the factory item, and other aftermarket performance crankshaft available in the market

The rigidity of the pin side is improved with the addition of a rib to the connecting rod pin.

The crankshaft manufacturing process is completed with a special hardening process according to HKS specifications to ensure increased reliability at high RPM loads, and reduce fatigue.

Tomei Oil Pump

Big 9 litre sump

N1 water pump

head work done by Ben at Racepace to his latest spec. This is crucial to the low end response. It feels like a V8 at low revs.

2860 turbos

Suspension fully modified to give a nice ride around town without harshness and to also outperform most other cars at the track and through the hills.

Includes:

revalved Tein RA shocks

custom upper control arms delivered mega caster

and lots more

Diff has been replaced with a shimmed up mechanical

Brakes are HARROP with braided lines

front 381mm rotors with 6 piston callipers

rear 343mm rotors with 4 piston callipers

Bonnet is genuine Topsecret single skin carbon

Front bar is genuine Nismo

Side skirts are Doluck

Large trust radiator. Oil cooler...

Has the Nismo multifunction display with 2 bar map and G-Meter page etc

Nismo 320km dash with 7,000 ks on it. Comes with original dash with 33,000 ks on it.

Exhaust is completely hand made 3.5 inch. Even has a working cat converter in it to keep the EPA off your back. Super quiet. In fact, while driving down the freeway, I can hear the climate control servo making minor adjustments occasionally. Every other big power GTR I have seen is loud and attracked the wrong kind of attention.

Rims are 18 x 10.5 + 12 TE37s in black. Comes with 2 sets of tyres.

The list goes on.... It cost me a fortune to get set up this way so it will kill at the track and be a really nice standard feeling car on the street.

Looking under the bonnet the only clue it isn't stock is the combination catch can / washer bottle and the silicone intercooler pipes.

It still runs the standard intercooler, airbox and plenum.

Interior is tip top. Only the odd small scuff by a careless japanese guy around the ashtray.

Currently it is producing around 390 rear wheel KW on normal pump fuel and is tuned safely so it can be driven to the track, take the win and drive home without breaking a sweat.

The power delivery is amazing, it is strong from idle due to the capacity and top secret work on the head. It pulls hard from nowhere and hits around 300 rwkw at 4000 rpm. Most cars are only coming on boost then.

This is very difficult to achieve with a working catalytic converter. Remove the cat, retune and the power will jump over 400 rwkw instantly.

If you have the money, or know someone who can afford it, pass on the info and feel free to PM me for more specific info.

I don't need to sell the car, but having it sit around doing nothing is a bit of a waste.

Link to comment
https://www.sau.com.au/forums/topic/268831-r34gtr-fast-tough-and-done-properly/
Share on other sites

happy to discuss possible trades.

FYI, almost everything on this car is new. It has had mega bucks spent on it and then it was put in the garage. It isn't a worn out legend, its basically a brand new car in every way except the car itself was built in 1999.

  • 1 month later...

Price dropped. Check out link to carsales advertisement.

The motor is barely run in and cost nearly 30K... then there is the rest of the car $$$$. I also have the standard stuff with the exception of the brakes and shocks...

Create an account or sign in to comment

You need to be a member in order to leave a comment

Create an account

Sign up for a new account in our community. It's easy!

Register a new account

Sign in

Already have an account? Sign in here.

Sign In Now


  • Similar Content

  • Latest Posts

    • So stock ECU does not like anything above 10 psi?  That Nistune one is just for "try" if it will be any different, I know it need to be tune for that. I know but YOU may know about these problem but i/we dont. They few little Skylines here let alone people who know anything about tham so that is why iam asking here  
    • So now we have a radiator with no attachments whatsoever. It lifts up with a particularly tight spot between the drivers side air box mount and the lower radiator outlet, but if you've got this far you will sort that too. This is the lower mounts with the rad out so you can see where the rubber bushes go, it is a straight shot upwards Done! Assembly is the reverse of disassembly, with blood less likely to be shed.
    • Right, onto the second last trick. The Air Con condenser is mounted to the front of the radiator and stays in the car when the radiator is removed. There are 2x 10mm headed self tappers holding the top of the condenser to the radiator, remove those The bottom of the condenser is attached to the radiator with clips. You need to lift the condenser out of those clips and clear (up, then forward). f**ked if  could work out how to do that last bit with the front bumper on. I hope you can, and you share the trick.  Bumper removal probably deserves its own thread one day once I've recovered the will to live, but basically you need to remove the wheels, front inner guard liners (clips and 10mm headed bolts), the self tapper between the guard and the bumper at the rearmost point of the bumper (same as an R32 that bit), any remaining clips at the top/front of the grill, an absolute bastard design with a plate that holds the top of the bumper above the headlight each side (only 1 bolt which is tricky to get to, but the plate catches 2 places on the bumper and must be removed....carefully!) and push clips between the bumper and guard under the headlight. If you've done all that you will be faced with wiring for the fog lights on both sides and in ADM Q50 RS at least, 4 nasty tight plugs on the driver's side for the ADAS stuff. So, the clips at the bottom look like this on drivers side (looking from the front) And on the passenger side (also from the front), you can see this one is already out Clearance on both of these are super tight; the condenser needs to move up but the upper rad support mount prevents that, and the radiator can't move down far because it is (rubber) mounted. Once you achieve the impossible and drop the condenser off those mounts so it does not stop the rad moving, you are good to go
    • OK, next the shroud needs to come off and there are a couple of tricks. Firstly, there is a loom from near the passenger side headlight to the fans, coolant temp sensor etc and there is no plug to undo.  In my case I was OK to leave the shroud on top of the engine so I just undid the passenger side fan plug and about 10 of the clips which gave enough free wire to put it aside. The fan plugs were super tight, the trick I used was a small falt screwdriver to push down on the release tab, then a larger flat screwdriver to lever the plug out of the fan unit....be careful with how much force you apply! If you need to remove the shroud altogether for some reason you will have to deal with all the plugs (tight) and clips (brittle)....good luck. I removed all of the clips and replaced them with cable ties that I will just cut next time. Also, in the Red Sport / 400R at least, the intake heat exchanger reservoir hose is bolted to the shroud in 2 places with 10mm headed bolts; so remove them (the hose stays in the car; no need to undo it at the t fittings down at the radiator lower mount. Once you've dealt with the HX hose and the wiring loom, there are 3x 10mm headed self tappers holding the top of the shroud to the radiator; remove those.   The shroud then lifts out of the bottom mounts where it sits on the radiator, up and onto the engine out of the way. Simples
    • Ok, disregard my “rate them” comment, sorry for my unrealistic input
×
×
  • Create New...