Jump to content
SAU Community

Recommended Posts

Ok so today i started! After a few too many bevies last night a mate and I didnt get around to actually working until 4pm, but we got the car stripped and the old radiator support out. Also started prepping the new one to go in :(

23691_378103951636_675416636_4268720_3394719_n.jpg

The sea of car parts!

23691_378103956636_675416636_4268721_2563625_n.jpg

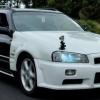
Before shot

23691_378103961636_675416636_4268722_3455171_n.jpg

Some of the tools to be used

23691_378103966636_675416636_4268723_2077792_n.jpg

23691_378103971636_675416636_4268724_8261776_n.jpg

Front bar and lights removed, and the sweet sports horns!

23691_378103976636_675416636_4268725_7163728_n.jpg

Gaurds gone draining the radiator, my brother stole my oil pan so i had to use an old wok and oven tray :)

23691_378103981636_675416636_4268726_1913572_n.jpg

23691_378103986636_675416636_4268727_8237233_n.jpg

Things get cluttered very fast!

23691_378103991636_675416636_4268728_3694472_n.jpg

Venting the aircon gas, note the rags over the top to stop any of it from spraying upwards, recommend eye protection

23691_378104006636_675416636_4268731_3228765_n.jpg

Old hinges (black) vs new hinges

23691_378104011636_675416636_4268732_3833881_n.jpg

Jimmy (panel beater) assessing the radiator supports, looks like the old skirts were trimmed back about 15ml and different railends used also discovered that there is no holes in the new rad support for the tie bars to be bolted too. Is there any difference between the tie bars in an s1 vs s2?

23691_378104016636_675416636_4268733_4993762_n.jpg

23691_378104026636_675416636_4268734_5966241_n.jpg

Point of no return... Jimmy starts to remove the old radiator support

23691_378104031636_675416636_4268735_5887856_n.jpg

Quick fix for lighting... speaker cable :D

23691_378104036636_675416636_4268736_6823585_n.jpg

Hangover cure...

23691_378104041636_675416636_4268737_5922841_n.jpg

Removal of old spot welds, using a 10ml (i think) drill bit, also note scratching the edges where sealer has been used

23691_378104046636_675416636_4268738_475507_n.jpg

23691_378104051636_675416636_4268739_4716475_n.jpg

23691_378104071636_675416636_4268743_135390_n.jpg

23691_378104061636_675416636_4268741_2289016_n.jpg

Rags in your pipes stop things getting in, also tape up the holes after removing the aircon condenser so nothing can get into that silver can.

23691_378104056636_675416636_4268740_450016_n.jpg

Removing the radiator support, using hammer and cold chisel

23691_378104076636_675416636_4268744_6470545_n.jpg

23691_378104081636_675416636_4268745_8365688_n.jpg

Unbolting the tie bars

23691_378104086636_675416636_4268746_5686936_n.jpg

Success

23691_378104091636_675416636_4268747_7756214_n.jpg

Off with the old on with the new

23691_378104096636_675416636_4268748_7551417_n.jpg

Preparing the new radiator support

23691_378104106636_675416636_4268749_6393877_n.jpg

23691_378104111636_675416636_4268750_3322808_n.jpg

Cover your windscreen when using a grinder near by, also have a fire extinguisher handy

23691_378104116636_675416636_4268751_5433565_n.jpg

Getting stuck into it tomorrow so hopefully have it fitted up by tomorrow evening :( if anyone lives near your welcome to drop in and have a look :)

  • Replies 83
  • Created
  • Last Reply

Top Posters In This Topic

I bet your neighbours are loving you right now...

When we did all the work on my two stagea's we were suprised how many small little difference's there where, just lucky we had something to go off.

small? hahahaha understatement! i will post pics tomorrow of the hybrid rad support...

anyways all welded in and sealed. Enough for one day tomorrow i will be fitting it all up

Hey man, looks like you got a bit done :blush:

I'm currently in Cowra but due to head back tomorrow morning so I might have to come around for a sticky beak tomorrow night lol I'll bring some beer :laugh:

PM me your address and I'll probably pop around about 7pm.

Looking good mate

Did you have to shorten the front inner skirts approx 15-20mm behind the head lights to get the correct angle for the headlights?

The new rad support lower rail, is it the same or different to the old one

I did not use the new lower rail as pretty sure mine was a r34 GTR not GTT support panel and hung too low, other wise the radiator would be too short in height.

Keep up the good work, sure helps when you have a pair of extra experienced hands.

I think i owe Jimmy about 10 cases by now! we had to cut the skirts back about 15 mm or so along the whole front edge, also i used the old lower rail as apposed to the gtr one that was on the new rad support. The gtr one had the radiator holder cups welded into position, but no bolt holes for the tie bars and was also too low...

I do suggest using a "NEW" rad support if anyone is thinking of doing it this way though, So much easier. If i had a new rad support i would have had it done in a day!

Darrin did you have problems mounting the condenser for the aircon? thinking i will have to make custom top mount brackets for it, also what did you do with the gtr bonnet latch support that runs down the front to the lower rail? cut it and drill a new hole? or something else?

Sealer is dry so time to go and paint it!

With the bottom of the bonnet catch support I used a peice of 20x3mm alloy approx 30-40mm long. Bolt it to the bottom rail and drilled a hole thru it and used a bolt and nut thru the support. You could probably redrill the support. I think you might be able to see what I did in my build thread when I painted the engine recently

The condensor brackets at the top had to be bent past 90deg to get the to fit. They could be done a little better thou.

Sorry I didn't make it tonight dude, I didn't get back to Blacktown till late and I am stuffed.

Took the car for a quick hoon to Sofala and had a bite to eat and a break so that added an extra 2 hours to the trip.

It's still covered in bugs, I'm contemplating a TLC package from Seven Hills Detailing Centre, poor thing needs some love lol

Will SMS if I decide to pop around tomorrow afternoon.

With the bottom of the bonnet catch support I used a peice of 20x3mm alloy approx 30-40mm long. Bolt it to the bottom rail and drilled a hole thru it and used a bolt and nut thru the support. You could probably redrill the support. I think you might be able to see what I did in my build thread when I painted the engine recently

The condensor brackets at the top had to be bent past 90deg to get the to fit. They could be done a little better thou.

was thinking that, think this is the way ill go just a piece of alloy. Ill have another look at the condenser tomorrow think something up

Sorry I didn't make it tonight dude, I didn't get back to Blacktown till late and I am stuffed.

Took the car for a quick hoon to Sofala and had a bite to eat and a break so that added an extra 2 hours to the trip.

It's still covered in bugs, I'm contemplating a TLC package from Seven Hills Detailing Centre, poor thing needs some love lol

Will SMS if I decide to pop around tomorrow afternoon.

Just in time to see it put together :blink:

All seals painted in nice gloss black now So after work tomorrow will fit her up (again) get the rad and condenser all back in, add fluids, think about remounting the trans cooler... the list goes on!

ill post the pics from the last 2 days up tomorrow aswell

This ride has the potential to be killer. RS and all, start checkn out the manual conversion thread, lol. Pics now! Cant wait. :)

hahahaha, have been reading it for dayssssssss :) its coming! just got home from work so here we go again!

Stephen where is the beer? :P:ermm:

anyone who does this remember that you need to put the plug for the thermo fan through the front of the radiator support next to the condensor pipes.... not hanging out the back near the power steering res..... ahhhhh FML!

Ok so here are more pics of the happenings of late, Jimmy and I started at about 0830 on sunday morning and finished up around 9ish... long ass day but got what we aimed to do done. Rad support in, welded, etch primed and sealed.

Here we go again!!!

So started where we had left off, removing the rad support from the rails and skirts of the old stagea. Instead of plug welding the nice person in japan decided it better to bead the whole damn thing! took a while but we got there without damaging the rad support at all. Once again its very good to have your best mate be a panel beater :( with the right tools!

23691_378904296636_675416636_4292098_1542862_n.jpg

Even wearing leather gloves you can still hurt yourself, piece of the skirt sliced straight through to Jims finger

23691_378904306636_675416636_4292099_6337846_n.jpg

Hence why I suggest having one of these around

23691_378904311636_675416636_4292100_5190938_n.jpg

Left overs...

23691_378904316636_675416636_4292101_3068885_n.jpg

Dry fit of the whole GTR rad support

23691_378904321636_675416636_4292102_3793803_n.jpg

After a few minutes we figured out that we would have to use the cross beam from the original rad support and the top half of the GTR support, because the GTR one did not have holes to bolt up the tie bar from the suspension

23691_378904326636_675416636_4292103_7182851_n.jpg

Dry fitting the condenser and the radiator

23691_378904331636_675416636_4292104_6867348_n.jpg

Also you have to cut the original skirts back approx 15 - 20 mm so that the rad support sits right and the new headlights fit in. Note covering the fuel side with a damp towel

23691_378904336636_675416636_4292105_1137949_n.jpg

Ended up having to cut more than in this pics all the way down the near the 10ml bolt is for the earth from the loom

23691_378904341636_675416636_4292106_3823557_n.jpg

23691_378904346636_675416636_4292107_381910_n.jpg

23691_378904351636_675416636_4292108_6966140_n.jpg

Then we used a self tapping screw either side of the new rad support to hold it in place while we check the fitment, this was about the time i started to get excited

23691_378904356636_675416636_4292109_2017296_n.jpg

23691_378904361636_675416636_4292110_4480768_n.jpg

23691_378904366636_675416636_4292111_6772231_n.jpg

23691_378904371636_675416636_4292112_7079507_n.jpg

23691_378904381636_675416636_4292113_4761081_n.jpg

So we got to testing or welding and setting up the machine on the left over bits of the donor car, I dont recommend using a gas less welder they leave way to much flux around the weld

23691_378904386636_675416636_4292114_3625734_n.jpg

Big clamps... :)

23691_378904396636_675416636_4292116_6323250_n.jpg

the join

23691_378904401636_675416636_4292117_7172567_n.jpg

So the welding begins... drilled 4 new holes to plug weld the corners to the side panles

23691_378904411636_675416636_4292119_4214545_n.jpg

23691_378904416636_675416636_4292120_1507031_n.jpg

23691_378904421636_675416636_4292121_5728234_n.jpg

Etch primed and now sealing, use a brush with short hair for the best result, applying the sealer with a corking gun

23691_378904431636_675416636_4292123_3792391_n.jpg

23691_378904436636_675416636_4292124_3671441_n.jpg

23691_378904446636_675416636_4292125_1834733_n.jpg

and so we called it a night!

The next day after the sealer was dry i decided to fit up everything roughly to make sure no major adjustments needed to be done before i painted the sealed parts of the car

23691_378904451636_675416636_4292126_5508716_n.jpg

23691_378904456636_675416636_4292127_4561527_n.jpg

The GTR reo fits perfect

23691_378904461636_675416636_4292128_7084266_n.jpg

23691_378904466636_675416636_4292129_6209583_n.jpg

The gaurds are pumped as! :)

23691_378904471636_675416636_4292130_2127412_n.jpg

Rough look with the lower lip this made me smile! but its going to be low as!

23691_378904476636_675416636_4292131_1318971_n.jpg

Lots of room for the front mount to go in

23691_378904481636_675416636_4292132_293321_n.jpg

After admiring it for a while I started to mask up to paint

23691_378904486636_675416636_4292133_5366095_n.jpg

23691_378904491636_675416636_4292134_4737844_n.jpg

Add some black gloss...

23691_378904496636_675416636_4292135_6958738_n.jpg

23691_378904501636_675416636_4292136_6508649_n.jpg

Then had to leave it over night to dry

So it brings me to today...

Got home from work and pulled out all the newpaper and got to putting it back together...

Condenser and radiator back in

23691_378904506636_675416636_4292137_926411_n.jpg

Worst setup to try and put hoses and clamps back on ever. Note the corrosion from when my old battery went bang, will be taking it out and getting it cleaned up and re painted

with in the next week or so

23691_378904511636_675416636_4292138_3170913_n.jpg

As the car sits now I have the overflow and the washer bottle back in. The rad and condenser all in and hooked up and the Bonnet and gaurds on and lined up. Hopefully tomorrow I get the rest of the thing back together.

Things I still need are:

New HID kit as the old on was interwoven into the loom and I dont want to use it.

side indicator plugs

make a little bracket to join the bonnet lock support and the cross beam

coolant

top up the trans fluid, thinking about changing its mounting position to possibly some fabrication work

pick up my HDI intercooler, fit it

get a pod filter

make a custom cai box

get an RB 26

convert it to manual

win the lottery

marry a super model who loves to cook and clean...

So jealous. Looks like its coming along very nice, and quickly. But please by some roof rail replacements to really set off that sleek look. :thumbsup: Really wish i could see this in the flesh.

For anyone interested or doing this conversion, i sore a website last night that had r34 oem hid lights(apprently) second hand for $1390 or there bouts. Not easiest of parts to come across for this conversion..

Create an account or sign in to comment

You need to be a member in order to leave a comment

Create an account

Sign up for a new account in our community. It's easy!

Register a new account

Sign in

Already have an account? Sign in here.

Sign In Now


  • Similar Content

  • Latest Posts

    • From there, it is really just test and assemble. Plug the adapter cables from the unit into the back of the screen, then the other side to the car harness. Don't forget all the other plugs too! Run the cables behind the unit and screw it back into place (4 screws) and you should now have 3 cables to run from the top screen to the android unit. I ran them along the DS of the other AV units in the gap between their backets and the console, and used some corrugated tubing on the sharp edges of the bracket so the wires were safe. Plug the centre console and lower screen in temporarily and turn the car to ACC, the AV should fire up as normal. Hold the back button for 3 sec and Android should appear on the top screen. You need to set the input to Aux for audio (more on that later). I put the unit under the AC duct in the centre console, with the wifi antenna on top of the AC duct near the shifter, the bluetooth antenna on the AC duct under the centre console The GPS unit on top of the DS to AC duct; they all seem to work OK there are are out of the way. Neat cable routing is a pain. For the drive recorder I mounted it near the rear view mirror and run the cable in the headlining, across the a pillar and then down the inside of the a pillar seal to the DS lower dash. From there it goes across and to one USB input for the unit. The second USB input is attached to the ECUtec OBD dongle and the 3rd goes to the USB bulkhead connected I added in the centre console. This is how the centre console looks "tidied" up Note I didn't install the provided speaker, didn't use the 2.5mm IPod in line or the piggyback loom for the Ipod or change any DIP switches; they seem to only be required if you need to use the Ipod input rather than the AUX input. That's it, install done, I'll follow up with a separate post on how the unit works, but in summary it retains all factory functions and inputs (so I still use my phone to the car for calls), reverse still works like factory etc.
    • Place the new daughterboard in the case and mount it using the 3 small black rivets provided, and reconnect the 3 factory ribbon cables to the new board Then, use the 3 piggyback cables from the daughterboard into the factory board on top (there are stand offs in the case to keep them apart. and remember to reconnect the antenna and rear cover fan wires. 1 screw to hold the motherboard in place. Before closing the case, make a hole in the sticker covering a hole in the case and run the cable for the android unit into the plug there. The video forgot this step, so did I, so will you probably. Then redo the 4 screws on back, 2 each top and bottom, 3 each side and put the 2 brackets back on.....all ready to go and not that tricky really.      
    • Onto the android unit. You need to remove the top screen because there is a daughterboard to put inside the case. Each side vent pops out from clips; start at the bottom and carefully remove upwards (use a trim remover tool to avoid breaking anything). Then the lower screen and controls come out, 4 screws, a couple of clips (including 3 flimsy ones at the top) and 3 plugs on the rear. Then the upper screen, 4 screws and a bunch of plugs and she is out. From there, remove the mounting brackets (2 screws each), 4 screws on the rear, 2 screws top and bottom and 3 screws holding in the small plates on each side. When you remove the back cover (tight fit), watch out for the power cable for the fan, I removed it so I could put the back aside. The mainboard is held in by 1 screw in the middle, 1 aerial at the top and 3 ribbon cables. If you've ever done any laptop stuff the ribbon cables are OK to work with, just pop up the retainer and they slide out. If you are not familiar just grab a 12 year old from an iphone factory, they will know how it works The case should now look like this:
    • Switching the console was tricky. First there were 6 screws to remove, and also the little adapter loom and its screws had to come out. Also don't forget to remove the 2 screws holding the central locking receiver. Then there are 4 clips on either side....these were very tight in this case and needed careful persuading with a long flat screw driver....some force required but not enough to break them...this was probably the fiddliest part of the whole job. In my case I needed both the wiring loom and the central locking receiver module to swap across to the new one. That was it for the console, so "assembly is the reverse of disassembly"
    • But first....while I was there, I also swapped across the centre console box for the other style where the AV inputs don't intrude into the (very limited !) space.  Part# was 96926-4GA0A, 284H3-4GA0B, 284H3-4GA0A. (I've already swapped the top 12v socket for a USB bulkhead in this pic, it fit the hole without modification:) Comparison of the 2: Basically to do the console you need to remove the DS and PS side console trim (they slide up and back, held in by clips only) Then remove the back half of the console top trim with the cupholders, pops up, all clips again but be careful at the front as it is pretty flimsy. Then slide the shifter boot down, remove the spring clip, loose it forever somewhere in the car the pull the shift knob off. Remove the tiny plastic piece on DS near "P" and use something thin and long (most screwdrivers won't fit) to push down the interlock and put the shifter down in D for space. There is one screw at the front, then the shifter surround and ashtray lift up. There are 3 or 4 plugs underneath and it is off. Next is the rear cover of the centre console; you need to open the console lid, pop off the trim covering the lid hinge and undo the 2rd screw from the driver's side (the rest all need to come out later so you can do them all now and remove the lid) Then the rear cover unclips (6 clips), start at the top with a trim tool pulling backwards. Once it is off there are 2 screws facing rearwards to remove (need a short phillips for these) and you are done with the rear of the console. There are 4 plugs at the A/V box to unclip Then there are 2 screws at the front of the console, and 2 clips (pull up and back) and the console will come out.
×
×
  • Create New...