Jump to content
SAU Community

Recommended Posts

Parts are located in Glenhaven (Next to Castle hill for those who dont no), Sydney

Contact me on 0415611553, Txt or call. If i do not answer please text me

SAU did not allow me to post all photos so if you would like to see them they can be found on this thread on nissan silvia.com http://www.nissansil...1

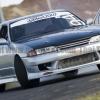
Wrecking s15 - Alot has gone but are still remaining bits

Car cannot be registered (repairable write-off) but can be fixed, no chasis rail damage, just damage down right side and drivers side floor pan, behind were floor pan is. Currently the car is still together and can be rolled but it is up on jackstands ready to pull everything out.

WHOLE CAR IS IMMACULATE apart from damage - Car is painted in standard gunmetal grey colour

Number of things under the bonnet still remain like all the abs, wiring, standard bov, fuse box, etc.

PLEASE PLEASE PLEASE if people can organise there own postage i would prefer it, im am very busy and dont really have time to organise it. If you can organise somewhere i can drop it to then i will

Im not going to name everything but the most common things that are left and the havent been damaged include:

- Five Stud Conversion front and rear $600 (includeds lines, hubs, bearing, brakes, everything)

- Cross Member - $150

- Front Left Control Arm $50

- Front left tie Rod/end $30

- Rear Subframe - (Includes all arms, diff, 50,000k's on it) $350

- Rear bar(slightly marked from accident, easyfix) $100

- Front Bar (slightly marked from accident, easyfix) $100

- Drivers Mirror $60 (Door if need but damaged)

- Passenger door complete with glass $250

- Passenger front guard $150

- Bonnet, immaculate $250

- Rear left tail light $75

- S15 wheels and good tires $300 (Check photos further down the page, Hankook and Potenza tires, one tire will need replacing and one wheel has been marked in accident

- Sunroof (Whole thing) $350

- got All Windows $$$?

- Carpet, immaculte!!! $100

- Immaculate Steering wheel (airbag) $150 (Is missing one cover off the back)

- I also have another REAR s15 5stud Conversion with hub, disks, brakes, all thats needed $250

There are more small parts so message me and ill let you no if i have them, but from the pictures you can get an idea of whats there and what isnt

255103_10150207897558654_811108653_6914293_3865724_n.jpg

249452_10150207897618654_811108653_6914294_4797136_n.jpg

254355_10150207897953654_811108653_6914301_7734537_n.jpg

247448_10150207898098654_811108653_6914305_8008428_n.jpg

180SX/S13

$50 - 180/s13 front reo

$50 - 180/s13 rear reo

$50 - Brake Booster

$250 - Chromoly Cusco Saftey 21 Full Roll Cage (Missing 2 rear legs and cross over bar, Was qouted around $150 to complete the cage which would be an EXTREMELY cheap roll cage)

$650ono - 5 speed turbo SR Gearbox - been out of car for a week - works perfect - was told it was reconditioned by previous owner about 20,000 ago, car has 72,293ks on it when pulled out - bit dirty needs a clean

$40 - 180SX/S13 front strut brace

$150 - Redtop SR20 Engine Wiring Loom/Harness

$250ono -180sx/s13 AC Condesor/Lines/Pump all the shit needed

$offers - Standard S13/180sx hubs,disks,calipers front and rear

$20 - Dash 10 sandwich plate adaptor (for oil coolers or oilfilter relocators, has one speed flow fitting still on it)

$20 each - 2x Redtop Sr20 Coilpack looms

$80 - 'Sand Blasted' STANDARD sr20det Intake Manifold (Looks brand new)

$20 - Standard sr20 sump

$50 - sr20de Headgasket

$100 - Redtop Injectors with Fuel rail - Speedflow fitting on the end

$30 - Passenger and Center air vents

$40 - Ac braket and tensioner

$40 - Cefiro AFM , Identical to a Z32, no plug

$200 - Z32 AFM

$60 - S13/180sx Gearbox Crossmember and gearbox Mount

$40 - cefiro thermo fan off condensor, will fit anything

$30 - 180sx/s13 window wipers with red new wiperblades

$10 - cefiro window washer bottle and motor

$70 - 180sx/s13 front seat and rail - wear on right of seat, needs vacuum, no stains

$150 - 180sx/s13 front 4stud hubs,knuckles,calipers,disks plus control arms - Good for ke70 or r31 upgrade - give some better stopping and nice camber?

$50 - standard sr clutch and pressure plate , about half worn id say

$40 - Radiator Adaptor Pipe for top radiator hose. Good for mounting sr20 in a datsun ute or similar, so the pipe isnt facing forward like it does standard

251173_10150208075038654_811108653_6915611_2480057_n.jpg

246704_10150208174928654_811108653_6916816_6243953_n.jpg

255162_10150207973688654_811108653_6914871_7162034_n.jpg

255082_10150207973928654_811108653_6914875_7189219_n.jpg

254243_10150207974023654_811108653_6914876_1187154_n.jpg

252465_10150207974123654_811108653_6914878_2293259_n.jpg

249423_10150207898353654_811108653_6914312_4585246_n.jpg

$150 - 180sx altezza tail lights (Basically brand new, were barely used)

253749_10150207898508654_811108653_6914315_5136200_n.jpg

$120 ono - Brand New adjustable suspension coilover springs, comes with coilover keys ( Fit on any type of shock absorber, can be adjusted 2 to three inches in height. For people who dont wanna spend the money on coilovers)

179833_492991676190_565421190_6440498_4546564_n.jpg

$300ono - Recaro Bucket Seat (Swade, Red Stitching, good Condition)

255761_10150207897388654_811108653_6914291_4385780_n.jpg248819_10150207897503654_811108653_6914292_6439993_n.jpg

If your interested please PM or TXT 0415611553

Edited by one_eighty_sx

Create an account or sign in to comment

You need to be a member in order to leave a comment

Create an account

Sign up for a new account in our community. It's easy!

Register a new account

Sign in

Already have an account? Sign in here.

Sign In Now


  • Similar Content

  • Latest Posts

    • Place the new daughterboard in the case and mount it using the 3 small black rivets provided, and reconnect the 3 factory ribbon cables to the new board Then, use the 3 piggyback cables from the daughterboard into the factory board on top (there are stand offs in the case to keep them apart. and remember to reconnect the antenna and rear cover fan wires. 1 screw to hold the motherboard in place. Before closing the case, make a hole in the sticker covering a hole in the case and run the cable for the android unit into the plug there. The video forgot this step, so did I, so will you probably. Then redo the 4 screws on back, 2 each top and bottom, 3 each side and put the 2 brackets back on.....all ready to go and not that tricky really.      
    • Onto the android unit. You need to remove the top screen because there is a daughterboard to put inside the case. Each side vent pops out from clips; start at the bottom and carefully remove upwards (use a trim remover tool to avoid breaking anything). Then the lower screen and controls come out, 4 screws, a couple of clips (including 3 flimsy ones at the top) and 3 plugs on the rear. Then the upper screen, 4 screws and a bunch of plugs and she is out. From there, remove the mounting brackets (2 screws each), 4 screws on the rear, 2 screws top and bottom and 3 screws holding in the small plates on each side. When you remove the back cover (tight fit), watch out for the power cable for the fan, I removed it so I could put the back aside. The mainboard is held in by 1 screw in the middle, 1 aerial at the top and 3 ribbon cables. If you've ever done any laptop stuff the ribbon cables are OK to work with, just pop up the retainer and they slide out. If you are not familiar just grab a 12 year old from an iphone factory, they will know how it works The case should now look like this:
    • Switching the console was tricky. First there were 6 screws to remove, and also the little adapter loom and its screws had to come out. Also don't forget to remove the 2 screws holding the central locking receiver. Then there are 4 clips on either side....these were very tight in this case and needed careful persuading with a long flat screw driver....some force required but not enough to break them...this was probably the fiddliest part of the whole job. In my case I needed both the wiring loom and the central locking receiver module to swap across to the new one. That was it for the console, so "assembly is the reverse of disassembly"
    • But first....while I was there, I also swapped across the centre console box for the other style where the AV inputs don't intrude into the (very limited !) space.  Part# was 96926-4GA0A, 284H3-4GA0B, 284H3-4GA0A. (I've already swapped the top 12v socket for a USB bulkhead in this pic, it fit the hole without modification:) Comparison of the 2: Basically to do the console you need to remove the DS and PS side console trim (they slide up and back, held in by clips only) Then remove the back half of the console top trim with the cupholders, pops up, all clips again but be careful at the front as it is pretty flimsy. Then slide the shifter boot down, remove the spring clip, loose it forever somewhere in the car the pull the shift knob off. Remove the tiny plastic piece on DS near "P" and use something thin and long (most screwdrivers won't fit) to push down the interlock and put the shifter down in D for space. There is one screw at the front, then the shifter surround and ashtray lift up. There are 3 or 4 plugs underneath and it is off. Next is the rear cover of the centre console; you need to open the console lid, pop off the trim covering the lid hinge and undo the 2rd screw from the driver's side (the rest all need to come out later so you can do them all now and remove the lid) Then the rear cover unclips (6 clips), start at the top with a trim tool pulling backwards. Once it is off there are 2 screws facing rearwards to remove (need a short phillips for these) and you are done with the rear of the console. There are 4 plugs at the A/V box to unclip Then there are 2 screws at the front of the console, and 2 clips (pull up and back) and the console will come out.
    • So, a bit of a side trip, but one that might be interesting for people with JDM cars and japanese head units. I know @Pac previously posted about a carplay/android auto adapter he installed which used the AUX input, and @V35_Paul put in one of the Tesla style units that replace both screens. The option I went with was a Lsait LLT-YF-VER5.87_2 (https://www.alibaba.com/product-detail/Lsailt-8GB-Android-Multimedia-Interface-for_1601187633672.html). Price was $1,150 for a single unit although they are much cheaper if you are willing to buy 2....$857ea. Make you you get the version 2 not version 1, it is faster and has a better UI - this is the manufacturer listing: http://www.lsailt.com/product/348.html. BTW if you've never bought from Alibaba before, don't be concerned....these guys can't stay in business unless they are responsive, ship fast etc, they were excellent (probably faster shipping than most local places) So, this was my task for a lazy Sat afternoon....looks complex but was all done in a few hours (it probably helps that I had some of it apart before so it was a bit familiar). I also decided to add a HD USB drive recorded at the same time and the unit also supports an aftermarket reverse cam (if you don't want to retain factory) and also AV in and HDMI out It looks much worse than it is, in fact in was genuinely all plug and play (no custom wiring at all). This video was pretty good (skipped a few steps), unfortunately they are an Aussie seller but no longer sell this unit (I guess Carplay/AA adapters are easier to install and much cheaper) https://www.youtube.com/watch?v=T5hJfYOB8Dg
×
×
  • Create New...