Jump to content
SAU Community

Recommended Posts

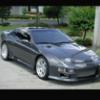
2002 Nissan 200SX S15 Spec S GT

Pewter

100 400km

$23 000

d7ir.th.jpg djjn.th.jpg ls9f.th.jpg z5ss.th.jpg

tha7.th.jpg gcev.th.jpg btds.th.jpg arwr.th.jpg

us5p.th.jpg i737.th.jpg 76bf.th.jpg aywh.th.jpg

r80y.th.jpg 5ffc.th.jpg t7j2.th.jpg 1f72.th.jpg

This is a beautiful example of a well cared for and lightly modified 2002 S15 Spec S GT (Australian delivered).

I am the third owner of the car since new and the two prior owners were just as meticulous as myself. I purchased the car 3 years ago in stock standard condition at 81 000km and it has been my pride and joy ever since.

The car has always been garaged and serviced regularly with high end oils. I can provide the log book and a folder full of receipts. Two keys and remotes are included (one remote is brand new). The tool kit and jack are also present.

The car has no accident history and has never seen a track. It is purely a weekend driver.

Have never had any police trouble and the vehicle is 100% legal.

Mature professional owner. No finance owing.

The car is in immaculate condition both inside and out. Regularly washed and waxed with high end products. Recent professional machine polish so the paint presents extremely well. A few small stone chips on the front bar as would be expected however.

Interior and leather seats are in excellent condition. One or two tiny blemish marks on the door trim if you are particular.

All of the factory plastic under-car and wheel arch linings are still present.

Have only ever used premium fuels (BP Ultimate or Shell V-Power).

I purchased the car in 100% stock form and it presented as new with very good engine compression test readings (155, 155, 152, 152psi) reflecting its sheltered life. I have performed mild but tasteful modifications over the last 3 years to improve the overall performance of the vehicle while also maintaining its daily drivability and reliability. The vehicle drives smoothly and would make an excellent regular driver or mechanically sound base for further modifications. The suspension is not lowered so speed bumps are not a problem and the clutch is light (it still has the original factory clutch which reflects the care that has been taken). The vehicle has improved power, torque and response, balanced handling, excellent grip, strong braking and a nice deep but not obnoxious or overly loud exhaust note.

The car has just had its 100 000km service with all fluids, filters and spark plugs recently replaced. No money to spend. Just jump in and enjoy! Inspections welcome.

Modifications list:

Engine:

- BMC pod filter in custom enclosure (sprayed satin black)

- GKTech front mount intercooler (All parts are black and look factory. This kit bolts up to the factory piping and does not require illegal cutting of the chassis.)

- Upgraded Walbro 255lph fuel pump

- Full Custom Exhaust Specialists (CES) 3in turbo back exhaust system including black ceramic coated twin dump pipe, full stainless steel system with a 200cell high flow catalytic converter, mid section resonator into a MagnaFlow muffler with twin 3in oval tips (that look factory standard). All sitting on firmer Cusco polyurethane exhaust hangers. This is a very highly regarded exhaust system worth $2 200 new. It produces no drone and is very quiet at cruising speed with a deep tone when you give it some revs.

- TurboTech dual stage electronic boost controller

- NisTune ECU (professionally tuned by well respected Matthew Spry of Performance Injection Tuning Services (PITS)). Approx. 180rwkw@15psi on a very safe tune.

- Optima D34/78 Yellow Top deep cycle battery (high end for aftermarket stereo)

Handling:

- Nismo strut brace (sprayed satin black)

- Whiteline adjustable sway bars (27mm front and 22mm rear)

- Whiteline front caster bushes

- Whiteline front camber pins

- Whiteline rear camber bushes

- Whiteline subframe alignment kit (set for traction)

Wheels/Brakes:

- QFM A1RM performance brake pads

- Koya BS-Tek 18in matte black wheels with Nismo centre caps and black lock nuts - 8in+25 front, 9in+35 rear

- Goodyear Eagle F1 A2 tyres 235-40 front and 255-35 rear. (Near new. These tyres provide phenomenal grip, especially in the wet). Recent quality wheel alignment also performed.

Exterior:

- Kaixen 5000K (pure white) HID headlight upgrade

- White LED front parking lights

- Smoked side indicators

- Smoked tail lights

- Front and rear ADM Nissan badges removed (JDM badges installed)

- GT spec spoiler professionally removed and boot resprayed

- Tinted windows

Interior:

- Full GT spec interior including leather seats and silver accents on wheel, door trim etc

- Black Nismo Duracon shift knob (extremely comfortable) (note photos show an earlier knob)

- Upgraded brushed silver pedals

- RaceTech 52mm boost gauge

- Boost controller missile switch (for high and low boost) mounted in glove box

- Full Dynamatting/sound insulation in doors, rear parcel shelf and boot

- Aftermarket stereo will be removed prior to sale and stock system reinstalled. Custom 10in subwoofer enclosure that fits snugly into the right boot space also included in sale.

All factory parts available with sale including airbox, sway bars, exhaust, 16in wheels etc.

Located Brisbane Southside

Contact:

Justin - 0422 995 980

[email protected]

No joyriders or timewasters. Genuine buyers with the money available only.

Email or text is preferable for any enquires. Feel free to call anytime. Leave a message if unanswered and I will call you back.

Link to comment
https://www.sau.com.au/forums/topic/432347-2002-nissan-200sx-s15-spec-s-gt-adm/
Share on other sites

  • 2 weeks later...
  • 3 weeks later...
  • 3 weeks later...

Thanks mate. Yes I hope someone can appreciate the care I've put into this S15 during my ownership. It is an excellent honest example that has not been thrashed. :)

I am biased but I would much rather have one of these than the 86's/BRZ's that everybody is buying now. Just as reliable, good looking, light weight and well balanced...with significantly more power and torque on offer! :D

Create an account or sign in to comment

You need to be a member in order to leave a comment

Create an account

Sign up for a new account in our community. It's easy!

Register a new account

Sign in

Already have an account? Sign in here.

Sign In Now


  • Similar Content

  • Latest Posts

    • Did this end up working? Did you take some pictures?
    • And finally, the front lower mount. It was doubly weird. Firstly, the lower mount is held in with a bracket that has 3 bolts (it also acts as the steering lock stop), and then a nut on the shock lower mount itself. So, remove the 3x 14mm head bolts , then the 17mm nut that holds the shock in. From there, you can't actually remove the shock from the lower mount bolt (took me a while to work that out....) Sadly I don't have a pic of the other side, but the swaybar mounts to the same bolt that holds the shock in. You need to push that swaybar mount/bolt back so the shock can be pulled out past the lower control arm.  In this pic you can see the bolt partly pushed back, but it had to go further than that to release the shock. Once the shock is out, putting the new one in is "reverse of disassembly". Put the top of the shock through at least one hole and put a nut on loosely to hold it in place. Put the lower end in place and push the swaybar mount / shock bolt back in place, then loosely attach the other 2 top nuts. Bolt the bracket back in place with the 14mm head bolts and finally put the nut onto the lower bolt. Done....you have new suspension on your v37!
    • And now to the front.  No pics of the 3 nuts holding the front struts on, they are easy to spot. Undo 2 and leave the closest one on loosely. Underneath we have to deal with the wiring again, but this time its worse because the plug is behind the guard liner. You'll have to decide how much of the guard liner to remove, I undid the lower liner's top, inside and lower clips, but didn't pull it full off the guard. Same issue undoing the plug as at the rear, you need to firmly push the release clip from below while equally firmly gripping the plug body and pulling it out of  the socket. I used my fancy electrical disconnect pliers to get in there There is also one clip for the wiring, unlike at the rear I could not get behind it so just had to lever it up and out.....not in great condition to re-use in future.
    • Onto the rear lower shock mount. It's worth starting with a decent degrease to remove 10+ years of road grime, and perhaps also spray a penetrating oil on the shock lower nut. Don't forget to include the shock wiring and plug in the clean.... Deal with the wiring first; you need to release 2 clips where the wiring goes into the bracket (use long nose pliers behind the bracket to compress the clip so you can reuse it), and the rubber mount slides out, then release the plug.  I found it very hard to unplug, from underneath you can compress the tab with a screwdriver or similar, and gently but firmly pull the plug out of the socket (regular pliers may help but don't put too much pressure on the plastic. The lower mount is straightforward, 17mm nut and you can pull the shock out. As I wasn't putting a standard shock back in, I gave the car side wiring socket a generous gob of dialectric grease to keep crap out in the future. Putting the new shock in is straightforward, feed it into at least 1 of the bolt holes at the top and reach around to put a nut on it to hold it up. Then put on the other 2 top nuts loosely and put the shock onto the lower mounting bolt (you may need to lift the hub a little if the new shock is shorter). Tighten the lower nut and 3 upper nuts and you are done. In my case the BC Racing shocks came assembled for the fronts, but the rears needed to re-use the factory strut tops. For that you need spring compressors to take the pressure off the top nut (they are compressed enough when the spring can move between the top and bottom spring seats. Then a 17mm ring spanner to undo the nut while using an 8mm open spanner to stop the shaft turning (or, if you are really lucky you might get it off with a rattle gun).
    • You will now be able to lift the parcel shelf trim enough to get to the shock cover bolts; if you need to full remove the parcel shelf trim for some reason you also remove the escutcheons around the rear seat release and you will have to unplug the high stop light wiring from the boot. Next up is removal of the bracket; 6 nuts and a bolt Good news, you've finally got to the strut top! Remove the dust cover and the 3 shock mount nuts (perhaps leave 1 on lightly for now....) Same on the other side, but easier now you've done it all before
×
×
  • Create New...