

Craved
-
Posts
17,563 -
Joined
-
Last visited
-
Feedback
100%
Content Type
Profiles
Forums
Events
Gallery
Media Demo
Store
Everything posted by Craved
-
Jimx what mods are you running to make this power output?
-
Does anybody have a steep driveway?? + low bumper = BAD!
Craved replied to Scotty's topic in General Maintenance
insurance, wouldn't be worth claiming since i got the keys out of the ignition while the car was going!!! put in a claim for damages with the police, they sure no worries i'll put it through with the DUI, theft, driving in a manner dangerous to the public charges!!!! Didn't hear from them again!!! typical, will take your money, but them chasing it for you... good luck! -
would the extra drain on the circuit affect the readings when done this way? i've got an MT installed yet the 2 tacho dont coincide all the time eg.. idle revs = MT higher 1K to 2.5K = equal revs above that = origal tacho higher
-
Does anybody have a steep driveway?? + low bumper = BAD!
Craved replied to Scotty's topic in General Maintenance
Had a similar issue to NA_R33, only this happened when someone tried to steal the car from the front of a club!!! Got the car back, only after being dragged 400+m down the road at about 90 Km/h.... definatley not the best time i've had in the 33! -
aZn_RoMeO so hows the progress going? what you should probably do is just take the time on it then when you think it is completely ready! take it down to a panel shop and get them to check it over and fix any problems!!! that's what i've decided to do just to make sure everything will be perfect.... worth a go paying maybe a couple of hundred over a couple of thousand dont you think 2 weeks today-----> time is almost going backwards LOL
-
is that price with the replacement of the timing belt?
-
<<>> nah we built this house, and the drive way doesn't go like that!!! what did you mean by working late tonight? i work nights so i always work late! hi-fill is like a spray putty-- or like a thick paint usually comes with primer mixed in with it!!! just fills up the little gaps in the surface before you paint!!!!! it's like thick paint that you spray then rub back!!! best way to do it is to spray the hi-fill then spray very lightly with matt black paint then you rub it back and that will show you if there is any low spots ---- very handy!!! i'll probly get a mate to weld the boot holes-- he did the re-inforcement on the front strut/apillar -- check post!! had a small hairline crack up the side in front of the door so welded this plate to re-inforce it on both sides!!!
-
<<>> yeah 400R i still have to re-fibreglass it as it got damaged when someone tried to steal the car!! yeah you'll have to take it all the way if you want to get everywhere! i'll be spraying the front quaters off the car too to get right down into the gaps! also with the fibre glassing of the boot surround had to take the lights out (rear) pain in the ass as it stuck down with sikaflex ---- took ages to clean the area and lights!! still got a fair bit of work to do now, but mostly with the repairing parts and the body kit, check out the pic below! the dash isn't too hard to take out, just undo the a pillar covers and all the bolts from under neath, then you have to pop out the vents from the window and there is 3 screws under that!!! took me a while to find them, then take it out... dont have a sun roof so cant help with that but if you mask it up well shouldn't get any paint in there! i know that silicon wont work cause it will flex and crack the paint, will either weld it or use fibreglass, quick way would be good! things left: boot holes hi fill boot lining hi fill body kit hi fill dents take windows out and rub reinforce the insides of the skirts --then spray.... im leaving the engine bay, just think the you'll want nothing to be on the body at all... good luck with that one
-
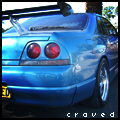
heres a photo from today. Just went over the car in 600, so once the windows come out the body of the car is ready! still have to finish the boot bonnet and doors! has any one had to fill the holes for the standard wing before, looking for an easy way to do this, filled the ones closest to the windows already, the others could be an issue!!! tips would be great!
-
<<>> Wfith going from red fto white they'll prob run a grey coat over the original paint, then spray it white! in my case im using a white coat of paint to change from black to blue, with using primer/hi-fill you'll have to sand it back again after doing thre whole car, but with using paint this doesn't have to be done! will post a few pics soon, i'll pm you soon for details about windows!
-
i'll be there to watch as the car wont be on the road then. A mate did his cams there, and a brand new convertable SAAB rolled it into the wall!!!! OUCH some nice scratches on their helmets though...lucky that was all
-
just took mine out for the respray, ummm pretty sure from memory you just undo like 3 bolts!took a bit of force to push the antenna through with twisting, only one problem with it up you wont be able to get it out from behind the jack mount!!! (with the antenna fully extended) got a spare one here if you cant fix it, we are a bit far apart though!
-
<<>> I'm guessing you got quoted $2K for prep only right? anyway, yeah spraying the 33, but actually havent got the windows out yet., was supposed to get some tools to removethem off a mate a work but that fell through when he left so i'll have to get someone to do it if i cant find the tools to buy somewhere!!! who gave you the quote for the windows? The scotch brites are harsh enough to rough the surface, if you spend the time on it and dont under estimate how long it will take! if you sand with the scoth ( mmm scotch--anyway) brites enough and are not worried about removing the factory orange peel you wont need to use sand paper..... if you do dont go lower than 600 then finish with 800.... check out some auto shops, thay have got good hard sanding blocks 200x70 mm that will help out.. just make sure they are hard!!!! If it's all done this way and there is no change of colour or repairs... putty bog etc then the paint can actually just be sprayed straight over the paint without the need to primer the whole car!!!! I'm actually changing colours completely so i am priming the repairs and just running 2 coats of white under the new colour to remove the factory black! 3 weeks til the spray and 2 weeks for licence back (enter memories of racing at the track here) and we'll see how long it takes to put back together -- i'm saying 3 days..... so i guess good luck to us both, just don't rush it
-
New product to avoid speed cameras
Craved replied to Torrens's topic in General Automotive Discussion
does anyone know if the spray is available in Australia? -
I heard an oil catch can was defecteable in a post by ndr, is this all catch cans, i was under the impression that the oil/air separator was legal if it was plumbed back into the intake as per stock setup is this true??
-
or get them to send to a mates place.. just an idea.
-
true, but theres that thing of getting exactly what you want, and the pleasure of seeing your own hard work in it!!! or am i getting sentimental i've spent 2.5 months working on it -- lost licence, sob! so what better time to do it! if your going to do it yourself-- slow and steady is the key!
-
how is this air con diagnostics mentioned done?
-
hey dude, try www.nismo.com.au and click on the nismo logo on the main screen..... limited choice though
-
<<>> going through the exact same thing right now, i actually have a few mates that do respraying, soo this is the info that i got! to sand back the car etc, i used heavy duty scotch brites.... sounds funny but the benifit of using these over say 600 or 800 wet/dry is that it doesn't actually cut into the paint like sandpaper!! thus not having the trouble of it digging in any spots due to uneven pressure, plus gets into fiddly bits easier!!! this is only going to be good if the currunt paint job is good-ish quality!!! just gotta take it down far enough to really dull --> hardly any reflection!!!! I've gotta bit more wqork on mine fixing dents etc, plus a custom body kit i made myself!!! big job! good luck with it!!! post or pm for more info.
-
Mc Ren, have you got a boost guage on the car -- besides standard. if so what is happening with boost at that point?
-
I had the white illuminous guage kit put into my R33, after pulling the dash in the last month or so found that the lights were missing completely... might try to get them back off the auto electrician.. if so i wont need all of them!!! will post here if i get them back!!!
-
oops missed a bit of the thread
-
miss nismo, if it's only the rotor size that needs to be changed, check out UAS at www.nismo.com.au they have an upgrade kit for the R32 $1195 for the set, gives 324 mm rotors with the standard calipars! may not help you with width, email to find out!!! hope it helps
-
How to remove water spray from bonnet
Craved replied to MRK25T's topic in Exterior & Interior Styling
yeah $1500 --- paint and painter thats all i had to pay for! helps when you know people in that field, and take the time to do things your self! --(not that i had much driving to do ) the spray booth is not yet factored in -- if i cant get one will have to hire for $400 btw MRK25T think i saw you working on that bonnet at UAS, was there to pick up parts.. how'd you get the bonnet home?
