


PewPew
-
Posts
561 -
Joined
-
Last visited
-
Feedback
100%
Content Type
Profiles
Forums
Events
Gallery
Media Demo
Store
Everything posted by PewPew
-
Hey guys. Just got around to installing my HDi EBC-R. I found a hole through the firewall for the hoses and cables and tee'd the boost line from the unit onto a hose coming off the intake manifold, but I'm a bit confused as to one of the solenoid connections. The instructions say one end is to be connected to the wastegate actuator and the other end to the turbo. I found the actuator hose fine, but just not quite sure which hose comes off the turbocharger. I did some research and found some people connect it to the intercooler piping instead? Would that be alright for this case? I'm running the stock SMIC on an R34 GTT. Also, does anyone know what the top hose on the standard solenoid goes to? I traced it to a gold pipe with a bend in it located under the intercooler piping but not sure as to what it actually is/does. At the moment, the stock solenoid looks like so with 2 hoses coming out, one of them tee'd: _____ l l________ l _________ ??? l l l l wastegate actuator l l ________l l_____ stock solenoid l _______________ intercooler l l l l l l ___l l___ So I guess my question is, instead of connecting the new solenoid to the turbocharger, would it be okay to connect it to the intercooler piping like some people have in other boost controller install guides? And also, what would I do with the top hose coming out of the stock solenoid? Block it off? Any help would be greatly appreciated!
-
Oh, I thought the vacuum line just after the BOV goes into the boost sensor? I traced it.. and it went into a little black box attached to the firewall with "Hitachi Boost Sensor" on it
-
Thanks for the replies guys! You're talking about this one right? Hey Sunny, how are the LEDS going?
-
Hey guys. Just got round to installing my boost gauge this afternoon .At the moment I've got it spliced in the vacuum hose just after the BOV on the crossover pipe, but whenever I let off the accelerator it fluctuates to about 17 psi the drops to 0 again :S After a bit of research, I found alot of people recommend putting the T piece on the vacuum line that runs from the intake manifold to the fuel pressure regulator. Just not quite sure where it is on the RB25DET NEO Could anyone point me in the right direction, if possible with pictures? Cheers Lyndon
-
Black R34 Gtt Stock Rims
PewPew replied to PewPew's topic in For Sale (Private Car Parts and Accessories)
Haha niiice! Just came up when I googled it ;D -
17x7.5 +40 all around. 5 x 114.3 stud pattern. Great condition, no curb damage whatsoever. Paid $450 a few months ago. Sanded, primed and painted them, now chasing $400. No tyres. Will ship at buyer's expense. 0466653693 - SMS or give me a call. Attached are some pics for reference:
-
Help! Please Rb25neo Conversion Wont Start.
PewPew replied to beRwick_GTRage's topic in General Maintenance
Sorry mate skimmed past the bit about it being a cold test. Mmmm.. true. If it's low in one or a few cylinders it should start, but will idle like shit :l -
Help! Please Rb25neo Conversion Wont Start.
PewPew replied to beRwick_GTRage's topic in General Maintenance
Correct me if I'm wrong, but isn't 120 a bit low for compression? My r34 neo came up at 160 to 165 across all 6. Or are the stag neo's different? -
I meant I made a typo mate
-
Oooops meant 9.35mm.. typo
-
Looks good Wacky Dee! How long did it take you to do? Also lovin the nismo+impul combo. Looks clean!
-
Stock GTT rims are 17x7.5 +40 for comparison. So 18x8 +37 will sit 935mm further out than stockies if my calculations are right :S
-
Hid's,whats The Best Brand? And How High Can I Go?
PewPew replied to show.it.off's topic in Exterior & Interior Styling
My set are cheapies (<$100) from eBay as well. They're fine (so far :S), and didn't have any dramas installing em -
Mmmmm yeah. Gunmetal is meaaaan. Mine new rims are heading off to the powdercoater's tmr afternoon
-
Isn't the only difference between series 1 and series 2 the color? I did mine with 2 cans of $15 spray paint from Autopro. Paint chipped easily, especially around the nuts when removing wheels. But since they're not exactly anything special, didn't bother me much and I just touched those up with some permanent marker. Shh don't tell anyone If I was you, I wouldn't go all out and pay hundreds of dollars to powdercoat or paint GTT stockers. 34 R rims on the other hand...
-
Hid's,whats The Best Brand? And How High Can I Go?
PewPew replied to show.it.off's topic in Exterior & Interior Styling
Theres like 184y12804h180 of these on the first page of Google images -
Are you gonna cut a hole in your bonnet under that or just bolt it on for teh lulz?
-
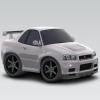
I'd say it's like buying a Nissan with a "NISSAN" badge on the boot, or LMGT4's with the NISMO decal That's how it comes out of the factory.
-
I was leaning towards just SSR as well. Thanks for the input guys
-
Hid's,whats The Best Brand? And How High Can I Go?
PewPew replied to show.it.off's topic in Exterior & Interior Styling
I did mine myself on my GTT and it took just over half an hour. Right side took about 25 mins.. but after I did one side, the other side was piss Not very complicated, just some screwing, unscrewing, plugging and unplugging -
Ooooh I like it
-
Hid's,whats The Best Brand? And How High Can I Go?
PewPew replied to show.it.off's topic in Exterior & Interior Styling
I'm guessing from your profile that you have an r34? If you have the stock XENON headlights, it's as simple as. 1. Unscrewing your bulb cover. 2. Take out the old bulb, plugging the existing connections into the ballast. 3. Plug the new bulb into the ballast and put it back where the old one was. 4. Mount the ballast. -
+1 I'll have to agree with Julz. Most people call it the Nismo kit but it's actually a factory option made by Altia.
-
So yeah I just picked up some new SSR Type C-RS rims and they're looking a bit dull in the factory gold. Gonna get them powdercoated in gunmetal and looking to get some decals from SSR because everyone knows each decal adds 5HP Just undecided between getting just the SSR ones, or both SSR and Type C-RS. I have a white 34 with Impul sides, black Eastbear lip and red calipers. What do you guys think? Here are some pics:
-
^ Post number 1337 Thanks for the advice guys, will probably take to it with a sponge soon...after the weather clears up a bit
