Jump to content
SAU Community

Recommended Posts

hi guys

Just having a browse on the UAS website and came across their 'cold air induction' snorkel and 'UAS alloy air box' for the 32 GTR

Unfortunately there arent any pics next to the items.

Is anyone using either of these on their GTR? Or do you have any pics?.....even past experiences with these products?

For the price they dont seem too bad and if there is actually a decent and cheaper alternative to the ARC box that enable you to keep pods, then im all ears :(

Heres the link for a reference (nismo.com.au ->products -> intake and cooling)

Btw they list the airbox for $195 and snorkel for $250

cheers

Link to comment
https://www.sau.com.au/forums/topic/160806-uas-32gtr-snorkel-and-alloy-airbox/
Share on other sites

thanks for the replies guys. I wasnt looking for pics on cars, its just when i looked last night they had no pic next to the description.

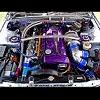
it looks as though the snorkel runs from the front bumper slits and then up through the guard which would be just as effective as my set-up where ive run some ducting through the bumper slits, through a hole in the guard and into the front of a modified stock airbox which is a complete sealed system.

And youre right, the 'air box' is simply a cold air partition. thought it was too good to be true :D All though ill give it kudos, it looks nice and would do an ok job with a cold air feed whilst letting you retain pods

so where it stands : made my own snorkel and cold air feed for $25 (cost of piping)

Bought a GTR airbox to replace pods and modified for free $150

All up ive spent $175 instead of $445 plus postage and can sell the pods to cover costs. yay

Now the question is...would their costly setup be better? More people should give the stock airbox a chance :huh:

heres the pics as requested...

you can see the ducting from the front bumper. I had to squeeze it through the little gap and lube it with some vasoline haha cause i couldnt be bothered taking the bumper off.

This ducting goes up through the guard and comes out in front of the airbox.

I had to hacksaw some of the lip off the airbox where the entry is. Where the plastic snorkel would normally attach to. What this does is give the ducting a straighter path into the airbox which keeps the diameter of the ducting at its largest.

i bought the ducting from a motor shop and its the Monza brand and is just ribbed convoluted tubing, about a meter in length. Approx 4 inches in diameter.

post-10672-1174301136.jpg

post-10672-1174301168.jpg

post-10672-1174301447.jpg

the airbox doesnt sit as flat as id like it but the bonnet still closes

The airbox is also against the Greddy pipe but i have orientated in a way that both can be friends (ie. rotated slightly)

Resonator? Is that the plastic behind the headlight that the original snorkel plugs into? i wondered what that was. how do i remove it?

nah see in your second pic through the duct there is a plastic thing that looks like little squares of chocolate? that's the resonnator (see pic)

that runs up into the bottom of the airbox AFAIK and keeps intake noise down or something... lol

mine was full of water so we binned it lol

post-1486-1174303976.jpg

ohhh i wondered what that radiator type hose went to

i guess anything that saves weight is worth getting rid of.

Whats the best way to get to it? front bumper off? or go from the top?

cheers Ronin

Create an account or sign in to comment

You need to be a member in order to leave a comment

Create an account

Sign up for a new account in our community. It's easy!

Register a new account

Sign in

Already have an account? Sign in here.

Sign In Now


  • Latest Posts

    • The final part arrived today to un-clampify and simplify the intake Who would have though a 1/2" hose stainless bulkhead fitting designed for below waterline bilge pumps would be what I needed Test fit on a 3" offcut I had laying around to see if it would work, and it worked a treat All going well the intake will be on its "final version" tomorrow 
    • Good luck on the weekend mate
    • Must have been an absolute nightmare to drive when the power steer was out, the rack ratio/wheel size/caster is all set up for power assistance
    • Welcome to SAU, what are you looking at buying?
    • I checked the injectors again (1 and 2, since they’re easiest to access) to make sure they weren’t clogged. Even though the entire fuel system had been cleaned, I wanted to be certain. Everything looked clean, so I reinstalled and connected everything. When I started the car to confirm everything was okay, it immediately revved up high, so I shut it off straight away. I checked to see if I’d missed a vacuum hose or something, but everything was connected. On the second attempt, the car ran without the high idle, but I noticed a distinct “compressed air” sound coming from the engine bay. Tracing the sound, I pushed injector #6 forward slightly and the noise stopped — it turned out it wasn’t seated properly, despite the fuel rail being bolted down. While holding it in place, the car idled steadily without stalling and ran for over 5 minutes. At this point, I pulled all six injectors out just in case I hadn’t seated them correctly or dirt had gotten onto the O-rings. Unfortunately, I discovered that I had damaged 3 out of 6 injectors (the OEM 270cc ones) during installation. So yes, this was my fault. Since only the pintle caps were damaged, I’ve ordered a Fuel Injector Service Kit from NZEFI to refurbish them. In the meantime, I reinstalled my new injectors – the car now idles fine for over 15 minutes without stalling. I have not attempted to drive it so far. It’s not perfect yet, as it hesitates when the throttle is pressed, but it’s a big improvement. Unplugging the IACV with the new injectors idles at around 800rpm, even with the IACV screw tightened fully. But this is probably due to tune.
×
×
  • Create New...