
Announcements
-
Similar Content
-
-
Latest Posts
-
 sold listed as a Tomei LSD 1.5 Way For 1998+ Nissan Skyline ER34 25GT RB25DE w/Open R200 https://www.ebay.com/itm/174006114594?campid=5338967980&mkevt=1&mkcid=1&toolid=10050&customid=&mkrid=711-53200-19255-0&loc_physical_ms=108689&loc_interest_ms=&campid=5338967980&mkevt=1&mkcid=1&toolid=10050&customid=71883f2ccc571356e0a757bc7adfdde2&mkrid=710-53481-19255-0&loc_physical_ms=108689&loc_interest_ms= it went in like butter all gears, alignment, back lash etc, rotation and clearances correct, and if rolling all rotates smooth and free when coasting down road , clutch in or out over 10 mph smooth... its the binding, clunking and jerking from a stop that is most concerning, also seems like its going to tear the tires off in 10 miles of normal road driving.
 -
 What 1.5 way? There's no such thing really as a 1.5 way, just different ways of explaining 2 ways with different ramp rates. HOWEVER. In any driving in a straight line your 1.5 or 2 or 1.7 way should have no clunking at all. With the clutch fully depressed the diff should be silent (unless it's welded but I'm assuming it's not). Something aint right here.
 -
Clutch is a spec brand, new clutch system,( PP, flywheel, friction disc, etc. pull type) installed 100 miles ago, with no problems.
-
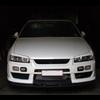
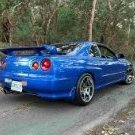
looking for some help and maybe some insight on others experience with a new LSD. R34 GT ran and drove beautifully, but always alot of grip loss due to the open R200 rear end, so I just installed a new 1.5 LSD way into the stock open R200 for a ER34. Simple. Everything seemed right. I test drove for the first time this weekend. as I started to back out the garage the first time slowly with tires straight it sounded and felt like I had a loose or half disconnected drive shaft...that was clucking around loose and shaking entire vehicle, and making it feel like the trans clutch was spontaneously slipping then grabbing very roughly while just letting out pedal slowly. I backed it out went to pull forward with the same noise, shake and slip grab feeling with hesitation, I turned the tires to back out more and then pulled ahead some same thing but worst because of added wheel resistance (which that I expected) puzzled … pulling it back in checking everything over and finding nothing wrong, I tried it the next day. same thing, couldn’t believe how it shook everything again making a terrible noise and making it feel like the trans clutch was slipping and grabbing, but I got it out of garage into the driveway, got it straight, drove forward and then reveres a few times in a straight line everything shaking , causing what felt like clutch slip and grab every time, sounded like right behind front driver tire and I could feel it in the floor board with my feet,... worst right when beginning to let clutch pedal out to engage slightly, shuttering and sounding terrible along the way…I managed to slowly get down the road, babying it the whole way, once I was rolling (out of 1st) seemed to be better and between shifts, then clutch felt closer to normal…not slip/ grab etc., but back down to any stop, straight road or turning, same thing. Made no difference if all tires were straight or if I was turning. All other gauge read out correct. with in 2 miles as planned I reached the empty parking lot and performed the break in procedure that came with lsd, essentially to drive in a figure 8 a bunch. Did this, binding chattering, and shaking the car the whole way. I drove it back home seemed somewhat normal once I was in straight line and past 10 mph or so, and I know it will “bind” on corners and cause some tires squeal when turning especially from a stop, but when I begin to move it still causes what feels like the trans clutch to slip and jerk badly as well as shaking the entire car, and sounds terrible, that I didn’t expect. I used the fluid they supplied with LSD kit and did the breaking, planning to change fluid as they suggest after breaking, but wondering will it get smoother or less aggressive with use? maybe a 1.5 is just too aggressive for normal road driving? I have a LSD that I put in my 71 cuda when I restored it, with amazing smooth , quite yet effective results. Different style LSD but that ones a joy to drive. maybe expecting too much from this R200?
-
 Join SAU NSW for a flame-grilled feed & flame-spitting cruise! Sunday 17th August 2025 3:30PM Meeting Archies Flame Grille Sylvania Waters 4:45PM Cruise Departure 5:15PM Arrival at Cape Solander Kurnell Meet Location: Archies Flame Grille Final Destination: Cape Solander Kurnell *Disclaimer* There will be a lead and follow car so no one should get lost. If you would like to attend or bring others along please put your name down and a +1 as numbers will be needed prior! This is NOT a race and we will all be adhering to all road rules. If this is what you want please come to one of our many track days. This is an official SAU:NSW event and will be run under a CAMS permit. One of the things that really sets our club apart is our commitment to being true enthusiasts. When on normal roads we strive to maintain good relations with the authorities as well as the public in general. When attending one of Skylines Australia NSW events please try to: • Be aware of surrounding environment and act accordingly. • Drive courteously on the state’s roads as a true enthusiast should. • Understand how important it is to maintain the good name of SAU NSW and thus, treat others accordingly. • Any misbehavior will not be tolerated and you will be asked to leave.
-


Recommended Posts
Create an account or sign in to comment
You need to be a member in order to leave a comment
Create an account
Sign up for a new account in our community. It's easy!
Register a new accountSign in
Already have an account? Sign in here.
Sign In Now