

Announcements
-
Similar Content
-
-
Latest Posts
-
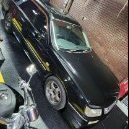
By AnimalGarage · Posted
Some of the east coast US Stagea got together this past weekend at Lime Rock Park in CT for Grid Life Circuit Legends. This is probably my favorite pic of the shoot with @Morgan.Mundahl on IG. Hope we get more stags out next year! i think I spotted 5 other than my own at the event. -
By AnimalGarage · Posted
Hi Cody, If you are looking for a simple "bolt in bolt out" solution, I may be able to help via trade. I'm swapping my auto RS4V from stock subframe to a reinforced S14 Rear subframe specifically for track duty. I was looking into different rear core options while the car was in air and I found your thread. My VLSD rear is freshly changed fluid/inspected. I will say even with Redline diff fluid it is still not as aggressive as I would like with the "sports" viscous core, and coming from a heavily modded evo with full drivetrain I'm looking for a bit more rotation with the throttle. I second this, the polyurethane bushings are pretty aggressive as is. If you're interested in the trade, I am driving out to Chicago in September for a time attack event. I could swing by and make the trade somewhere Sept 12-13th or 15-16th if you are interested and you have not already solved this issue yourself. -

-

By GabsReDeal · Posted
No, the panel filter is the standard dry one. Yes, I did clean the AFM with electrical contact cleaner. -
 Or shift gently. While the risk goes up as the power/torque does, not everyone breaks gearboxes.
-


1.thumb.png.36afd656b26d55f5d425fc76e21561f2.png)


Recommended Posts
Create an account or sign in to comment
You need to be a member in order to leave a comment
Create an account
Sign up for a new account in our community. It's easy!
Register a new accountSign in
Already have an account? Sign in here.
Sign In Now