Jump to content
SAU Community

Recommended Posts

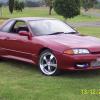
Item: 1994 Nissan S14/200sx with evil eye conversion, 207000km on the chassis, 25000km on forged motor, 5 speed manual, rego until March 2011

Location: Western Sydney (near Penrith)

Specs as follows:

Engine/Electronics:

Fully forged SR20 bottom end (has 25000km on it since install - CP pistons with 86.5 bore, Eagle rods, ARP headstuds, ARP mainstuds, crankshaft machined and balanced)

HKS metal head gasket 1.2mm

Trust rocker arm stopper

brand new oil pump

brand new water pump

brand new timing chain and tensioner

diff and gearbox fluids changed 10000km ago

high flowed T28 turbo (tuned at 19psi)

HKS SSQ BOV

550cc injectors

Apexi AVC-r electronic boost controller

Apexi power fc j-detro with hand controller and air flow meter removed

direct intake pipe from K&N pod filter to the turbo

Coolingpro aluminium radiator

Hi Octane radiator air guide

Apexi 1.3kpa radiator cap

heavy duty racing grade blue radiator hoses

Hybrid front mount intercooler

Hybrid vacuum distributor

blue racing grade vacuum hosing (with spare length)

Apexi aluminium induction box for pod filter

Walbro 500hp fuel pump

mandrel bend 3 inch exhaust system from the turbo back with sports cat converter and 4 inch X-Force cannon (with silencer aswell if required)

Tien Super Street suspension

adjustable caster bushes

full adjustable camber kit

all front bushes replaced with new urethane bushes

Cusco front and rear strut braces

(have dyno sheet for 215.9rwkw)

Interior:

Sparco X-Fast gear knob

Sparco steering wheel

leather “Silvia” embossed gear boot

2 x Monxa SP12 reclinable sports seats

“Silvia” embossed vinal rear seat cover (black and light blue)

colour coded dash (same colour as exterior - centre console lid, ignition barrel surround, dash cluster surround, gearbox lid, stereo surround, air conditioner surround)

Exterior:

Genuine Uras S14 Type S full kit (front bar, rear bar side skirts) - imported myself from Japan

Uras 25mm wide vented front guards

full respray in Opal (blue base layer with purple and green pearl)

Lenso D1r 5 spoke rims - black painted centre with polished lip (275/17/40 rear and 245/17/40 front – 98% Sumitomo rubber)

5Zigen lock nuts made of aircraft alloy

S15 “lightening bolt” badge on bonnet

personalized number plates (black with metallic silver writing)

smoked tail lights with garnish, smoked front bar blinker, smoked front corner blinker (have original tail lights and garnish aswell if required)

shaved ariel hole and spoiler holes

30% tinted windows

Stereo:

JVC KW-AVX810 double din dvd player (dvd-r, dvd+r, cd-r, mp3, avi, divx, usb input, SD memory card reader, optional input for reversing camera, has bluetooth with module for most motorola phones)

pair of alpine 6½ inch 3 way splits with cross overs (front doors)

pair of alpine 6½ inch 2 ways (rear parcel shelf)

pair of Clarion 10 inch subwoofers

Clarion V-Net 450 amp

have receipts for almost everything since I purchased the car in 2007. all engine work was done by Race Solutions in Penrith, dyno tuning was done by Hitman in Penrith and all body work was done by Smooth Autostyle in Homebush.

Reason for Selling: Time to allow someone else to enjoy it.

Contact Details: Mobile number is 0412969751 or you can email me at [email protected] or simply PM me through here and I'll get back to you...

Price: $11 500 ono (No Swaps)

Recent Pictures:

post-14943-1288662972_thumb.jpg

post-14943-1288663028_thumb.jpg

post-14943-1288663099_thumb.jpg

Link to comment
https://www.sau.com.au/forums/topic/342720-94-s14-with-series-2-front-end/
Share on other sites

  • 2 weeks later...
  • 2 weeks later...

Create an account or sign in to comment

You need to be a member in order to leave a comment

Create an account

Sign up for a new account in our community. It's easy!

Register a new account

Sign in

Already have an account? Sign in here.

Sign In Now


  • Similar Content

  • Latest Posts

    • Even with the piston at TDC there was room for it to drop, but I don't think it can drop fully into the cylinder, the problem you have is that you need something pushing against the valve to hold it up so you have enough room to put the new stem seal on and the spring etc.  I used compressed air only because putting rope in the cylinder seemed a bit risky to me, I know people have done it countless times before like this. Overall it's a pain in the ass job. Honestly you'd probably be better off taking the head off because the risk of dropping something in the engine and the finicky-ness of it all is very stressful. If you are going to attempt it though i 10000% recommend a 36050 valve spring/keeper tool. I had both the traditional lever type and after doing 1 cylinder it was absolute pain to get those valve keepers in place, even with 2 people. That 36050 is amazing, you do have to push hard to get them in place but it works perfectly almost every time. Back to my actual issue I think my engine is just tired and old and the rings have gone bad. The comp numbers (cold, no oil) were: Cyl 1 -129psi Cyl 2 - 133psi Cyl 3 - 138psi Cyl 4 - 137psi Cyl 5 - 157psi Cyl 6 - 142psi   Cylinder 5 and 6 having the most carbon on them.
    • Who did you have do the installation? I actually know someone who is VERY familiar with the AVS gear. The main point of contact though would be your installer.   Where are you based in NZ?
    • Look, realistically, those are some fairly chunky connectors and wires so it is a reasonably fair bet that that loom was involved in the redirection of the fuel pump and/or ECU/ignition power for the immobiliser. It's also fair to be that the new immobiliser is essentially the same thing as the old one, and so it probably needs the same stuff done to make it do what it has to do. Given that you are talking about a car that no-one else here is familiar with (I mean your exact car) and an alarm that I've never heard of before and so probably not many others are familiar with, and that some wire monkey has been messing with it out of our sight, it seems reasonable that the wire monkey should be fixing this.
    • Wheel alignment immediately. Not "when I get around to it". And further to what Duncan said - you cannot just put camber arms on and shorten them. You will introduce bump steer far in excess of what the car had with stock arms. You need adjustable tension arms and they need to be shortened also. The simplest approach is to shorten them the same % as the stock ones. This will not be correct or optimal, but it will be better than any other guess. The correct way to set the lengths of both arms is to use a properly built/set up bump steer gauge and trial and error the adjustments until you hit the camber you need and want and have minimum bump steer in the range of motion that the wheel is expected to travel. And what Duncan said about toe is also very true. And you cannot change the camber arm without also affecting toe. So when you have adjustable arms on the back of a Skyline, the car either needs to go to a talented wheel aligner (not your local tyre shop dropout), or you need to be able to do this stuff yourself at home. Guess which approach I have taken? I have built my own gear for camber, toe and bump steer measurement and I do all this on the flattest bit of concrete I have, with some shims under the tyres on one side to level the car.
    • Thought I would get some advice from others on this situation.    Relevant info: R33 GTS25t Link G4x ECU Walbro 255LPH w/ OEM FP Relay (No relay mod) Scenario: I accidentally messed up my old AVS S5 (rev.1) at the start of the year and the cars been immobilised. Also the siren BBU has completely failed; so I decided to upgrade it.  I got a newer AVS S5 (rev.2?) installed on Friday. The guy removed the old one and its immobilisers. Tried to start it; the car cranks but doesnt start.  The new one was installed and all the alarm functions seem to be working as they should; still wouldn't start Went to bed; got up on Friday morning and decided to have a look into the no start problem. Found the car completely dead.  Charged the battery; plugged it back in and found the brake lights were stuck on.  Unplugging the brake pedal switch the lights turn off. Plug it back in and theyre stuck on again. I tested the switch (continuity test and resistance); all looks good (0-1kohm).  On talking to AVS; found its because of the rubber stopper on the brake pedal; sure enough the middle of it is missing so have ordered a new one. One of those wear items; which was confusing what was going on However when I try unplugging the STOP Light fuses (under the dash and under the hood) the brake light still stays on. Should those fuses not cut the brake light circuit?  I then checked the ECU; FP Speed Error.  Testing the pump again; I can hear the relay clicking every time I switch it to ON. I unplugged the pump and put the multimeter across the plug. No continuity; im seeing 0.6V (ECU signal?) and when it switches the relay I think its like 20mA or 200mA). Not seeing 12.4V / 7-9A. As far as I know; the Fuel Pump was wired through one of the immobiliser relays on the old alarm.  He pulled some thick gauged harness out with the old alarm wiring; which looks to me like it was to bridge connections into the immobilisers? Before it got immobilised it was running just fine.  Im at a loss to why the FP is getting no voltage; I thought maybe the FP was faulty (even though I havent even done 50km on the new pump) but no voltage at the harness plug.  Questions: Could it be he didnt reconnect the fuel pump when testing it after the old alarm removal (before installing the new alarm)?  Is this a case of bridging to the brake lights instead of the fuel pump circuit? It's a bit beyond me as I dont do a lot with electrical; so have tried my best to diagnose what I think seems to make sense.  Seeking advice if theres for sure an issue with the alarm install to get him back here; or if I do infact, need an auto electrician to diagnose it. 
×
×
  • Create New...