Jump to content
SAU Community

Recommended Posts

Realistically 12:1 is fine.

Just don't go lean and run less ignition timing to make more power at the expense of reliability.

If it were my car and I was heading down Mallala I would want afr's around the mid to high 11's, no higher.

We did kind of get of track a little, my origional post stated that bad tuning i.e lean afr's and retarded ignition timing is what causes problems. Then some how we got in to the whole advanced ignition timing = more heat or what ever.

Basically you want the heat in the combustion chamber (where it can be used), you don't want it spilling out in to the exhaust, so to speak.

But as I said above, you really don't know what is the most reliable until you tune it in conjunction with an egt guage.

  • Replies 1.8k
  • Created
  • Last Reply

Top Posters In This Topic

Top Posters In This Topic

Posted Images

So what is it then?

You would rather what? Tune lean run less ignition timing?

or tune a little richer and run more ignition timing?

I am talking about a whole package, not just playing with ignition timing or just with fuel.

Consider most hipo motors, how they are tuned.

They don't lean the suckers out and run stuff all ignition timing, they tend to run them richer and keep the ignition timing in there, especially around peak torque.

Obviously if you dial in too much fuel you will see egt temps climb due to what is known as afterburn. Its a balancing act, if you really hammer the car around the local track I would definitely consider investing in an egt temp guage. Its the only way to achieve the safest tune.

I should also mention the japs tend to tune a little richer and run a little more ignition timing in their drift cars.

I've done quite a bit of research in to the theory of tuning and feel I have quite a good idea what is going on.

A richer tune that allows a little more ignition timing is a safer tune.

EDIT: ESPECIALLY for ceramic turbine turbo's.

:)

Correct, theres no point leaning out your afr and getting pinging and possible detonation under high work loads. As you said much safer to run it a little rich and tinker with the timing.

Also on the topic of these boost controllers, i have read quite a few pages and really dont have time to read 25 so if someone can vouch they work well on an R32 GTS-t/GTS4 i'l just get one. Thanks in advance :)

Hey all,

Just wanted to say, I emailed Mark on 4/10, he got back to me on 5/10, I transferred the $$ on 5/10 and got the controller today 13/10. This includes a weekend so realistically I received what I paid for within 4-5 days of the funds clearing.

FYI I took some photos of the valve installed on my R34 GT-T. My mechanic helped me do this and I'm *very* happy. Initially it drove pretty much as standard (I don't have a standard turbo though, but computer + fuel system is stock), then wound it in... ummm a bit too far and Mark is not kidding, you only need to go one quarter of a turn at a time.

Let's just say I know what boost cut feels like. :lol:

So overall it's now set about 2/3 a turn in (i.e. more boost) from how it was sent to me and the car is hitting 13-14 PSI then easing back to about 12-13 PSI towards redline. Haven't noticed any significant spike other than maybe 1 PSI when boost initially kicks in, certainly not a drama. No detonation and the engine doesn't feel like it's leaning out. A PowerFC and dyno run will confirm this...

For the install we pissed off the piece of piping with the restrictor in it (running from the inlet side) and the entire "3-way" setup. Used fairly long lengths of new tubing so the valve can be hidden under the intake pod - will tidy this up later.

See the pics for what I mean. Took about 10 mins tops, then about 5 test drives around the block to adjust boost (run in 3rd gear).

Overall: happy customer. :D

post-17890-1129203941.jpg

post-17890-1129203959.jpg

post-17890-1129203975.jpg

post-17890-1129203992.jpg

post-17890-1129204015.jpg

Regarding the stock restrictor, how many people have removed this?

I am extremely happy with my boost controller. Chucked the turbosmart one away.Initially when I put it on it didn't hold the boost as well as i thought it should. I made a few enquries. I pulled off and plugged the lines fron the factory solenoid and removed the plug from it as well.The boost rises quickly to 15 psi and drops only back to 13psi, not 8-9.

great product, i'm using it to run 22 psi. the only drama i have had is when runing the hose from the intake manifold to the controller. the seat the ball sits on has built up with carbon and prevented it from sealing, this causes a loss of boost and has to be taken off the seat to get the boost back up. the best ways to stop this from happening is to run an inline filter, or source boost closer to the turbo where the air is cleaner.

im gonna buy one.

ill see how it goes.

i have two boost controllers:

a profec a, was in a plastic bag in the glove box when i baught my car. the sellers husband said that it was in jap and that he wassnt able to tune it or some thing liek that?????

and a turbo smart old skool duel stage boost controller, the seller said its set at stock and 12 psi.... however when i flick the switch theres really no difference,,,, so im assuming somethings broke, havnt had time to look at it.

anyways, ill tak the easy way out and get this little thingy... hopefully it doesnt spike liek it says it doesnt... very hard to beleive tho.

wish me luck

Hello all, good to see all the discussion about the Turbotech.. ;)

And I especially get a buzz out of seeing my little design installed under the bonnet so keep the pics coming its great !!!

A few people have had difficulty reaching me lately as I had to go out of town for a few days for a family illness thing but all has returned to normal now..

Cheers

Mark :D

Ok.. finally got around to installing this bastard..

FCUK ME.. What a son of a gun to get the bloody vacuum hose off..

Took me about 20minutes and alot of grunt to get it off.. finally worked out that if you twist.. and twist.. and twist they come off.. Didn't find a restrictor..

Pretty much just replaced the T-Piece with marks controller.. first run.. boosted to about 0.75Bar.. finally got it down to about 0.65Bar.. spikes a little bit so still goto fine tune it..

haven't blocked off the T piece hose or the solenoid, just completely removed it from the wastegate hose..

Goto say.. good fun driving with it, comes on boost hard, might wind it up harder this weekend after service.

hey all,

another user to have just installed, and seem to be having problems. im certain i installed it all correct, but it seemed to over boost. here a pic of my setup..

Sv402621.jpg

PLEASE note the screw wasnt like that when i drove it, that was before i put it all back together (obviously). i am in doubts though that i have the right hose for pressure/vacuum, but thats the one everyone says.

after it overboosted, i had the car idelling and popped the hose off the bottom of the turbotech, there was no vacuum at all. im even starting to think the hose fell off the compressor housing, but its gotten dark now and i cant have a real good look.

can someone confirm my setup for me please.. or other opinions (beside the spring being stuck in the thread, the ball falling etc im sure the turbotech is working fine).

cheers :)

I'll be ordering one of these things. If anyone knows me from other forums, I don't have a Skyline, but I will be needing one of these to limit boost.

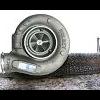
I have an ST205 GT-Four with a twin-actuator design, and with the second actuator enabled the boost peaks at 1.55 bar (about 22-23psi) in third gear, and with the second actuator disabled it still gets 1.15 bar in third gear. if anyone knows the GT-Four the CT20b is a steel-wheel turbine, quite a large turbo for a street car, so it's very laggy (ie. fullboost at 4000rpm, a very large kick!):

turbo1.jpg

I've just emailed Mark and hopefully I will get one of these at the discounted rate, even though I don't drive a Skyline :D it pays to be a forum whore sometimes... ;)

edit: I was reading through this thread thinking it was pretty short - got to about the 9th page, then went to the last page. :) 25 pages! so I fast-forwarded and just sent Mark the damn email. Have I missed anything important??

Edited by tangcla

Create an account or sign in to comment

You need to be a member in order to leave a comment

Create an account

Sign up for a new account in our community. It's easy!

Register a new account

Sign in

Already have an account? Sign in here.

Sign In Now


  • Similar Content

  • Latest Posts

    • From there, it is really just test and assemble. Plug the adapter cables from the unit into the back of the screen, then the other side to the car harness. Don't forget all the other plugs too! Run the cables behind the unit and screw it back into place (4 screws) and you should now have 3 cables to run from the top screen to the android unit. I ran them along the DS of the other AV units in the gap between their backets and the console, and used some corrugated tubing on the sharp edges of the bracket so the wires were safe. Plug the centre console and lower screen in temporarily and turn the car to ACC, the AV should fire up as normal. Hold the back button for 3 sec and Android should appear on the top screen. You need to set the input to Aux for audio (more on that later). I put the unit under the AC duct in the centre console, with the wifi antenna on top of the AC duct near the shifter, the bluetooth antenna on the AC duct under the centre console The GPS unit on top of the DS to AC duct; they all seem to work OK there are are out of the way. Neat cable routing is a pain. For the drive recorder I mounted it near the rear view mirror and run the cable in the headlining, across the a pillar and then down the inside of the a pillar seal to the DS lower dash. From there it goes across and to one USB input for the unit. The second USB input is attached to the ECUtec OBD dongle and the 3rd goes to the USB bulkhead connected I added in the centre console. This is how the centre console looks "tidied" up Note I didn't install the provided speaker, didn't use the 2.5mm IPod in line or the piggyback loom for the Ipod or change any DIP switches; they seem to only be required if you need to use the Ipod input rather than the AUX input. That's it, install done, I'll follow up with a separate post on how the unit works, but in summary it retains all factory functions and inputs (so I still use my phone to the car for calls), reverse still works like factory etc.
    • Place the new daughterboard in the case and mount it using the 3 small black rivets provided, and reconnect the 3 factory ribbon cables to the new board Then, use the 3 piggyback cables from the daughterboard into the factory board on top (there are stand offs in the case to keep them apart. and remember to reconnect the antenna and rear cover fan wires. 1 screw to hold the motherboard in place. Before closing the case, make a hole in the sticker covering a hole in the case and run the cable for the android unit into the plug there. The video forgot this step, so did I, so will you probably. Then redo the 4 screws on back, 2 each top and bottom, 3 each side and put the 2 brackets back on.....all ready to go and not that tricky really.      
    • Onto the android unit. You need to remove the top screen because there is a daughterboard to put inside the case. Each side vent pops out from clips; start at the bottom and carefully remove upwards (use a trim remover tool to avoid breaking anything). Then the lower screen and controls come out, 4 screws, a couple of clips (including 3 flimsy ones at the top) and 3 plugs on the rear. Then the upper screen, 4 screws and a bunch of plugs and she is out. From there, remove the mounting brackets (2 screws each), 4 screws on the rear, 2 screws top and bottom and 3 screws holding in the small plates on each side. When you remove the back cover (tight fit), watch out for the power cable for the fan, I removed it so I could put the back aside. The mainboard is held in by 1 screw in the middle, 1 aerial at the top and 3 ribbon cables. If you've ever done any laptop stuff the ribbon cables are OK to work with, just pop up the retainer and they slide out. If you are not familiar just grab a 12 year old from an iphone factory, they will know how it works The case should now look like this:
    • Switching the console was tricky. First there were 6 screws to remove, and also the little adapter loom and its screws had to come out. Also don't forget to remove the 2 screws holding the central locking receiver. Then there are 4 clips on either side....these were very tight in this case and needed careful persuading with a long flat screw driver....some force required but not enough to break them...this was probably the fiddliest part of the whole job. In my case I needed both the wiring loom and the central locking receiver module to swap across to the new one. That was it for the console, so "assembly is the reverse of disassembly"
    • But first....while I was there, I also swapped across the centre console box for the other style where the AV inputs don't intrude into the (very limited !) space.  Part# was 96926-4GA0A, 284H3-4GA0B, 284H3-4GA0A. (I've already swapped the top 12v socket for a USB bulkhead in this pic, it fit the hole without modification:) Comparison of the 2: Basically to do the console you need to remove the DS and PS side console trim (they slide up and back, held in by clips only) Then remove the back half of the console top trim with the cupholders, pops up, all clips again but be careful at the front as it is pretty flimsy. Then slide the shifter boot down, remove the spring clip, loose it forever somewhere in the car the pull the shift knob off. Remove the tiny plastic piece on DS near "P" and use something thin and long (most screwdrivers won't fit) to push down the interlock and put the shifter down in D for space. There is one screw at the front, then the shifter surround and ashtray lift up. There are 3 or 4 plugs underneath and it is off. Next is the rear cover of the centre console; you need to open the console lid, pop off the trim covering the lid hinge and undo the 2rd screw from the driver's side (the rest all need to come out later so you can do them all now and remove the lid) Then the rear cover unclips (6 clips), start at the top with a trim tool pulling backwards. Once it is off there are 2 screws facing rearwards to remove (need a short phillips for these) and you are done with the rear of the console. There are 4 plugs at the A/V box to unclip Then there are 2 screws at the front of the console, and 2 clips (pull up and back) and the console will come out.
×
×
  • Create New...