

MearCat
-
Posts
472 -
Joined
-
Last visited
-
Feedback
100%
Content Type
Profiles
Forums
Events
Gallery
Media Demo
Store
Everything posted by MearCat
-

Turbo Temperature Probe Install Location
MearCat replied to MearCat's topic in Engines & Forced Induction
The O2 sensor in the RB's are in the (dump) pipe straight after the turbo exhast housing - as is the case in most cars I would say. -
Turbo Temperature Probe Install Location
MearCat replied to MearCat's topic in Engines & Forced Induction
I should have said this before - I will not be putting the EGT probe before the turbo as I'm not willing to pull the turbo and manifold off to fit a temperature probe. R33S2 - yeah - I designed and made it myself. There's a bit of circuitry and programming behind it though. -
I have made a custom temperature gauge to show ambient, intake, oil and turbo temps. I have installed the ambient probe in the bumper area, intake probe right before the throttle body, oil probe in a filter sandwich plate but not sure on the turbo probe. I have the option of either having a probe that is mounted into the upper dump pipe right next to the flange (measures exhaust gas temp), or a thermocouple washer that is bolted directly onto the turbo exhaust flange (measures the turbo housing temp). Any opinions on which would be better? and why? The speed of the response of either thermocouple is very fast. I have attached a pic for those who want to see the custom gauge.
-
I have just bought a set - Has anyone got instructions on how to fit them? Not for drift setup that is.
-
If you wanted to read a single temp, as a cheap option I would suggest this thermometer from Jaycar http://www.jaycar.com.au/productView.asp?ID=XC0224 These are quite accurate and if the cable isn't long enough, you can solder some more wire on it without affecting it's accuracy too much. This reads from -50degC to +150degC too. My temperature gauge project is using thermocouples with braided stainless sheath to stop the wiring from frying around the turbo and engine - they are a little more expensive that std thermocouples that you get from Jaycar etc, but temperature probes and thermocouples genarally are not threaded. You will need a compression gland to seal around the probe. btw - See the attached pic for my weld & thread tap result
-
I did think of that but I talked a welder this morning and he said that the wall thickness of the cross over pipe is not really thick enough for a decent thread for (relatively soft) aluminium. I have got him to weld a small block of ally on the side on the pipe to increase the thickness and tap a thread through that block and the pipe wall instead. So I will now end up screwing the probes' compression gland directly into the pipe.
-
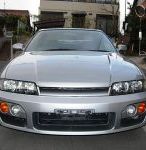
That rice valve is long gone. The pic I've used is when I first got the car. First thing I did was pull the BOV off and sell it. Bah - Stupid aftermarket show off valves.
-
I'm actually measuring 4 temps, with 3 of them using a K-Type thermocouple probe - mainly designed for testing flue gasses. I'll PM you with more details As for the engine bay - it came like that from Japan a few months ago! Nice eh?
-
Can it be TIG welded to brass though?
-
RE - The pic below... I have a brass nut which my temperature probe fits into and will be using it to measure intake temps. What is this intake piece (circled in red in the pic) made from? Cast Aluminium? Can it be soldered/brazed/welded to brass at all? If not, how else can I join this brass nut onto the intake pipe? Maybe a steel washer between the brass nut and intake pipe?
-
Remove the sensor from the cat and go to somewhere like Bunnings where they have those rack of nuts & bolts that you can check the thread size & pitch. To plug up the std sensor hole, just buy a bolt the same thread and length as the sensor and bolt it it in the cat. But be warned - if you just cut off the sensor wire from the car and leave the sensor in, there is a piece that is prone to (loudly) rattle around and give you the sh!ts.
-
The sensor is nothing but a heat activated switch for the orange "cat light" on the dash. You can indeed cut the entire sensor off (I only have a wire on my car now after i cut mine off) with no ill-effects. Most after market cats do not have a bung for the sensor anyway.
-
Yes that's right. Power FC's are for use on manuals only.
-
I wasn't thinking of selling any in the immediate future but in the long term I may look into how much it would be to get them manufactured in a ABS plastic or something similar, but don't hold your breath. Hence this thread to show people how to make them. Although, depending on feedback/demand .... As for holding it down, it doesn't actually need anything at all. There is a lip at the back of the dash which the back part of the pod stops it from moving back/front and at the front of the pod where it's contoured to the dash stops it from moving left/right. I was running 12psi tonight (on a cool 12degC evening) and at WOT & fast cornering and it didn't move at all. But the bottom of the pod is slightly raised from the dash level to allow to double sided tape/velcro just in case.
-
The final product, painted matt black (which matches the dash very well and doesn't reflect any sunlight). For those of you who are curious, the 3 orange and 1 red LEDs under the boost gauge are for my Axis/Hyperform shift light. Total Cost was ~$50
-
Pics of the nearly finished product. All that needs to be done is cut a small hole in the bottom/side to feed to tube and wiring through, and painting it.
-
Fibreglass halves have now been moulded/set, cut and sanded to form a single pod. Next step. Glass the 2 halves together...
-
Fibreglass halves have now been moulded/set, cut and sanded to form a single pod. Next step. Glass the 2 halves together...
-
The sunload sensor is just a LDR (Light Dependant Resistor) and is used by the climate control. When it detects eg. the sun has come out from behind clouds, the climate control cranks up the air con a little to account for extra heat that the sun would give heating up your car.
-
If you look at the pic on this post you'll hopefully see that the template is half blue, half white. What I did was mix some blue food colouring with water and dipped half of the plaster template into the water. Just like the old Colgate toothpaste ads on TV This line that runs down the length of the template and over the face separates it into about halves. So I mixed up another batch of plaster of paris, poured it into plastic container, waited for it to set a bit and then pushed the blue/white template (blue side down) into this plaster up to the line so that no more blue was showing. Waited for it to 95% set and pulled out the template. Then I mixed up another batch of plaster and pushed in the template (white side down this time) so that no more white was showing. What you should end up with two reverse (negative moulds) of the 2 halves of the gauge pod - which you can seal with wax, coat in a release agent (or oil) and fibreglass in them. Then pull the two pieces of fibreglass out, clean off the release agent and fibreglass the two seperate halves together. I hope that makes sense. NOTE : Make sure you cover the template in Vaseline before you push it into the plaster, otherwise you'll never get it out!
-
I bought a Greddy single pillar pod but have decided to go the way of having the gauge in the corner of my dash. See my thread HERE for my custom made one (not finished yet though). I believe that my design would give you better visibility (less obstructed) than any pod attached to the A-pillar and certainly less chance of getting defected.
-
When working with plaster of paris, white dust and marks get EVERYWHERE in your car. Once dry, the plaster wipes off easily with a a damp rag, but I highly recommend covering what you can with sandwich/Glad wrap to stop 1) the wet plaster sticking to anything when you first mix it up and it's setting and 2) the dry plaster marking everything it touches which white marks when you're fitting up any template to parts of the interior.
-
I got the two halfs of the mould done last night. I should get to do some fibreglassing into these moulds in the next few days. Once set, the 2 halfs will then be glassed together and then automotive bog used to patch up any small inconsistencies. The 2nd pic shows a pencil marking where the outer rim of the gauge (it's a 60mm Apexi EL2 boost gauge btw) will be situated.
-
These pods are now for sale - see HERE for anyone interested in purchasing them. I have many other gauge pods available now too - 180SX, S14, S15, Stagea, Forester, WRX... I thought I'd post a few pics of of my latest project for my R33 for those who are interested. My mate who has a WRX showed me a few pics of a gauge pod (made by AVO) that you can get for WRX/Liberty/Forester and sits at the bottom of the A Pillar. It's a nice alternative using a Greddy/Autometer style pod and drilling holes into you pillar and certainly more subtle that the A-Pillar pods. I looked around and sure enough, I couldnt find anyone who sells them for Skylines. The WRX ones are like $90 anyway. So I thought i'd make my own, using Plaster of Paris as a template, make a reverse mould also out of Plaster of Paris and then fibreglass into that mould. For those who are interested, here area couple of pics so far. All I did was mixed up a batch of approx 2L of Plaster of Paris, waited until it started to set (into a pretty gluggy consistency), poured it into a plastic bag and shoved it into the corner of the dash/windscreen/A-Pillar (see first pic). Once set, I pulled the plastic off and started shaping to roughly what I wanted with a file and rasp (see 2nd pic). There were a few holes and bits I had to mix more plaster to patch up, but it took about 3-4 hours to shape and sand it, minus the time it took for the patches to dry. The last couple of pics are progress so far. What do you guys think? Total finished cost of Plaster of Paris and fibreglass should be about $40
-
hehehe - what the heck are you trying to do? Fly away with that wing?!? I can see why the cops were attracted to your car. Best thing to do is get rid of the wing and put something a little more reasonably sized back on, otherwise you'll probably get more attention from the boys in blue than it's worth. I doubt the pits will give you a permit for that big T-Wing though.
