


stuartlaw_78
-
Posts
205 -
Joined
-
Last visited
-
Feedback
0%
Content Type
Profiles
Forums
Events
Gallery
Media Demo
Store
Everything posted by stuartlaw_78
-
Rebuild Pics, Etc For You All....
stuartlaw_78 replied to stuartlaw_78's topic in General Automotive Discussion
No worries mate.... if you need any help if and when the time comes around, I'll be more then happy to help you out if you need it. Doing it yourself is half the fun....! I have no regrets... Let me know if you go ahead with it..... -
Rebuild Pics, Etc For You All....
stuartlaw_78 replied to stuartlaw_78's topic in General Automotive Discussion
P.S.. I won't lie to you mate, some of the tools are quite expensive but some are quite cheap... work out what you really need and only buy them as you need them otherwise you'll end up with a heap of tools that you didn't need... ex: Torque wrench... ranges from $80 - $240 but stuff like ring compressor: $10 - $15 -
Rebuild Pics, Etc For You All....
stuartlaw_78 replied to stuartlaw_78's topic in General Automotive Discussion
I't depends how much of the work you want to do yourself... The main tools I used were... - pulley puller -ring compressor -torque wrench -heaps of sockets and spanners -breaker bar -engine hoist -engine stand -spark plug socket obviously... -allen keys - heavy duty chains for engine hoist and high tensile bolts.. (don't use normal bolts) -valve spring compressor -Dial gauge I'm sure I've missed several but forgive me, I'm tired..... - etc, etc.... That's the main tools though.. there are a few tools that you need if you want to check all tolerences, etc... to make sure everything is how it should be.. Do you have a Skyline manual?? At the front of that, it has all of the tools you need for the build. Mate. if you have half a brain, which I'm sure you do... patients, and commonm sense, you can do it!! It's not hard.... People get scared off by the whole idea, but it's not that hard... Just take your time... Take heaps of pics, and label everything as you go. Document everything then you can't go wrong... Is there anything you wanna know?? -
Rebuild Pics, Etc For You All....
stuartlaw_78 replied to stuartlaw_78's topic in General Automotive Discussion
Nah mate, I've never done any study in this field mate... got a manual... lots of determination, common sense, and patience!! I did do a lot of research as I was doing the rebuild and took my sweet time doing it... Asked a lot of questions, etc.... Why do you ask?? -
Rebuild Pics, Etc For You All....
stuartlaw_78 replied to stuartlaw_78's topic in General Automotive Discussion
Just a tip though for people.... if you decide to leave the timing belt cover off, make sure you put in spacers in behind the Crank Angle Sensor.. otherwise you'll have what happened to me... the CAS touches the Cam gear bolts, then the metal shavings get into the bearings of the CAS, it seizes up , then snaps the key and the whole spline off of the Exhuast gear... checl out this pic!!! -
Rebuild Pics, Etc For You All....
stuartlaw_78 replied to stuartlaw_78's topic in General Automotive Discussion
Thanks mate, it's been tough but rewarding.. Thanks for your advice as well... It runs like a dream.. *Touch wood*!! -
Rebuild Pics, Etc For You All....
stuartlaw_78 replied to stuartlaw_78's topic in General Automotive Discussion
That is true mate but it can still be done on the standard parts that remain.. We just went through everything and checked everything by the the specs... Your right though, it's not really something you do once mods are done... I've done just over 1,000kms and it seems to use a bit more fuel but I'm guessing that it's because I've been loading it up a bit up hills to bed in the rings... I haven't really reved it much passed 4 grand... been too nervous.. I might open it up a bit now though, I won't red line it yet though.... Performance is much better although I haven't done the ECU yet... it seems to pick up a lot better, that's probably got a lot to do with the turbo though... I love it... -
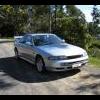
Hi all, I now have my Skyline back on the road after my long and extensive rebuild! I went ahead and did it all myself, except for the head recon and block machine work... I tell ya, it was an experience.. I'm glad I did it and will do it again for sure... I learnt so much and made a couple of mistakes along the way but it was well worth it.. Here are a few stages and pics of my rebuild.... If you are planning on doing this yourself or need to know anything, feel free to ask me, I may not know everything but I've learnt a hell of a lot doing this so feel free to ask me anything... I'll do my best to answer you questions... This here is the motor just before we were about to lift it out of the car... if only I knew what I was getting myself into!!! As you can see, we managed to get the hoist under the car but we had to jack up the car, rest it on the jack stands, so we could get the hoist legs under the car into the right position. I was so nervous that the bolts holding the chains onto the engine, were going to snap but they didn't. The chains were rated up to 700kgs and cost me $25 per meter!! I wanted the good stuff... We used an 8 1/2 tonne engine hoist so that was well and truely up to the task. We also used high tensile bolts so I was probably worrying about nothing.... Here's the engine, half way out... We had to make sure the transmission was sliding out with the engine as it should. It is actually a lot easier to take off and put on the transmission while they are both out of the car. I've tried lining up the trans input shaft to the clutch plate with the engine in and it can be damn hard.... Keep in mind, when getting to this stage, keep an eye on all of the pipes, brake lines, etc... they have a habbit of getting in the way. We were lucky enough not to have to take the A/C and power steering right out... They stayed in the car under the bonnet, fully connected and sealed... We just un bolted them from the car and pushed them aside. A tight fit but it works alright. Just thought I'd throw this one in.. We actually run the wheel jack under the trtans so as we pulled the engine/trans up and forward... the trans slides forward on the jack instead of hanging there or even worse, scrapping on the ground... As the trans slid off of the drive shaft, we tied the drive shaft up to the exhuast so it didn't knock against the ground.... This pic speaks for itself... It was at this point that I could see the state of the motor from the outside... It had quite a few leaks around it and was looking a bit tired. We managed to get all of the exteriors off of the engine with no hassles... We were very methodical, almost anal with our labling.. we labelled EVERYTHING that came off and wrote down on a notepad, that way, we would have no problems putting it back together. Worked a treat.... It was now that I peered into the exhuast chambers and could see that the vavle stem seals were stuffed because there was oil seeping down the valve stems from the top... The intake manifold has quite a few bolts holding it on and some are quite difficult to get to. Here is the top of the engine with the covers off... The cam shafts were in very good condition.... not really any wear marks on the lobs, etc which was a suprise... I later snap the front part of the exhuast cam but that's later... Here is the block with the head just removed.. I tell ya, the pistons were pretty nasty!! We later found 4 cracks in the block witch the machinist managed to fix while they got the block.... The head was in ok shap but there was so much shit under the valve seats... I got the hydraulic lifters pulled apart and bled.. they like new, only cost me $80 to do that....... Here was our fuel for the project!! Hehe.... Got us through those tough times... there were a few of those!!! I went through the build process and will give much more details about the build process very soon. I'm just sorting out the pics... This pic is the finished thing though... The biggest thing I can advise is... DONT start your motor until your completely 100% surely positive that the timing is right!!! This is a must otherwise when you turn that key, you'll have a motor that won't start because you've just bent your valves and you'll then have to rip the head off again and spend more money.. The rb motors... (well the rb25 anyway) have timing makers on the front covers for the cam gears and the crank gear has a dot that lines up with a marker on the oil pump... make sure they are all aligned together... Here is most of the specs..... Bored 20thou.. -Weisco oversized forged pistons. (They were about 8.4:1 comp but I've shaved the head slightly to bring the comp back up a bit...) -Shot peened rods. -polished crank (didnt need machining) -Everything was balanced and blueprinted. -Exedy Heavy Duty Clutch (30% more clamping force) I replaceed the thrust bearing, I would recommend you do that while the trans is off.... -The block got square decked as well. -High flowed the turbo.. (stage 3 - up to about 250-270 rwkw) -Fully recond head... (Porting on both sides and polish on the exhuast side) -Bled lifters -All new bearings of course!! -ARP head studs -ARP exhuast studs and intake -ARP conrod bolts -Airpod filter... -New water pump, oil pump and thermostat. (Recommended) -New CAS There is probably more but I'm tired... there will be more to come... keep your eyes open... I hope this has been a good read.....
-
Hi all, I think my CAS is faulty, ever since I replaced it, my engine has been pinging... Does anybody have one lying around for the RB25DET???
-
In that thread mate, what do you mean by "drive pulley keyway"? You mentioned that is was loose? Are you talking about the bolt that goes through to hold the pulley on? This pinging only seemed to happen after replacing the exhuast cam and the Crank Angle Sensor... Maybe the CAS is faulty yeah????
-
Thanks mate... I'll check it out...
-
Hi all, I've got a few parts for sale from my RB25DET... -Power steering pump (works fine) -Original pistons (in good cond, just need a clean up, X 6 of course) -Genuine Nissan head gasket (Brand new still in plastic) -Original head bolts (used - not sure if anyone would want them but there here anyway in case someone has a use for them) -Original clutch and pressure plate (Worked fine, didn't slip, I just wanted more clamping force because I'm running more boost, etc.. ) Just let me know via PM and we can go from there.....
-
Hi all... My car is pinging a bit under load and it's not to do with fuel becaused I'm using the 98 RON fuel... It doesn't matter how much I retard of advance the timing, it still pings... If a knock sensor has come off, can this caus the engine to ping???
-
This Has Never Happened Before!
stuartlaw_78 replied to stuartlaw_78's topic in General Automotive Discussion
I would love to be able ti use the cam still but it didn't just snap off the half moon part of it, it snapped the whole spline off of the cam down to the end!!! The whole piece was jammed into the CAS!! Nothing left for the CAS to grab onto caus it got snapped off down to the base!! I just brought another cam and fitted it last night... Runs like a dream and yes, I've now put some washers in place of the timing belt cover so the CAS doesn't touch the cam geard bolts.... A valuable lesson learnt but if this is the only mistake I've made with the rebuild, then I'm as happy as a pig in....... ;-) -
This Has Never Happened Before!
stuartlaw_78 replied to stuartlaw_78's topic in General Automotive Discussion
Then how does the sensor know what position the cam is in then if there is no pin left on the cam end... The sensor would have nothing to slide and lock into!? I'm confussed... -
This Has Never Happened Before!
stuartlaw_78 replied to stuartlaw_78's topic in General Automotive Discussion
Thanks all.. damn, I did so well with the rebuild too... Did it all and I stuff up something like this... feel like a damn idoit!! Ahh well, you live and learn I guess..... If anybody has an exhuast cam for the rb25det, let me know.. I have been told that the rb20det is exactly the sam cam so I can use that if I have to...... -
This Has Never Happened Before!
stuartlaw_78 replied to stuartlaw_78's topic in General Automotive Discussion
If I just put some washers on when I put the sensor on (the same thickness as the timing belt cover), that should solve the problem yeah?? once I get the new cam of course.... -
This Has Never Happened Before!
stuartlaw_78 replied to stuartlaw_78's topic in General Automotive Discussion
Yeah, I will try and take some pics of it.... keep an eye on this thread.. I'll post them here tomorrow.. I will be sure to put spacers in when I put it back together.. an expensive lesson!! If I were to put aftermarket cams in, what would you all recommend and can I run cams with more lift and longer duration with the standard ecu?? I'm guessing that I can but I just won't get the power gains until I get the ecu changed.... -
This Has Never Happened Before!
stuartlaw_78 replied to stuartlaw_78's topic in General Automotive Discussion
Thanks for all your comments mate, I will take them on board.... The actualy cam is in one piece, it's just the very tip of it that the crank angle sensor slips onto that snapped off.. that piece is still in the shaft of the sensor when I took it off.... Does that clarify things anymore... -
Rb25det Cams Compatible With Rb20det Cams?
stuartlaw_78 replied to stuartlaw_78's topic in General Automotive Discussion
its ok... I think I've found the answer.... and that would be a yes...... they are interchangable..... Let me know otherwise but from what I've heard, they are... -
This Has Never Happened Before!
stuartlaw_78 replied to stuartlaw_78's topic in General Automotive Discussion
I actually installed it and did it to the book... Why is it touching the bolts??? I left the timing belt cover off, I think the sensor bolts onto this after the cover is put on so in theory, if I don't put the cover on, then, the sensor would bolt up that much closer to the cam gear, therefore, touching the bolts?? Does that sound possible??? -
Hi all.. Just rebuild my engine and have been running it for a week and today it died!! It seems that the crank angle sensor completely seized up and snapped the end of the exhuast cam off!! Has anybody ever had this happen?? Also, the 4 bolts that hold the exhuast cam gear on were scrapping against the crank angle sensor and there are metle shavings everywhere!! Anybody shed some light on this????
-
I've got an rb25det and need a new exhuast cam.. I've been told that the rb20det cam is the same.. Is this true???
-
I'm actually after one as well... where did you get it from? Web site??
-
Anybody got one for me? Mines making a nasty grinding noise... Cheers
