


one.etik
-
Posts
60 -
Joined
-
Last visited
-
Feedback
0%
Content Type
Profiles
Forums
Events
Gallery
Media Demo
Store
Everything posted by one.etik
-
R34 Gtr Xenon Headlights
one.etik replied to Watchamacallit's topic in For Sale (Private Car Parts and Accessories)
interested in the left hand headlight plus postage to adelaide if anyone out there is chasing the right hand one, PM'd -
hey mate, if your interested in separating them at all. how much for front bar and headlights and possibly bonnet plus postage to Adelaide. Mine just had an encounter with a Kangaroo. If not all good
-
Various Parts - Nissan
one.etik replied to proRB88's topic in For Sale (Private Car Parts and Accessories)
Hey, EXTREMELY INTERESTED in the R34 Headlights if still available, how much for postage to Reynella SA -
R34 Xenon Head Lights
one.etik replied to johnbarry88's topic in For Sale (Private Car Parts and Accessories)
Hey, EXTREMELY INTERESTED if still available, how much for postage to Reynella SA -
hey mate, if your interested in separating them at all. how much for front bar and headlights plus postage to Adelaide. If not all good
-
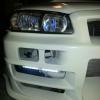
Started this a little while ago, just thought I'd post it up to see what people think.
-
Guards, Headlights and Clear Indicators SOLD
-
sorry mate, no centre console just front end stuff. I'm actually looking for one myself, mine's cracked at the top Cheers
-
can post at buyer's expense (negotiable )
-
no takers??
-
Selling parts from my gtst, due to r34 front end conversion - Gtst Bonnet (Needs Paint as clear coat worn, other than that all straight) -- $80 - Gtst Front Guards (Need Paint, fair condition, no indicators) -- $100 - Gtst Orange Front Indicators (good condition, no harness') -- $50 Pair - Gtst Clear Front Indicators (good condition, one mount has been repaired,with harness' no globes) -- $120 Pair - Gtst Headlights (good condition, with harness', no globes) -- $140 Pair - Gtst Sidemount Intercooler (fair condition with piping, no crossover pipe) --$70 - Gtst stock steering wheel (fair condition) - $30 All reasonable offers considered Pick Up, Old Reynella, SA Dylan - 0457413994 (sms during work hours)
-
R32 To R34 Conversion Bodykit
one.etik replied to marbz's topic in RB Series - R31, R32, R33, R34 (1986-2002)
Hey Mate, What state are you in? Viva Garages stock them in SA -
R324 Build-up Project In Far East
one.etik replied to cooljustin's topic in Projects, Overhauls and Build-ups
Hey, looking awesome man any chance of a close up of the cut outs for the headlights, bout to undertake this project for myself just waiting on the kit. Cheers -
Hi all, Just finished fixing my L/H headlight (Projector had come loose inside unit) now since I have put it back together all I am getting when I turn my headlights on is every indicator light turning on and no headlights. My parking lights work fine its only when it is flicked over to low beams. So far I have checked all the globes, wiring and connectors, as well as the indicator stalk (have had many issues with the stalk before). Oh and when I turn the high beams on the indicator relay goes spastic as well as the indicators themselves. Can any one shed some light on the issue Cheers
-
R32 Body Kit + Guards
one.etik replied to JiN_MaN's topic in For Sale (Private Car Parts and Accessories)
Hey man, spoke before on the phone. Keen for front bar, so if any one out there is keen for skirts and/or rear bar. show some interest Cheers -
does the steering wheel come with a boss kit and any chance of some pics
-
Skyline Parts For Salee, Lots Of Parts
one.etik replied to boz_soljah's topic in For Sale (Private Car Parts and Accessories)
PM SENT -
What condition is the bonnet? Is it the one on the car in the pic? Front Right corner damaged? Cheers
-
What size is it? Boss Kit? Cheers
-
got any pics?
-
Good idea, didn't think of that
-
Hi all, Just completed my CAI and heat shield on the weekend and figured I'd post up some pics. Unfortunatly I didn't think of this when I was actually making and installing it, but its not rocket science so you'll get the idea Materials Used Petrol Funnel (bought from local servo) $5 100mm AirCon Duct (breeze-air shop, scrap from old install) $? 2 X "600mm x 300mm x 3mm 602 grade aluminium sheets" (Local aluminium wholesaler) $30 10mm 90 degree aluminium edging $3 Rubber Edging Zip Ties Duct Tape bit of 16mm conduit pop rivets and a some free time Method Started off by cutting the funnel to suit the size of the air duct, then used duct tape to secure it to the funnel. Due to my Front mount only using one of the stock intercooler holes I was able to utilize the other one. I zip tied the air duct to the back intercooler hole and used a bit of conduit around the edge to hold it in properly. I mounted the funnel to the fmic piping in the bottom right cut out of my kit. Next was the Heat shield, After reading through many of the cai threads, figured I'd go with the cardboard templates to get the shape. After a bit of stuffing around trying to get it to fit, I traced the template on to the aluminium and started cutting, probably could have gone for a thinner alluminium cos it took a while to cut and file it to size. Once that was done, pop riveted the 90degree angle stuff to the edge to hold the final product together. Added a bit of rubber edging and easy as that. Hope this may help anyone looking to go down this road.
-
R33 S2 & R32 Parts
one.etik replied to s13silvianissan's topic in For Sale (Private Car Parts and Accessories)
PM SENT -
I found a good cheap boost controller for $22!!!
one.etik replied to CEF11E's topic in Forced Induction Performance
Have bought two in past 3 weeks, 3 day turn around on both Stupid me didn't tighten lock nut up fully and first one decided come apart while on boost surprised parts of the turbo didn't end up out exhaust, Second ones working a treat -
Brand New Td04e And More Parts
one.etik replied to boosted_sa's topic in For Sale (Private Car Parts and Accessories)
Location??
