


R3N3
-
Posts
388 -
Joined
-
Last visited
-
Days Won
14 -
Feedback
0%
Content Type
Profiles
Forums
Events
Gallery
Media Demo
Store
Posts posted by R3N3
-
-
3 minutes ago, Duncan said:
The pressure switch should be inline with the + (I assume, or possibly the -) to the compressor. PDM can supply it power at all times when AC switch is on and throttle is less than say 80%, the pressure switch will just cut the circuit any time its threshold is reached.
At this stage I have wired so the pressure switch and fan switch are separate switched inputs in the ECU. I have then provided an 8A output direct to the compressor for switching. However, I do like your way, as it would mean one less input needed.. maybe if I run out I’ll switch it.
are there any other conditions you would turn compressor off? Launch control active etc?
-
AC is now all wired up. The fan switch and pressure switch are hooked up as inputs via the ECU and the compressor is an 8A HCO via the PDM. I’m assuming I need to set the pressure and fan switches as generic switches/inputs? And then have some conditions to switch the fan and compressor on/off?
engine bay all buttoned back up:

I ordered a TAARKS power steering pump AN10 fitting, as I’m thinking I’ll mount the power steering reservoir in the airbox, to tidy up the bay a bit more.
i have also noticed some brake fluid leaking around the reservoir of the BMC, so hopefully nothing serious. I’ll be flushing all the fluid and replacing when I do the rotors and pads.
in other news, I have booked a conference in Sapporo Japan at the end of August, so I have given myself three full days in Tokyo, so feel free to provide recommendations on where to go. The Nismo factory/showroom is top of the list so far.
-
I have been stuck into house renos every spare minute I’ve had lately, so the skyline has been neglected in the garage..
I have decided not to run the finned cam covers and sold them, I just wasn’t 100% happy with them. I also got scammed on FB market place, where I thought I had purchased a nice condition boot interior. So fair to say enthusiasm to work on the car has been low anyway..
it’s raining today and the kids are out of the house, so I thought I’d find some motivation and finish up the A/C install:
I gave the bonnet latch and bracket a paint black, as it was pretty ugly and so it’s less visible through the grill. The compressor is so much smaller and lighter than the old OEM unit. I also had to modify one of the AC hard lines, as it was fouling on the wastegate down-pipe. This isn’t a criticism of the FPG kit, as there is no way he could allow for every turbo/wastegate/exhaust combo out there. I actually think it sits nicer this way now anyway, as the lines sit nice and parallel against the wheel arch.
I think the favourite purchase is the purchase of the bonnet prop/stay clip, as my car has never had one in my ownership..
-
 3
3
-
-
1 hour ago, Dose Pipe Sutututu said:
Has crossed my mind, just the styling I'm not keen on. The front grill is like a large grater lol
They are boring as hell to drive, but would make a nice family cruiser.
-
8 hours ago, Duncan said:
Sorry if I'm missing something...does that mean you have to cut the speaker wires to remove the door?
It’s not ideal but you would need to disconnect terminals from speaker and feed through door as you take them off. I needed to add a cable anyway for my central locking solenoid for the alarm, so I re-purposed the old speaker cable for that and then the new wire was for the speakers
-
like this
-
1
-
-
4 minutes ago, klutched said:
Yesterday I got the pressure sensor harness in and then started going through the stock ecu wiring and labelling everything I need to wire up to the new ecu. There wasn't a whole lot that I had to reuse. Ac in/out, powersteer, start position, and a couple of Digital Inputs and Aux outs Ive got running around the car. Was left over with a bunch of unused factory wires.
Went to run some speaker cable through to the doors but found out it's on a connector so that was a no go. Will probably end up tapping onto the stock wire and running to the back for an amp.
I ended up drilling a hole in that door connector to pass some new speaker wire through. A large portion of the connector is blank, so it fit in there well and didn’t impact the other terminals/connectors. You don’t need to drill a hole in the female part in the door, as it’s not sealed and allows cable to be fed through.
looking good!
-
1
-
-
I think it’s a Denso style connector?
-
39 minutes ago, LjB123 said:
What made you got .63 instead of .71 housing? Just response? Couldnt you push a little more power from a .71 with lower PSI?
I just asked TAO and he recommended .63..
I’d recommend sticking to .63 if you want a similar power figure and the best possible response. I’m running a completely un-opened motor too, so I could push harder if I wanted but I asked the tuner for some reliability, which is why we limited boost.
I’m no turbo expert, so I’ll let @hypergear answer that but I’m assuming the trade off for the slightly bigger housing would be response. I’m assuming they may be for a slightly larger displacement engine?
Put it this way, if I were to do it again I’d go the .63 again.
-
Also, i think that the finned RB cam covers I purchased are not the genuine rb20 red top finned ones. I believe they are standard 20 covers that have been milled very slightly to create the raised fins… Im not sure if the guy I bought them off even knew, however, the fact they didn’t come with a matching valley cover is now a bit of a give away..
Anyway, annoying as it is, they are still a unique piece and they were modified very well, so I will get them painted up and put on the car. Now to chose the paint color…
-
1
-
-
So I have had a bit of time over the weekend and decided to make a start on the AC kit:
As usual, the FPG gear is top notch quality.
I'm glad that when I wired the car I had the forethought to provide some spare wires in the engine bay. Luckily one of these wires was a 25A high current output cable from the PDM suitable for the thermo fan.
The strategy will be to run all the pressure switch and ac clutch via the haltech, so I can have better control, like turning the compressor off at higher rpm’s, hard launches etc. I can also use the fan for general cooling duties etc.
At this point I’m also thinking I should just buy the FPG power steering pump kit because all other ancillaries are new..
-
2
-
-
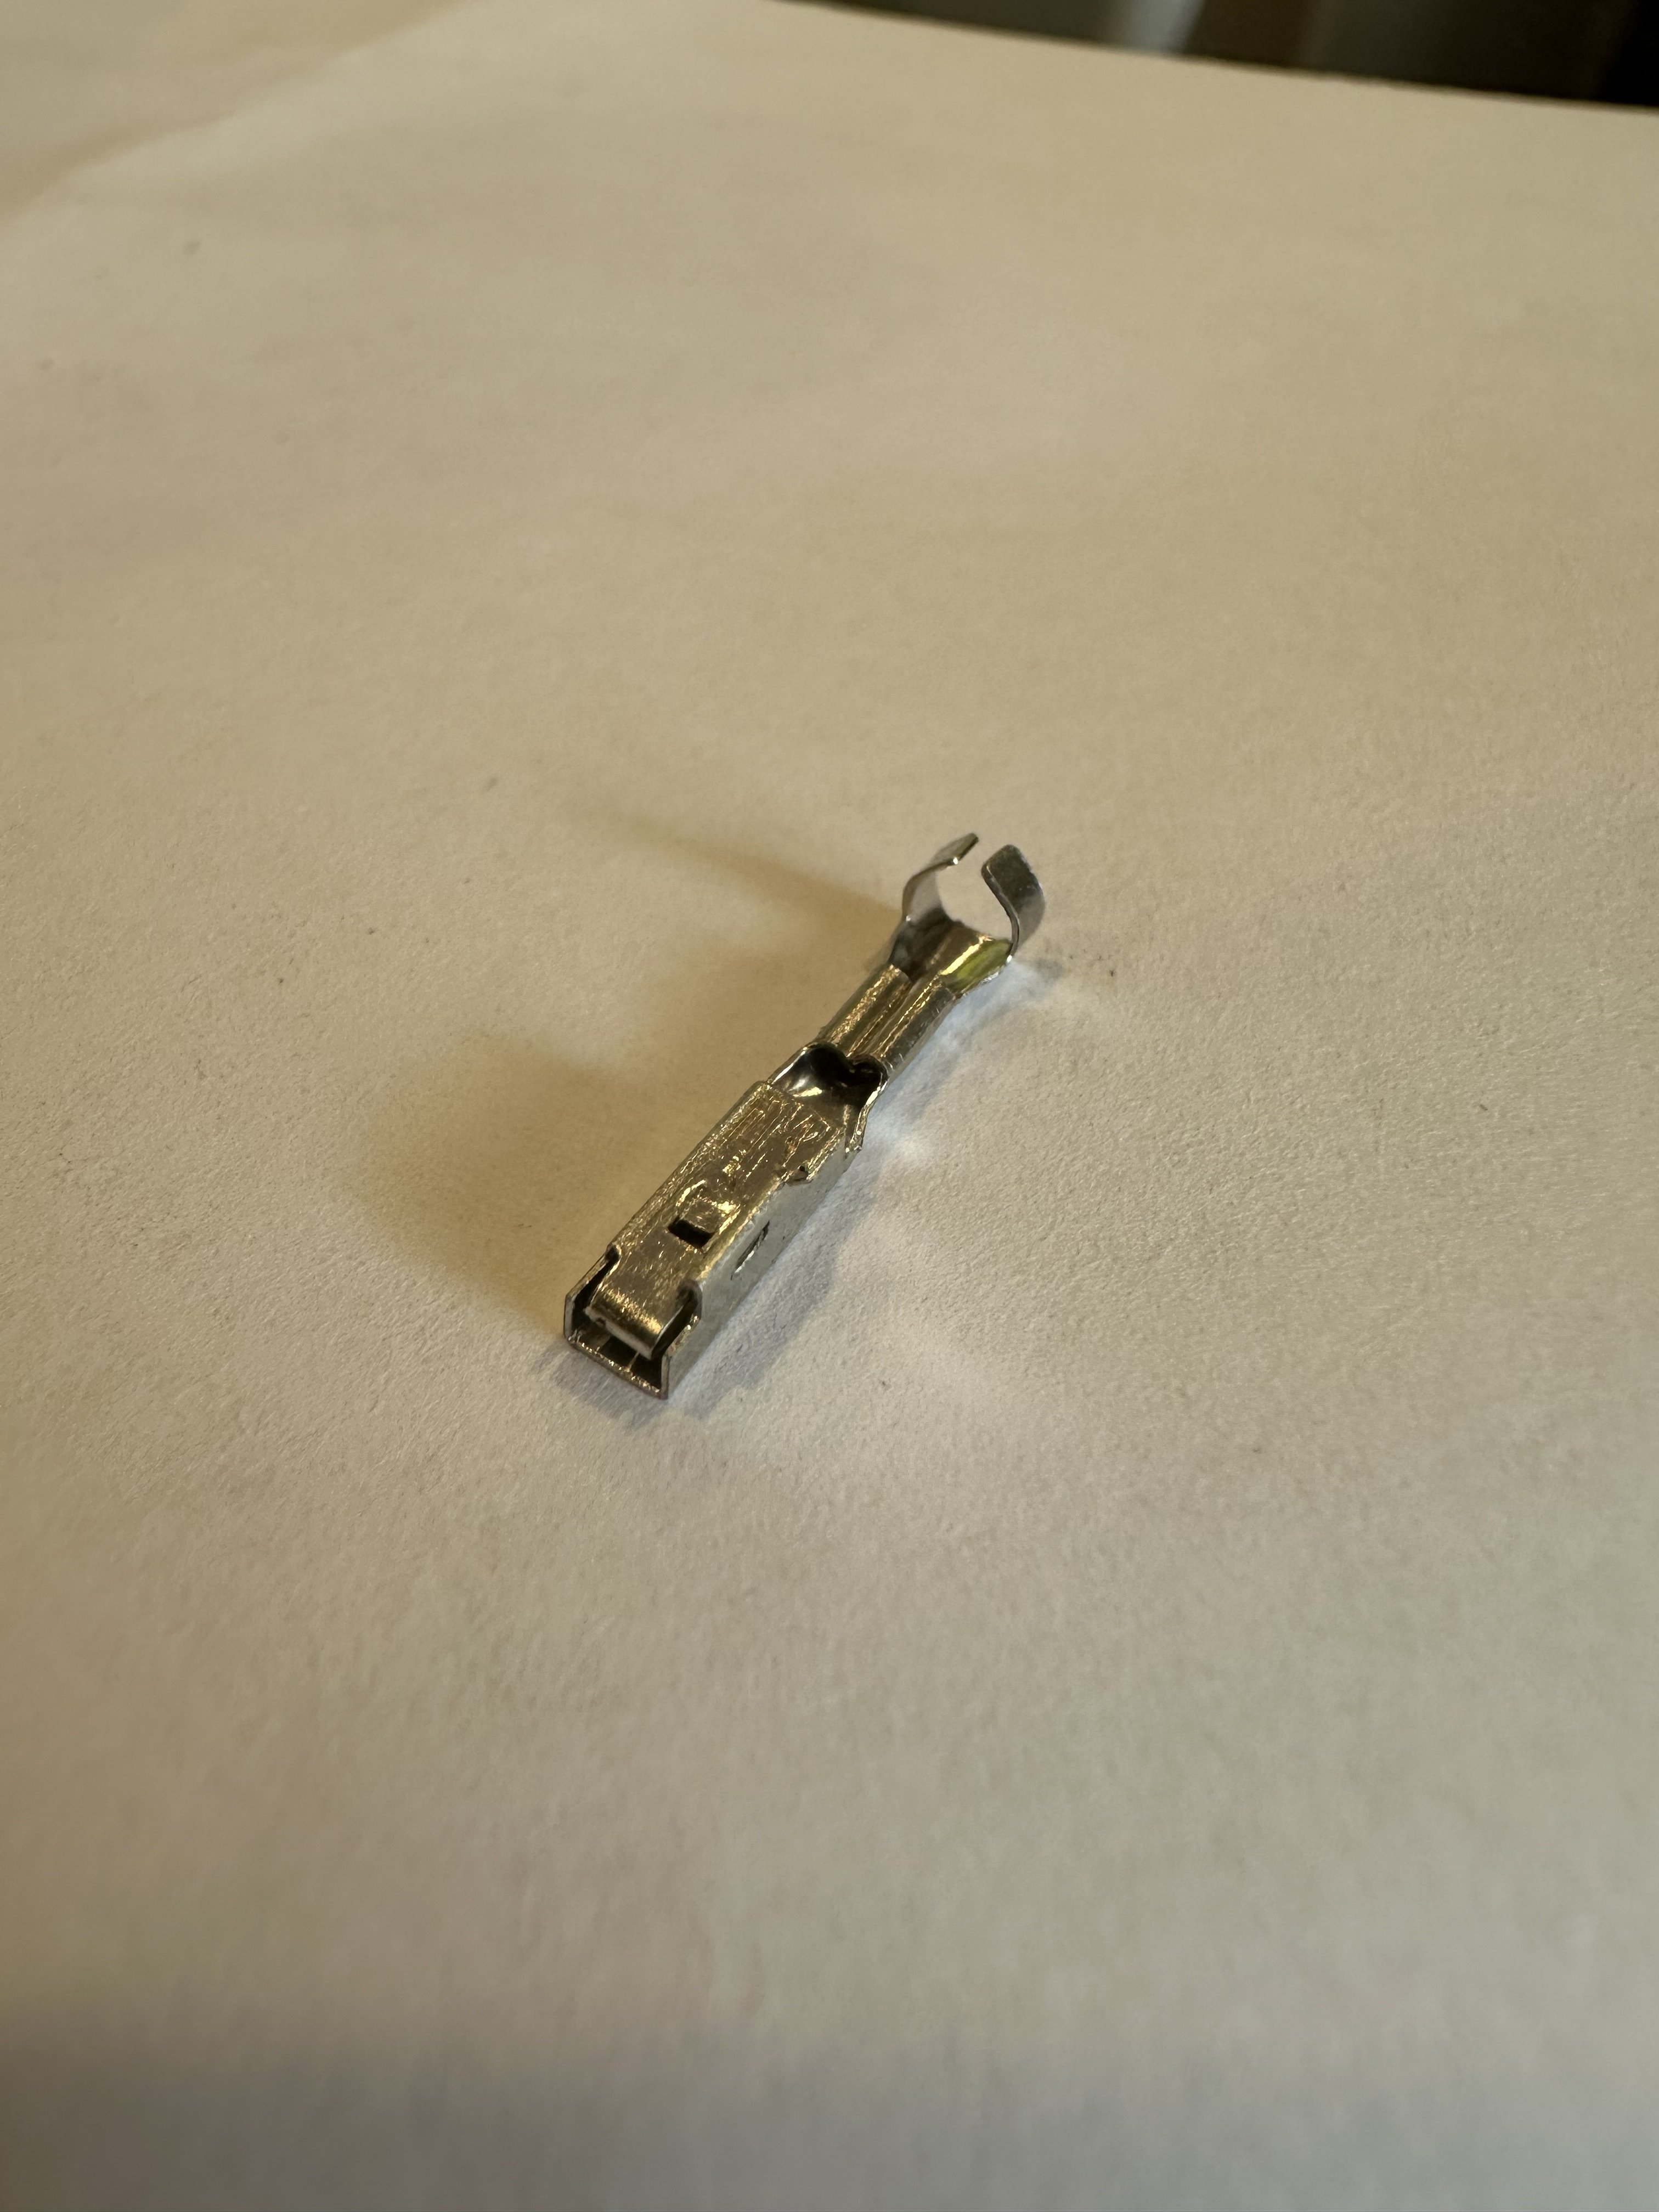
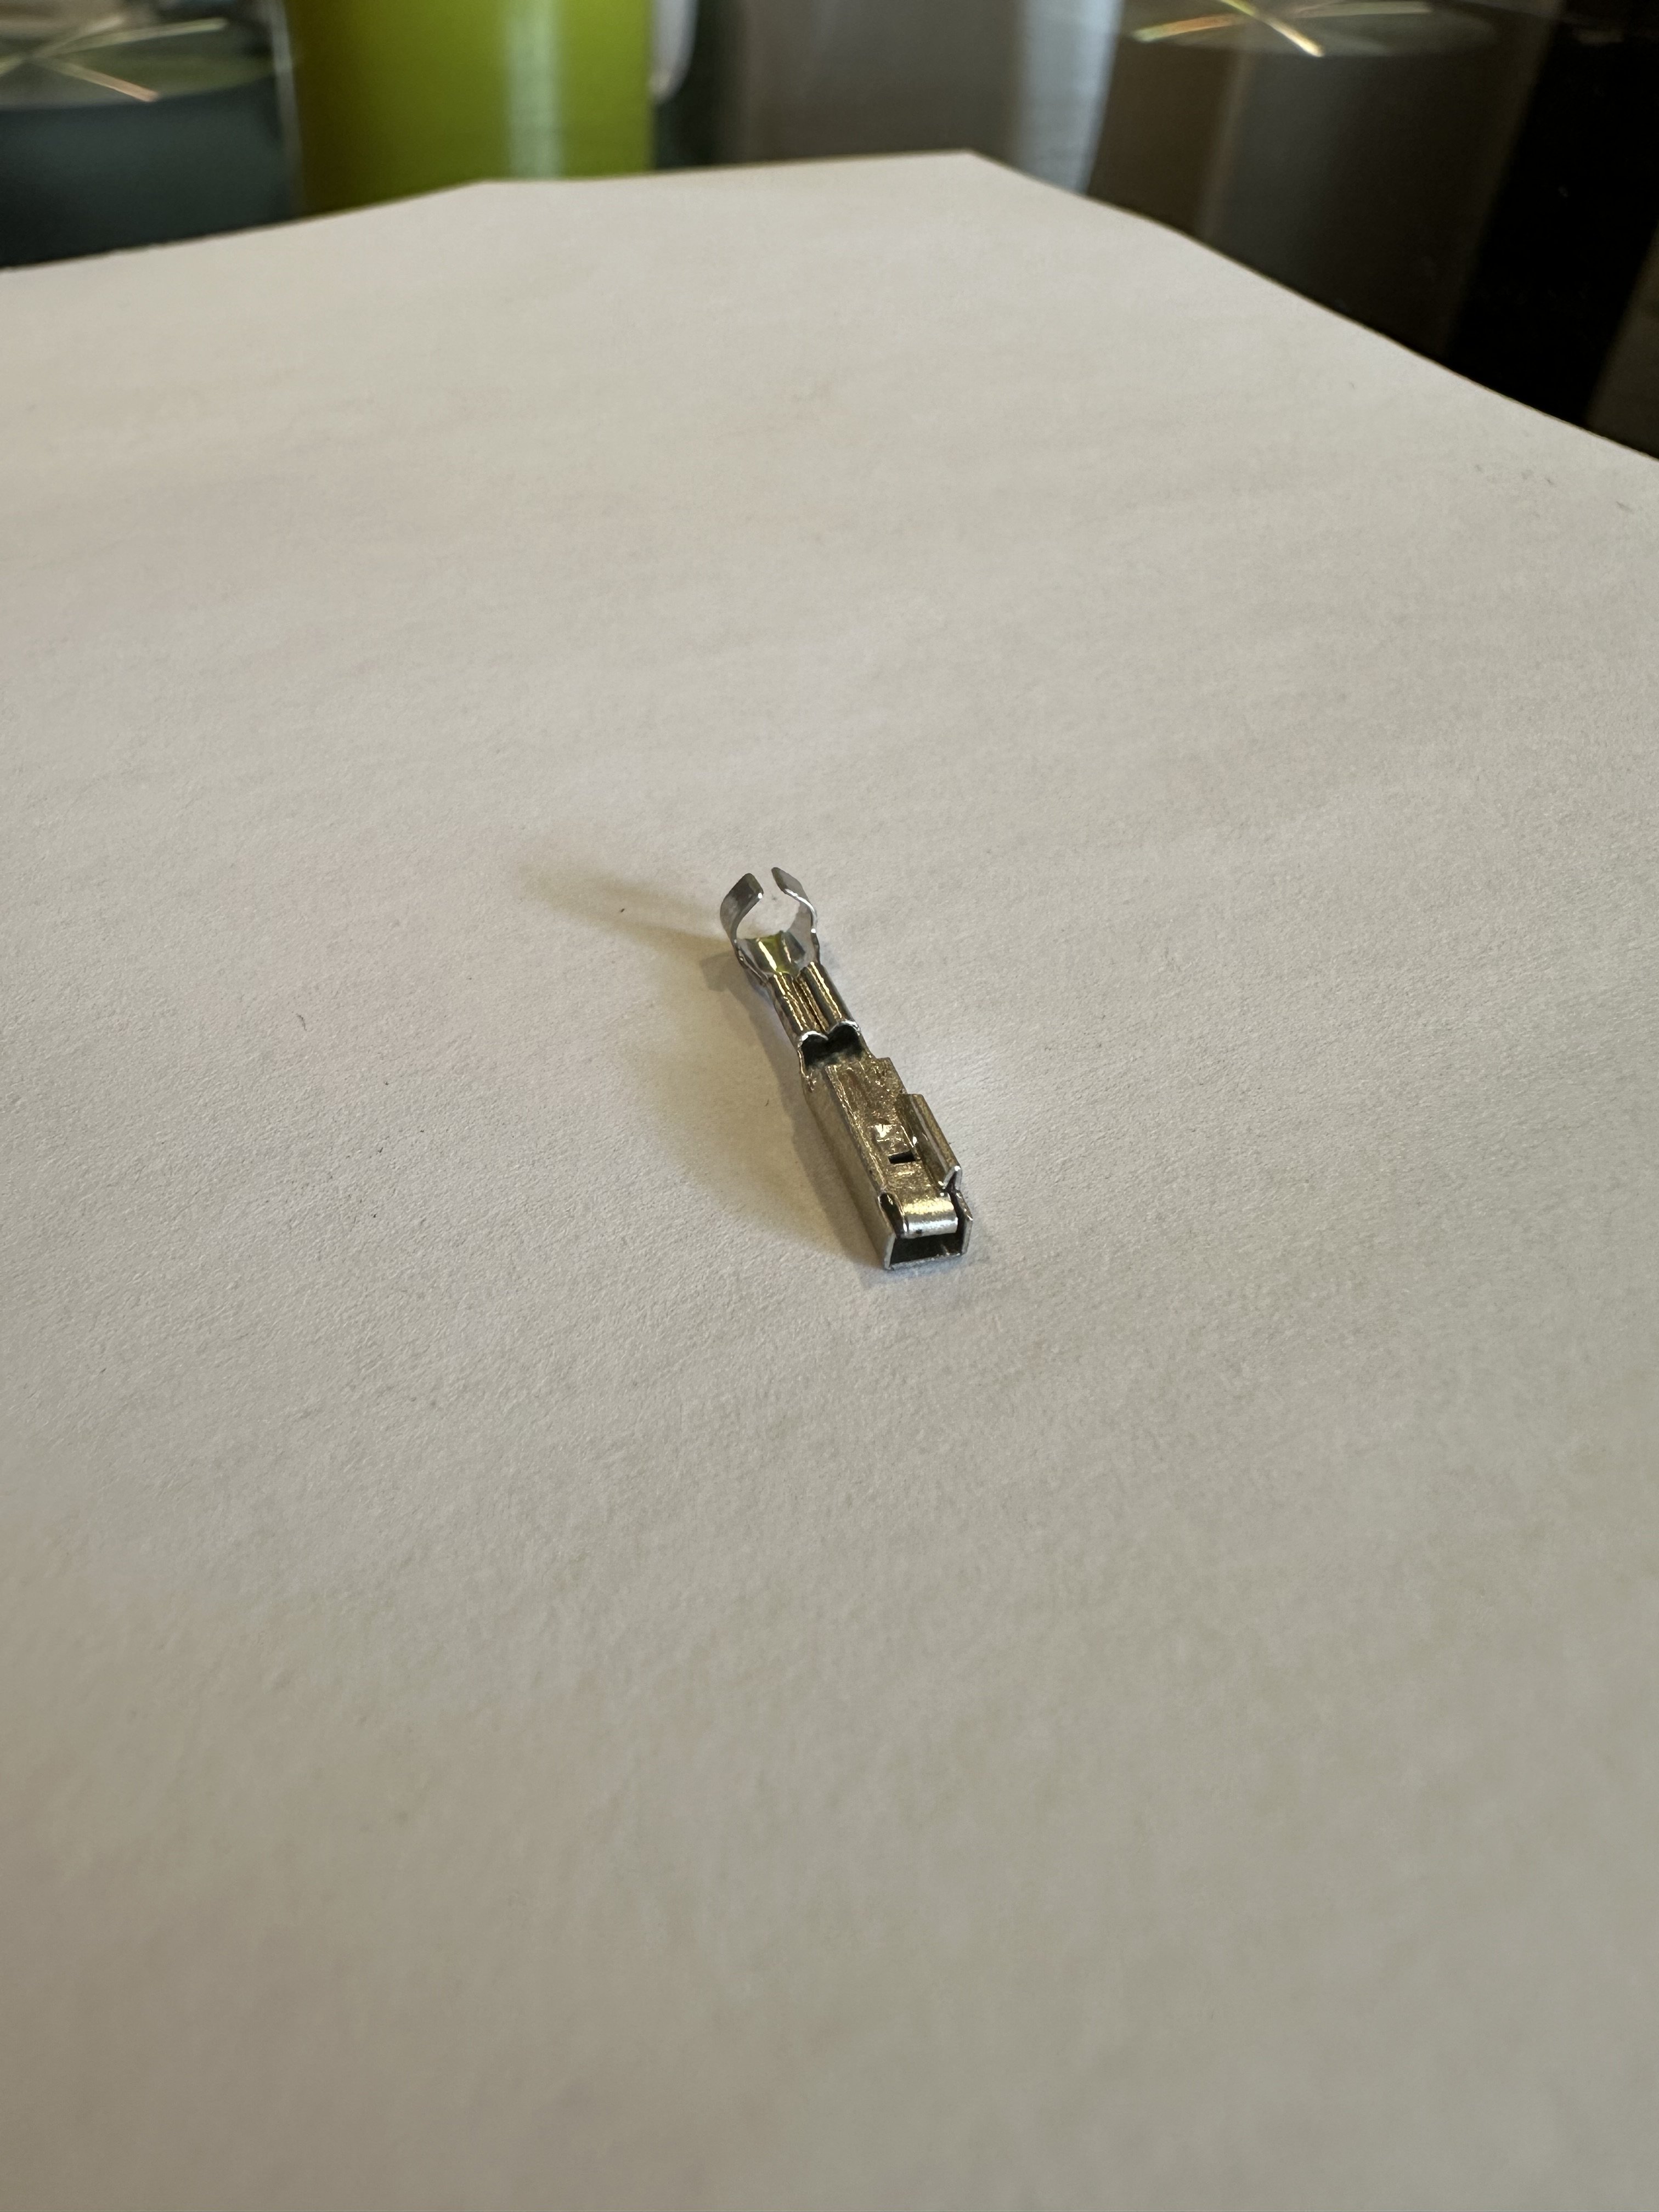
Hi All.
I’m not sure what pin type this is:
im sure it’s a common one. For reference it is off an AC pressure switch on a R33.Thanks
-
The NZ build mentioned above is mine.the ATR43ss2 is a weapon if you’re after 300ish kw on 98. I have seen so many good results from @hypergear over the years, and Taos input to these forums and general support to the members was the key reason I chose hypergear.
At those power levels there is no need for a new manifold. No spacer was needed to install the unit. I chose for the external wastegate plumb-back version, which has the exhaust housing modified for an external wastegate to be fitted.
i made a conservative 311kw and am hoping for over 360kw once I get motivated and modify the fuel system for ethanol.
-
4
-
-
Finished sail panel
before and after pics of the cam covers:
-
3
-
-
So I have been slowly accumulating a bunch of parts to go on, which I’ll touch on in another future post. But in the meantime, I have been working with a mate to 3d print some sail panels (internal covers for the wing mirrors) with integrated tweeter pods. Pretty happy with the result:
The car is taking a bit of a back seat to house Renos at the moment. We have an old 1920’s villa, so we are making it more family friendly with bigger wardrobes, all new double glazed windows/doors, kitchen upgrade and most importantly a 2nd bathroom..
-
4
-
-
6 minutes ago, Dose Pipe Sutututu said:
He doesn't want me to say "I told you so" for not buying a Haltech 2500.
Ah, I’ll leave it at that…
-
 1
1
-
-
16 hours ago, klutched said:
I think the intake side is almost done apart from fab. Just have to bolt the iacv back up, clean the fuel lines out and put them in and fuel rail and injectors in.
Didn’t want to go DBW while you’re doing fab to get rid of the iacv?
-
21 hours ago, klutched said:
Got the driver's door deadened on Wednesday and then finished putting the wiring and handle back on today and got the door card on. Need to decide on some decent speakers to run and install them before I screw them back on.
I went with kicker gear for mine. I’d say it’s mid range (I’m no audio guru…). I’d recommend running new decent speaker wiring through the doors though for the new speakers, especially if using an amp. It’s a bit of a prick, but worth it IMO.
-
1
-
-
3 hours ago, Adz2332 said:
Thanks mate!
I run 18x9.5 +11 O disc rear and 18x9 +18 R disc front. This is on a 33, not a 32 but I have no issue with clearance
not the best pic sorry
-
7 hours ago, Roy said:
Tops...so this
https://www.iee.nz/product-page/gtr-electronic-pedal-conversion
Is basically a modded standard pedal? Works for me if so
That’s the one!
-
 1
1
-
-
+1 on the IEE option. He also has some of the right size grommets to block up the hole in the firewall. I would have done this over the 350z pedal had I known prior.
-
36 minutes ago, admS15 said:
Yes I had similar issues to what dose is experiencing. Went through everything, had the system regassed, was still playing up, drained it and replaced the sensor/switch on the dryer, still same. A/C guy gave up at that point.
As mentioned, I wired in a S15 thermistor and just let it hang on the floor and everything worked. It turned out to be a bad connection at the plug for me, I returned to using the original thermistor. I had slight issues a couple more times but after cleaning the plug and terminals really well, it's been good for quite a few years now.
The plug for said thermistor is located just behind the glovebox area. Pretty sure it can be accessed without removing much. Small hands help.
From my understanding all the thermistor does is work out when to turn compressor off and on as described above.
Surely the fpg kit being ordered has some more modern way to run everything and comes with solid instructions. Please let us know @R3N3 when it arrives.
Will do. The FPG kit only replaces everything from the firewall forward, so everything else needs to function. Thanks for the info on the thermistor!
-
1
-
-
12 minutes ago, Dose Pipe Sutututu said:
It does go on and off, there's a thermo amplifier in the equation. This sensor sits inside the evaporator core and usually has a 3x pin connector.
I recall @admS15 had a similar issue and cut/shut a S15 200SX one in.
What it does, it cuts the AC request when the evaporator starts to get too cold to stop it from icing up.
These stupid thermo amps seem to fail quite a bit, I suspect mine has as the AC request will go on/off very quickly.
For now, being the lazy prick that I am, have setup a canbus key to enable the AC compressor (bypassing the HVAC controls) with a pulse setting to run the compressor for 7 secs, followed by a 3 sec pause, then back on for 7 secs.
Looking at the wiring diagram though, it looks like the amp signal is managed by the ac controller, so will then switch on/off with the a/c request switch?
-
So the FPG aircon kit has been ordered and will hopefully be shipped next week. I had previously noted I planned on utilising the PDM/ECU to control the compressor and the aux fan. @Duncan this is what I’m thinking:
- install a haltech pressure switch instead of the supplied trinary switch and connect to ECU
- run the compressor and fan directly from the PDM, then remove all relays.
i already have the ac demand switch wired to the ECU, so then the ECU can control the compressor and fans based on coolant temp/pressure. From what I see in the wiring diagram, the compressor just remains on when ac is on and doesn’t change state with air temp etc (other than pressure change)??
-
1
-


Daymo's Back! - R32 RB25DET NEO
in Projects, Overhauls and Build-ups
Posted
For the NZ wiring kit (which Yelsha copied) the black wire is + and the white is -. For me (according to my wiring notes) I have the black (+) connected to pin B1 and white (-) pin B5. Hope that helps?