


TimmyMA70
-
Posts
338 -
Joined
-
Last visited
-
Days Won
5 -
Feedback
0%
Content Type
Profiles
Forums
Events
Gallery
Media Demo
Store
Everything posted by TimmyMA70
-
Tim's 1992 N14 SSS Build
TimmyMA70 replied to TimmyMA70's topic in Members Cars, Project Overhauls & Restorations
Thanks mate ? the outside definitely doesn't reflect the inside though lol -
Tim's 1992 N14 SSS Build
TimmyMA70 replied to TimmyMA70's topic in Members Cars, Project Overhauls & Restorations
I agree with you there that a texture would finish it off quiet nicely. I've in fact ordered some wrinkle silver paint. I'll give that a try first and worst case, if I'm not happy with that, I'll look at other options. Thanks for the feedback man ? -
Tim's 1992 N14 SSS Build
TimmyMA70 replied to TimmyMA70's topic in Members Cars, Project Overhauls & Restorations
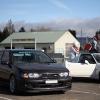
Just a small one for tonight guys. Painted the airbox last night and assembled it all tonight for a mockup. I personally like the stealth black. I'm in 2 minds about the colour of the intake pipe. I'm thinking Satin Silver at this stage to keep it clean, although not in your face. We'll see though. My wife was having a fiddle with the camera tonight too and took a bit of a fun photo I thought I'd share too: Thanks for reading guys ? -
Tim's 1992 N14 SSS Build
TimmyMA70 replied to TimmyMA70's topic in Members Cars, Project Overhauls & Restorations
Hey guys, some more progress the past couple of days. Made a mount to support the air intake: welding probably isn't 'insta worthy' however, it's definitely stuck on there lol. Welded the intake temp sensor in the intake as well: I made this 'duct' for the inlet into the airbox too, designed it so it'll pickup the air pushing around the radiator, this shot is from the inside of the box, looking towards the radiator. Also managed to get the air/oil separators setup: Lastly a photo of the 1/4 turn Dzus fasteners for the airbox lid. I still need to get some foam for under the airbox lid and paint the airbox and intake black too. Thanks for reading guys ? -
Tim's 1992 N14 SSS Build
TimmyMA70 replied to TimmyMA70's topic in Members Cars, Project Overhauls & Restorations
Thanks mate!! I think the black paint will 'hide' it a bit in the engine bay, won't look so in your face. -
Tim's 1992 N14 SSS Build
TimmyMA70 replied to TimmyMA70's topic in Members Cars, Project Overhauls & Restorations
A few photos from todays efforts guys. Made a start on the airbox: Made the lid, I still need to finish it off. Mount the Dzus 1/4 turn fastners on the lid, nutsert and bolt the sides and finish the duct from beside the radiator oh and of course, paint it black ? Although definitely made some progress today which is nice. A nice change from the wiring anyhow. Thanks for reading ? -
Tim's 1992 N14 SSS Build
TimmyMA70 replied to TimmyMA70's topic in Members Cars, Project Overhauls & Restorations
There has been alot of time involved, as per any project car. Although definitely enjoyed the feedback! I'm really excited to fire it up too! Hopefully won't be too long now. -
Tim's 1992 N14 SSS Build
TimmyMA70 replied to TimmyMA70's topic in Members Cars, Project Overhauls & Restorations
Thanks very much mate! Thanks for looking. I appreciate the words even more ? -
Tim's 1992 N14 SSS Build
TimmyMA70 replied to TimmyMA70's topic in Members Cars, Project Overhauls & Restorations
Hey guys, another update: Pretty much all the engine bay wiring is complete. I need to finish the airbox off and make the intake mounts before I terminate the air temp sensor. The DBW throttle body has been terminated, however not braided, want to double check it all works before braiding it. Painted the 'loom channel' yesterday too, in wrinkle black. Definitely makes it disappear. Thanks for reading guys ? -
Tim's 1992 N14 SSS Build
TimmyMA70 replied to TimmyMA70's topic in Members Cars, Project Overhauls & Restorations
Milestone update guys! Cranked the car today, removed the coil packs and plugs, dumped the oil and put fresh oil in (Penrite 10/10ths 10w40) Wanted to prime the oiling system. So a few bursts on the starter motor. With some luck I might have the car running by the end of the week, no pressure ? 20190915_143101.mp4 -
Tim's 1992 N14 SSS Build
TimmyMA70 replied to TimmyMA70's topic in Members Cars, Project Overhauls & Restorations
Hey man, yep, sure can. Basically the mount where the sensor bolts to sat far too high, you see where the Tarrks setup, the sensor sits quiet low and pretty much in the centerline of the crank pulley. The Ross setup had the sensor sitting higher and subsequently towards the front of the car more, which caused fouling on the chassis rail. I couldn't really get any photos of what was happening due to access. However if you look closely on the photos I've put up of the Tarrks setup, you can actually see the mark the sensor mount left on the chassis rail. It isn't a fantastic photo, as it wasn't taken at eye level to the crank, however you can see that the mount is alot bulkier and sits up way higher than the Tarrks setup I believe when I did some investigation work that the mount which had been supplied as the 'FWD' mount kit was in fact the same as the RWD setup. This would work awesome in a RWD application, where you have alot more real estate and no chassis rails for miles lol. -
Tim's 1992 N14 SSS Build
TimmyMA70 replied to TimmyMA70's topic in Members Cars, Project Overhauls & Restorations
Hey guys, A few more updates, have been busy wiring. Only have the gearbox sensors, the starter solenoid (received terminals for that this afternoon) electric water pump controller and the fuel pump to go and the car will be ready to crank. Anyway, a few pictures: I have been trying to figure out a way to run the wiring across the rocker cover here, it always looks so messy in the OEM state. I've come up with this setup which should look alright once it's sprayed in wrinkle black, same as the rocker cover. Coil packs terminated Crank trigger, oil pressure sensor, oil temp sensor, knock sensor Starter solenoid wire and a voltage reference wire for the alternator That's all for now guys, as usual thanks again for reading -
Tim's 1992 N14 SSS Build
TimmyMA70 replied to TimmyMA70's topic in Members Cars, Project Overhauls & Restorations
Hey guys, another update: Unfortunately the Ross crank trigger setup for FWD and RWD ended up being the same which ended up causing the sensor mount to contact the chassis rail. It was going to be extremely hard to modify that setup, however I found the Tarrks kit and thought I'd take a punt on it. Pretty close! Modified the lower mount, where it bolts to the oil pump cover, much better: I've got the water pump all hosed up now too: I started to make a bit of a template for the airbox too: Going to finish on the wiring: Had to do some extensive rewiring in behind the dash as I removed the fuse/relay box on the drivers side, so anything that wasn't redundant had to be rerouted. This is the wiring atm, ready for testing. Once it's all tested and proven, it'll be braided and taped to the existing looms. -
Tim's 1992 N14 SSS Build
TimmyMA70 replied to TimmyMA70's topic in Members Cars, Project Overhauls & Restorations
Small update guys: I've reached the spaghetti stage of the build. In the process of wiring in the Haltech. Using bussed Deutsch plugs for the power supply to the injectors and the coil packs. I've mostly sussed out the Drive By Wire setup, it's reasonably straight forward to wire in too. Apart from that I've got a shitload of leftover inputs/outputs, which is to be expected with a 'basic' N/A build. However I'm going to run a separate loom with these in it, so they'll be easy to access if/when the time comes for a change or upgrade. -
Tim's 1992 N14 SSS Build
TimmyMA70 replied to TimmyMA70's topic in Members Cars, Project Overhauls & Restorations
Hey guys, Slow on the updates again as you can see... Anyway, I'm back. Have had a few up's and down's as expected with making custom items. The thermostatic oil filter bracket I made whilst the engine was out, was only a guesstimate. Unfortunately when I went to finish off the oil cooler lines, the 90 degree bends I was using fouled on the rocker cover, I managed to tweak it until there was clearance, however I wasn't completely happy with it. Sooo, I made a new one. Much more rigid than the previous design, it is yet to be painted: In between work and other commitments I began mocking up the intake components I had been piecing together, this is what I came up with: 6" OD bellmouth for the filter to mount on, down to 3.5" OD on the outlet, I continued the 3.5" for 130mm to a 3.5" - 3" aluminium reducer then to a 3" 60 degree mandrel bend. The finished product, fabricated by yours truely: As I was welding each part of the intake together, the wall thickness was different between each component, so I went ahead and ported each piece after it was welded. The finished product: As per usual guys, thanks for reading -
Tim's 1992 N14 SSS Build
TimmyMA70 replied to TimmyMA70's topic in Members Cars, Project Overhauls & Restorations
Hey guys, A bit of a milestone this weekend, the N14 has been off the road for 4 months now. Although I'm definitely honing in on it running soon! The front bar and passengers side guard are finally on for good, both guard liners have also been refitted. The car (apart from the bonnet) is back together... finally! A bit of a teaser pic of whats to come with the intake, hopefully the bends should be here this week. I have since removed the gearbox (I mocked the gearbox up to check clearance on everything else I have fitted) Torqued up my Xtreme 3.9kg flywheel tonight, clutch will go on tomorrow afternoon (Xtreme HD Organic...I'm non turbo, so make f**k all torque remember ??) Thanks for reading -
Tim's 1992 N14 SSS Build
TimmyMA70 replied to TimmyMA70's topic in Members Cars, Project Overhauls & Restorations
Hey guys, just some more parts hoarding. This time for the intake: Plan is to use my 6" ID airfilter on the 3.5" ID - 6" OD bellmouth, then weld the 3.5" to 3" transition onto that, then go to a 3" 45° or 60° aluminum mandrel bend (unsure yet) then to the throttle body (which is 3" OD) Anyhow, here are a couple of the parts. As usual, thanks for reading ? -
If there was ever someone who gets it, it's me man. I don't trust other shops either. However I think it's far more rewarding once the project is complete ?
-
I love a good DIY build mate. Can't wait to see the finished product.
-
Tim's 1992 N14 SSS Build
TimmyMA70 replied to TimmyMA70's topic in Members Cars, Project Overhauls & Restorations
Thanks mate ? I said the same thing to a mate of mine. Sent him a photo saying "I finally found a strut brace to match my masking tape" ?? -
Tim's 1992 N14 SSS Build
TimmyMA70 replied to TimmyMA70's topic in Members Cars, Project Overhauls & Restorations
Finished product on the wiring guys: I was having clearance issues from my Whiteline strutbrace to the intake manifold. A local guy had a Cusco GTIR strut brace, so asked him for a lend of it. Fits really well. Has alot more clearance to the manifold and throttle body. Unsure of the colour though. I have ordered a new one and I'll return this one. However, I'm thinking I'll leave the brace blue until the car is all finished before I make my decision ? The N14 is alot more complete currently, so took a snap ? Bought a sequential shift light too, should be excellent for track work. They're such a small compact unit though! That's all for now, as always, thanks for reading ? -
Tim's 1992 N14 SSS Build
TimmyMA70 replied to TimmyMA70's topic in Members Cars, Project Overhauls & Restorations
Ahh yes. Each to their own dude ? if it works for you, keep it up. I enjoy trying to improve things, make them more suited to what I want out of the car as much as I do driving it, so this stage of the build isn't a chore for me at all. -
Tim's 1992 N14 SSS Build
TimmyMA70 replied to TimmyMA70's topic in Members Cars, Project Overhauls & Restorations
Haha!! I just can't do dodgy, or slapped together. One of my favourite saying is: 'the poor man pays twice' and it has proven to be right on so many occasions that I now live by it. Taking your time and doing it right the first time is worth it, even just for the reward of job satisfaction in the end ? Thanks for the words man. It helps to motivate me and keep this updated, that's for sure ? -
Tim's 1992 N14 SSS Build
TimmyMA70 replied to TimmyMA70's topic in Members Cars, Project Overhauls & Restorations
Thanks man ? With the extensive rewiring with my fuse box, I had to reloom and conduit the body loom after stripping all the redundant wiring out if it anyhow. So decided, no time like the present ? -
Tim's 1992 N14 SSS Build
TimmyMA70 replied to TimmyMA70's topic in Members Cars, Project Overhauls & Restorations
Thanks man! Really appreciate the words. Alot of time has gone into it, as with any project. For the body loom I used the self closing braided wrap from Jaycar. Which is pretty good stuff and easy to work with. The engine loom is getting a higher temp rated braid, obviously a bit hotter around the engine than on top of the chassis rails etc.

