Jump to content
SAU Community

Recommended Posts

Hey guys-

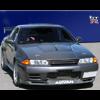
thought I'd post a coupla pics of the new beast - finally a GTR resides in my garage!!! The car made 272rwkws (at 13psi) at Willall racing prior to purchase running rich at around 10.3:1 AFR.......now post compliance last weekend it made 170rwkws with an AFR that simply went off the scale rich (>9:1). Hmmm.....me smells a rat somewhere!!!! Anyways Peter Hall assures me it is tune based (we chucked a standard 32GTR computer in it and it made 226rwkws!) and the computer has a jap remap chip in it. Oh well - PWR FC D-Jetro and some 700cc injectors on their way at the moment. Should hopefully make low-mid 300's at the wheels post Martin Donnon super tune in the near future. Very happy with the purchase - especially since it sports a huge amount of extras including the R34 GTR engine and bigger twin turbos......

Those of you trying to make a GTST into a GTR (as I did for 4 years) don't stuff around - go the GTR. Traction is sweet!!!!!!

post-3189-1139551063.jpg

post-3189-1139551108.jpg

post-3189-1139551174.jpg

Link to comment
https://www.sau.com.au/forums/topic/105291-new-addition-to-the-garage/
Share on other sites

Nice work on the purchase, don't forget to take the fuse out for when you want to see your rear quarter trying to overtake you! Lovin the slide!

Yeah - came to Aust with the handy 4wd/2wd switch already fitted. From experience it shall now be known as the uneven tyre wear switch......(scratches head - wonders last time he saw a GTR drifting)

Yeah - came to Aust with the handy 4wd/2wd switch already fitted. From experience it shall now be known as the uneven tyre wear switch......(scratches head - wonders last time he saw  a GTR drifting)

Giddyup on the already fitted switch............I've seen 1 silver 32 GTR sliding at Lalla, dude wasn't the best drifter BUT mmmmmm 26 sounding killa!

nice

looks like in near furture there will be more R32 GTR then gts-t in SA SAU :O

got a Greddy fuel rail and sards 700cc injectors for GTR, interest?

*sits back and waits for teenie chicks to jump in and comment - OOOhhh nice car, can i go for a ride*

:lol: :lol: :lol:

Edited by Maxx
nice. Just watch out for the bad hair day at the tuners :D

Hey that got my attention! :rofl:

Whats the quarter mile time and mph for that VL engine transplant you did in your Skyline? Just interested to know how all that brutal driveshaft twisting torque translates into actual real world acceleration B)

Im picking around 13.9 @ 100mph. Am I right?

Edited by Martin Donnon

lol. havent found out as yet :D 1/4 mile doesnt interest me.

ps. - the brutal torque quote is a dig taken from the v8 (black jeans, beanie headed, VB drinking) boys....as im sure you know :rofl: Hows your car coming along?

Edited by Bl4cK32

Aussie=heavy=straight line=drags

Japanese=light=corners=hills======where its at!!!

Who cars about the straight line crap!!!!

and as for tuners.........LOL there is only a couple of good ones left to my knowlege and they are not north of the city! Don't know how that Mick dude got a job here?.........hang on yeh i do!!!!

Create an account or sign in to comment

You need to be a member in order to leave a comment

Create an account

Sign up for a new account in our community. It's easy!

Register a new account

Sign in

Already have an account? Sign in here.

Sign In Now


  • Similar Content

  • Latest Posts

    • Can I suggest you try EBC directly again and link them to as many competitor catalogues as you can to show their listing is incorrect, eg https://dba.com.au/product/front-4000-series-hd-brake-rotor-dba42304/ If you have access to an R33 GTST VIN and your VIN, you could also use a Nissan Parts lookup like Amayama to show them the part number is different between 33 GTST and 34 GTT which may get their attention
    • So i got reply from EBC and they just this site where you can clearly see those 296mm fronts on R34 GTT. I send them photos and "quotes" that 296mm are not for 34 GTT and they are too small. But it will be very hard to return them cuz nobody here knows 100% and they just copy those EBC catalogue :-D https://ebcbrakesdirect.com/automotive/nissan/skyline-r34
    • Hi, is the HKS  Tower Bar still available ? negotiable ? 🤔
    • From there, it is really just test and assemble. Plug the adapter cables from the unit into the back of the screen, then the other side to the car harness. Don't forget all the other plugs too! Run the cables behind the unit and screw it back into place (4 screws) and you should now have 3 cables to run from the top screen to the android unit. I ran them along the DS of the other AV units in the gap between their backets and the console, and used some corrugated tubing on the sharp edges of the bracket so the wires were safe. Plug the centre console and lower screen in temporarily and turn the car to ACC, the AV should fire up as normal. Hold the back button for 3 sec and Android should appear on the top screen. You need to set the input to Aux for audio (more on that later). I put the unit under the AC duct in the centre console, with the wifi antenna on top of the AC duct near the shifter, the bluetooth antenna on the AC duct under the centre console The GPS unit on top of the DS to AC duct; they all seem to work OK there are are out of the way. Neat cable routing is a pain. For the drive recorder I mounted it near the rear view mirror and run the cable in the headlining, across the a pillar and then down the inside of the a pillar seal to the DS lower dash. From there it goes across and to one USB input for the unit. The second USB input is attached to the ECUtec OBD dongle and the 3rd goes to the USB bulkhead connected I added in the centre console. This is how the centre console looks "tidied" up Note I didn't install the provided speaker, didn't use the 2.5mm IPod in line or the piggyback loom for the Ipod or change any DIP switches; they seem to only be required if you need to use the Ipod input rather than the AUX input. That's it, install done, I'll follow up with a separate post on how the unit works, but in summary it retains all factory functions and inputs (so I still use my phone to the car for calls), reverse still works like factory etc.
    • Place the new daughterboard in the case and mount it using the 3 small black rivets provided, and reconnect the 3 factory ribbon cables to the new board Then, use the 3 piggyback cables from the daughterboard into the factory board on top (there are stand offs in the case to keep them apart. and remember to reconnect the antenna and rear cover fan wires. 1 screw to hold the motherboard in place. Before closing the case, make a hole in the sticker covering a hole in the case and run the cable for the android unit into the plug there. The video forgot this step, so did I, so will you probably. Then redo the 4 screws on back, 2 each top and bottom, 3 each side and put the 2 brackets back on.....all ready to go and not that tricky really.      
×
×
  • Create New...