
Announcements
-
Similar Content
-
-
Latest Posts
-
 I'll give it a go, it cannot hurt Although, every time I go to Bunnings for one thing, I end up with a trolley load of stuff In other stuff news, I can fit 6 x 15kg bags of Gypsum in the boot of the MX5, I could have put a few more in, but I was already pushing my comfort levels buy dropping 90kg into to boot....LOL
 -
 It seems to happen only when moving not stationary. It happens more frequently when reversing and turning steering wheel to the right. I MAY have found what the sound is and if it’s that I will feel so dumb since it did start happening around when I put 18” wheels. I attached the image of where there’s a scraping line to that plastic liner and the other side does not have that.
 -
 Is it a noise that if you turn the wheel, and hold it turned to the right, the screech continues? Or does it only occur while you're moving the steering wheel? Does it occur when stationary turning the steering wheel from centre to the right?
 -
I want to also note I did lift the tire and checked for any play to see if it was a bad tie rod. It doesn't move at all.
-
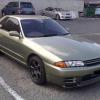
Any insight will help find the issue. When I do a sharp turn to the right I hear a screeching sound coming from the front. It only happens turning Right and not Left. Steering fluid seems okay. Not sure what this part is(picture) but one side seemed "wetter" than the other. All bushing from a quick look did not seem damaged. I'll do a better look but wanted to ask here in case it helps me troubleshoot faster.
-


Recommended Posts
Create an account or sign in to comment
You need to be a member in order to leave a comment
Create an account
Sign up for a new account in our community. It's easy!
Register a new accountSign in
Already have an account? Sign in here.
Sign In Now