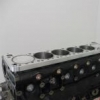
Rb Engine Assembly Check List
Announcements
-
Similar Content
-
Latest Posts
-
Have a look at that (shitty) pic I posted. You can see AN -4 braided line coming to a -4 to 1/8 BSPT adapter, into a 1/8 BSPT T piece. The Haltech pressure sender is screwed into the long arm of the sender and factory sender (pre your pic) into the T side. You can also see the cable tie holding the whole contraption in place. Is it better than mounting the sender direct to your engine fitting......yes because it removes that vibration as the engine revs out 50 times every lap and that factory sender is pretty big. Is it necessary for you......well I've got no idea, I just don't like something important failing twice so over-engineer it to the moon!
-
Yup. You can get creative and make a sort of "bracket" with cable ties. Put 2 around the sender with a third passing underneath them strapped down against the sender. Then that third one is able to be passed through some hole at right angles to the orientation of the sender. Or some variation on the theme. Yes.... ummm, with caveats? I mean, the sender is BSP and you would likely have AN stuff on the hose, so yes, there would be the adapter you mention. But the block end will either be 1/8 NPT if that thread is still OK in there, or you can drill and tap it out to 1/4 BSP or NPT and use appropriate adapter there. As it stands, your mention of 1/8 BSPT male seems... wrong for the 1/8 NPT female it has to go into. The hose will be better, because even with the bush, the mass of the sender will be "hanging" off a hard threaded connection and will add some stress/strain to that. It might fail in the future. The hose eliminates almost all such risk - but adds in several more threaded connections to leak from! It really should be tapered, but it looks very long in that photo with no taper visible. If you have it in hand you should be able to see if it tapered or not. There technically is no possibility of a mechanical seal with a parallel male in a parallel female, so it is hard to believe that it is parallel male, but weirder things have happened. Maybe it's meant to seat on some surface when screwed in on the original installation? Anyway, at that thread size, parallel in parallel, with tape and goop, will seal just fine.
-
How do you propose I cable tie this: To something securely? Is it really just a case of finding a couple of holes and ziptying it there so it never goes flying or starts dangling around, more or less? Then run a 1/8 BSP Female to [hose adapter of choice?/AN?] and then the opposing fitting at the bush-into-oil-block end? being the hose-into-realistically likely a 1/8 BSPT male) Is this going to provide any real benefit over using a stainless/steel 1/4 to 1/8 BSPT reducing bush? I am making the assumption the OEM sender is BSPT not BSPP/BSP
-
By funkymonkey · Posted
I fashioned a ramp out of a couple of pieces of 140x35 lumber, to get the bumper up slightly, and then one of these is what I use -
I wouldn't worry about dissimilar metal corrosion, should you just buy/make a steel replacement. There will be thread tape and sealant compound between the metals. The few little spots where they touch each other will be deep inside the joint, unable to get wet. And the alloy block is much much larger than a small steel fitting, so there is plenty of "sacrificial" capacity there. Any bush you put in there will be dissimilar anyway. Either steel or brass. Maybe stainless. All of them are different to the other parts in the chain. But what I said above still applies.
-


Recommended Posts
Create an account or sign in to comment
You need to be a member in order to leave a comment
Create an account
Sign up for a new account in our community. It's easy!
Register a new accountSign in
Already have an account? Sign in here.
Sign In Now