Jump to content
SAU Community

Recommended Posts

OK looks like this is back up for sale, In our new house now and if i want the things i want its gotta go. New car is on the way aswell so something has to give. Have reduced the price $5000. Unfortunatley in 6-12months i'll have the money for something like this again but not now... I hadnt moved the car since september and in that time the AFM has died so i will get a new one soon and the windscreen is cracked.

Im selling my recently completed R34 Drift car. Unfortunatley due to a change in circumstances i wont be able to use it to its full potential.

The car is a RACE/RALLY rego ONLY it cannot be registered EVER. So please dont ask about compliancing rego etc etc...

The details are:

1999 R34 Skyline Sedan (had 73k's)

Factory NEO turbo Auto

Engine:

1994 180sx SR20DET with 60k's

Trust TD06H-20G turbo

Tial 38mm external gate

High Mount manifold

Nismo 550cc injector's

FMIC

Retuned ECU

Z32 AFM

Full 3inch exhaust

K+N pod

Oil cooler and relocator

Catch can

Custom Engine loom by PLMS devlepments

Driveline:

S13 5 speed

Extreme Clutch

Custom 2 peice tail shaft

Shimmed Stock Diff

Suspension:

G4 coilovers with custom spring rates to suit SR20 conversion

Front Nismo Upper control arms

Rear camber arms

Hicas breaker

URAS extra lock spacer's

Front 20mm spacer's

Wheels:

URAS 17x9 + 30 with falken tyres ~ 50%

URAS 17x9.5 + 15 with average tyre's

Interior:

Fixed back seats on Bride super low rails

Racing logic hydraulic handbrake

Deep dish steering wheel

Custom dash setup with Apexi RSM as speedo/tacho

autometer fuel gauge

custom warning lights

4 X defi style gauges

relocated battery

2 X harnesses

completely gutted dash/ interior of all trim and sound deadning

Exterior:

Full nismo option skirts

maseratti orange paint

Thats all i can think of atm

i have weighed the car with the SR conversion it came in at 1240kg 240kg lighter then stock!!

have also had it dynoed at 296rwhp @ 12psi

Since completion i have taken the car to one wet track day and only done around 300 road km's. Everything was baught new for the car. I wanted to build something reliable from the start. The only thing the car really needs is a 2way diff and it is finsihed. Took the car to a drift comp sept, dry day at last. Went damn hard came 4th which i was happy with seen it was the first time i had drifted on a dry track in 2 years!! Easliy fried the 17x9.5's with 235/45's so much grip with them to was awesome kept up with a 430rwhp ceffie!

Im looking at around $25,500 $21000 $20,000ono

if you have any questions please pm me.

Im located in Bunbury WA (2hours south of perth)

I will post photo's later for now please see the link at the bottom of the page.

please keep any negative comments to yourself.

Edited by msports180

i will throw in 4xr33 stock rims with tyres so then you have everything you need straight away to go drifting.

You can fit 4 rims and tyres where the back seat used to be and another 4 in the boot :P

$25,500

this thing is ready to go, anyone looking into drifting this is it. So balanced, very smooth on transitions. Beautifull to drift. Only needs a 2way and thats it. Then nothing else needs to be spent on it.

I will do this cheaper with stock turbo/ecu/inj's

or will swap for a jzx100 chaser manual/s15

or c33 laurel plus cash my way

need it gone

Edited by msports180

Finnally got to use this thing in the dry on sunday. I gotta say its so much fun. The longer wheel base is such an advantage you can just hold it flat where alot of the s13's r lifting off. Awesome car, came 4th in the local comp. Someone must want a car thats ready to go. Jump in and start winning and be different!! Car never missed a beat all day, no problems at all. So ive used it twice now.

I get the keys to my house in 3-4weeks so i need this gone.

post-11869-1189641850_thumb.jpg

post-11869-1189641905_thumb.jpg

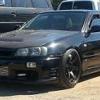
yeh im in WA. Nah its not the holden colour, its a maserati orange apparently. If u put it next to the holden colour its slightly more orangey

  • 2 weeks later...

need this gone.

may swap for a 4x2/4x4 dual cab ute worth 10k ish and the rest in cash.

Edited by msports180
  • 1 month later...
  • 2 weeks later...

lol looks weird a SR20 in the house of a RB.. lol haha

Crazy car man.. i'm lookin at buyin or buildin a track car but this is way out of my budget... good luck with the sale..

GUYS THIS CAR IS READY TO GO.. U WANAN DORRIE, PERFECT WAY TO START OFF!!!!

Create an account or sign in to comment

You need to be a member in order to leave a comment

Create an account

Sign up for a new account in our community. It's easy!

Register a new account

Sign in

Already have an account? Sign in here.

Sign In Now


  • Similar Content

  • Latest Posts

    • So stock ECU does not like anything above 10 psi?  That Nistune one is just for "try" if it will be any different, I know it need to be tune for that. I know but YOU may know about these problem but i/we dont. They few little Skylines here let alone people who know anything about tham so that is why iam asking here  
    • So now we have a radiator with no attachments whatsoever. It lifts up with a particularly tight spot between the drivers side air box mount and the lower radiator outlet, but if you've got this far you will sort that too. This is the lower mounts with the rad out so you can see where the rubber bushes go, it is a straight shot upwards Done! Assembly is the reverse of disassembly, with blood less likely to be shed.
    • Right, onto the second last trick. The Air Con condenser is mounted to the front of the radiator and stays in the car when the radiator is removed. There are 2x 10mm headed self tappers holding the top of the condenser to the radiator, remove those The bottom of the condenser is attached to the radiator with clips. You need to lift the condenser out of those clips and clear (up, then forward). f**ked if  could work out how to do that last bit with the front bumper on. I hope you can, and you share the trick.  Bumper removal probably deserves its own thread one day once I've recovered the will to live, but basically you need to remove the wheels, front inner guard liners (clips and 10mm headed bolts), the self tapper between the guard and the bumper at the rearmost point of the bumper (same as an R32 that bit), any remaining clips at the top/front of the grill, an absolute bastard design with a plate that holds the top of the bumper above the headlight each side (only 1 bolt which is tricky to get to, but the plate catches 2 places on the bumper and must be removed....carefully!) and push clips between the bumper and guard under the headlight. If you've done all that you will be faced with wiring for the fog lights on both sides and in ADM Q50 RS at least, 4 nasty tight plugs on the driver's side for the ADAS stuff. So, the clips at the bottom look like this on drivers side (looking from the front) And on the passenger side (also from the front), you can see this one is already out Clearance on both of these are super tight; the condenser needs to move up but the upper rad support mount prevents that, and the radiator can't move down far because it is (rubber) mounted. Once you achieve the impossible and drop the condenser off those mounts so it does not stop the rad moving, you are good to go
    • OK, next the shroud needs to come off and there are a couple of tricks. Firstly, there is a loom from near the passenger side headlight to the fans, coolant temp sensor etc and there is no plug to undo.  In my case I was OK to leave the shroud on top of the engine so I just undid the passenger side fan plug and about 10 of the clips which gave enough free wire to put it aside. The fan plugs were super tight, the trick I used was a small falt screwdriver to push down on the release tab, then a larger flat screwdriver to lever the plug out of the fan unit....be careful with how much force you apply! If you need to remove the shroud altogether for some reason you will have to deal with all the plugs (tight) and clips (brittle)....good luck. I removed all of the clips and replaced them with cable ties that I will just cut next time. Also, in the Red Sport / 400R at least, the intake heat exchanger reservoir hose is bolted to the shroud in 2 places with 10mm headed bolts; so remove them (the hose stays in the car; no need to undo it at the t fittings down at the radiator lower mount. Once you've dealt with the HX hose and the wiring loom, there are 3x 10mm headed self tappers holding the top of the shroud to the radiator; remove those.   The shroud then lifts out of the bottom mounts where it sits on the radiator, up and onto the engine out of the way. Simples
    • Ok, disregard my “rate them” comment, sorry for my unrealistic input
×
×
  • Create New...