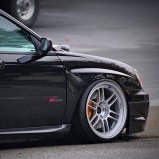
Sanding/preparing Front Bar For Painting
Announcements
-
Similar Content
-
Latest Posts
-
Forgot to include this but this is the mid section of my steering rack that looks like it has a thread/can be turned with that notch mentioned in the post:
-
Hey everyone, Wanted to pick some brains about this issue I'm having with rebuilding my 33 rack (PN is 49001-19U05). All of the tutorials/videos I've seen online are either R34 or S Chassis racks which seem to be pretty straightforward to disassemble but this process doesnt carry over to my rack. Few of the key differences that I've noted The pinion shaft on the other racks bolt on with 3 torx bolts: Whereas my rack bolts on with 2 allen head bolts: These changes are pretty inconsequential but the main difference is how you pull the actual rack out of the housing. The other skyline/s chassis racks can be taken out by tapping the rack out of the body with a socket and it just slides right out. I'm unable to do that with my rack because there's a hard stop at the end that doesn't let the seal/shaft be tapped out. Can also see a difference in the other end of the rack where mine has a notch that looks like you're able to use a big wrench to unthread 2 halves of the rack whereas the other racks are just kinda set in with a punch. My rack: Other racks: TLDR; Wanted to know if anyone has rebuilt this specific model of steering rack for the R33 and if there were any steps to getting it done easier or if I should just give this to a professional to get done. Sorry if this post is a bit messy, first one I've done.
-
I would just put EBC back on the "I would not use their stuff" pile and move on.
-
Can I suggest you try EBC directly again and link them to as many competitor catalogues as you can to show their listing is incorrect, eg https://dba.com.au/product/front-4000-series-hd-brake-rotor-dba42304/ If you have access to an R33 GTST VIN and your VIN, you could also use a Nissan Parts lookup like Amayama to show them the part number is different between 33 GTST and 34 GTT which may get their attention
-
So i got reply from EBC and they just this site where you can clearly see those 296mm fronts on R34 GTT. I send them photos and "quotes" that 296mm are not for 34 GTT and they are too small. But it will be very hard to return them cuz nobody here knows 100% and they just copy those EBC catalogue :-D https://ebcbrakesdirect.com/automotive/nissan/skyline-r34
-


Recommended Posts
Create an account or sign in to comment
You need to be a member in order to leave a comment
Create an account
Sign up for a new account in our community. It's easy!
Register a new accountSign in
Already have an account? Sign in here.
Sign In Now