thatjonokid Posted January 17, 2011 Share Posted January 17, 2011 So heres my problem, got a S2 RB25DET to put in the R32gtst of mine, using the R32 loom and microtech LTX16S ECU. Then I realised that the coils on the S2 are different as they have the igniter on the coils where as the S1 are the same as the 20 coils...If I cant swap the coils over is there any way to get around it without using the 25 loom? Thanks Link to comment https://www.sau.com.au/forums/topic/350779-help-ignition-issues-s2-rb25-into-r32/ Share on other sites More sharing options...
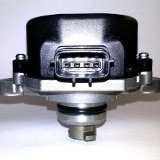
BH_SLO32 Posted January 18, 2011 Share Posted January 18, 2011 Just use the RB20 coils otherwise you will need to rewire the connection of the RB20 loom to the RB25 coil pack loom. I have attached a photo of an RB25 S1 loom I rewired to suit R34 coil packs (with built in transistor in the coil pack). Unfortunately you cant see the connector but it is a single 8 pin black plug. Link to comment https://www.sau.com.au/forums/topic/350779-help-ignition-issues-s2-rb25-into-r32/#findComment-5630862 Share on other sites More sharing options...
thatjonokid Posted January 18, 2011 Author Share Posted January 18, 2011 Just use the RB20 coils otherwise you will need to rewire the connection of the RB20 loom to the RB25 coil pack loom. I have attached a photo of an RB25 S1 loom I rewired to suit R34 coil packs (with built in transistor in the coil pack). Unfortunately you cant see the connector but it is a single 8 pin black plug. RB20 coils are rooted, got brand new splitfires for the 25. so I can just splice the rb25coil pack loom to the rb20 loom and it should be good? thanks heaps Link to comment https://www.sau.com.au/forums/topic/350779-help-ignition-issues-s2-rb25-into-r32/#findComment-5630990 Share on other sites More sharing options...
BH_SLO32 Posted January 19, 2011 Share Posted January 19, 2011 RB20 coils are rooted, got brand new splitfires for the 25. so I can just splice the rb25coil pack loom to the rb20 loom and it should be good? thanks heaps Modify the RB20 loom with the addition of the mating 8pin plug to suit the Rb25 coil pack loom. You will need to remove the RB20 transistor plug and 3pin (power,earth and check connector) plug and join them to the respective pins on the 8pin RB25 plug (you will need to source this plug). The wiring diagrams will help. Link to comment https://www.sau.com.au/forums/topic/350779-help-ignition-issues-s2-rb25-into-r32/#findComment-5632714 Share on other sites More sharing options...
LowgZ Posted June 6, 2011 Share Posted June 6, 2011 In addition to this, I am currently doing the exact same conversion, aside the coilpack issue as I have my complete rb20 still avaialble for parts is there anything else that would need to be replaced so the rb20 loom and ecu could be used with the Series 2 RB25..??? Link to comment https://www.sau.com.au/forums/topic/350779-help-ignition-issues-s2-rb25-into-r32/#findComment-5851915 Share on other sites More sharing options...
LowgZ Posted June 11, 2011 Share Posted June 11, 2011 Anyone ^^^ ???? Link to comment https://www.sau.com.au/forums/topic/350779-help-ignition-issues-s2-rb25-into-r32/#findComment-5861474 Share on other sites More sharing options...


Recommended Posts
Create an account or sign in to comment
You need to be a member in order to leave a comment
Create an account
Sign up for a new account in our community. It's easy!
Register a new accountSign in
Already have an account? Sign in here.
Sign In Now