Jump to content
SAU Community

Recommended Posts

  • Replies 273
  • Created
  • Last Reply

Top Posters In This Topic

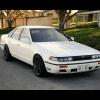
Cool cars continued filing past, including this Nissan R32 Skyline GTS-4...

6325998918_67906db8b1_b.jpg

6325246709_85647d5511_b.jpg

...and it's tougher brother; the 'Godzilla' R32 Skyline GT-R.

6326003898_3104094e07_b.jpg

A very lumpy V8 caught my attention, emanating from this HRT Holden VL Walkinshaw, originally competing in the Australian Touring Car championship a couple of decades ago.

6325251723_338c2e8fd0_b.jpg

I'm not sure if it was the genuine article or just a replica; but if so, they did a very good job.

Another R32 Skyline GT-R burbled past as I kept walking.

6325253565_fcdea98e00_b.jpg

6325254591_771d0c09fa_b.jpg

Link to comment
https://www.sau.com.au/forums/topic/363022-my-ceffy/page/8/#findComment-6104381
Share on other sites

I then joined a small crowd of people around what was probably one of the most expensive cars there; a Porsche Carrera GT. I'd never had the opportunity to see one in the metal, and spent some time staring and drinking in all the little details.

6326005726_9483827ce5_b.jpg

6325255449_01c919f7e2_b.jpg

6326009364_24e20c661e_b.jpg

This matte black Jaguar XK-R was very cool too.

6325257313_14cbfd0983_b.jpg

6325258109_66b073a7bf_b.jpg

Link to comment
https://www.sau.com.au/forums/topic/363022-my-ceffy/page/8/#findComment-6104382
Share on other sites

Getting a bit tired after walking around for a little while with two heavy cameras, I decided to head back to the car, snapping a few more photos on the way back.

6325280357_5e7bbd961f_b.jpg

a

6326031734_f8fa306b10_b.jpg

6325279303_15bb3de09a_b.jpg

Not that I'm even close to being able to work yet, but it was a little bit depressing watching some of the other professional car photographers in action.

I feel like it was something that was taken away from me by my health, just as my career was really starting to take off with constant shoots and articles for mags such as Truckin' Life, Extreme Performance, Street Fords, Zoom, High Performance Imports, Power Torque, Street Commodores, Hot 4s, Australian Street Rodding, Caravan & Motorhome, mixed in with some people and architectural photography, and licencing some images for advertising use by Mack Trucks, amongst some print and image CD sales.

Hopefully I can get back to at least doing a little bit, I really hate having to be stuck at home 20 hours a day while my feed machine is pumping the liquid nutrition into me. That said, I'm in the middle of editing my photos down to put together an official portfolio site. Which I'm hoping will help lead to further licencing opportunities for some more passive income, that doesn't require me to physically do things that I'm not up to.

Anyway, I got back to the car with my arms and legs aching a bit, and sat down for a while to do some water, as it was a warm and sunny day,

Edited by Stang
Link to comment
https://www.sau.com.au/forums/topic/363022-my-ceffy/page/8/#findComment-6104392
Share on other sites

6325281359_c27f3263e3_b.jpg

6326035662_b1695130e1_b.jpg

6326036588_856b794f5f_b.jpg

After sitting down resting for a while, I headed out again, pulling onto the road behind a cool old Bentley convertible. I'm not sure of the model or year, but I would guess it was made in the 1930s or 1940s.

6326037544_452f046db9_b.jpg

I took a few more photos in a nearby park.

6330544946_c44cb95f24_b.jpg

6329794591_b34045cf21_b.jpg

Since it was such a nice day, I went for a long drive through the Barossa and back through the Adelaide Hills. After hearing all the awesome cars in Tanunda, I was curious as to what my car sounded like from the outside. Apart from idling in a workshop or carpark, I'd never had the opportunity to hear it.

So after stopping on the side of a 110km/h signed road, I set up my D90 on a tripod, and proceeded to take off down the road.

6330548986_4b5bca7551_b.jpg

6329795841_704f6a6670_b.jpg

It was worthwhile finding a 110 zone, as it allows you to stretch the car's legs a bit without doing anything illegal.

Link to comment
https://www.sau.com.au/forums/topic/363022-my-ceffy/page/8/#findComment-6104399
Share on other sites

nice work man! some of those car are amazing!

that s12 gazelle especially. not often you see one with a v6 in it.

they were actually released from factory with a vg30 in them in america along with 5 stud hubs.

unfortunately like everything here in aus we only get the watered down versions :(

Link to comment
https://www.sau.com.au/forums/topic/363022-my-ceffy/page/8/#findComment-6104615
Share on other sites

Don't forget though Danny - the US got the real arse ends of the S chassis models v13 and upward. And did they even ever get a Nissan domestic/factory delivered model with the RB series motor?

I don't think we had it too bad; thank God for grey imports :)

Killer shots Rohan, keep em coming.

Link to comment
https://www.sau.com.au/forums/topic/363022-my-ceffy/page/8/#findComment-6107909
Share on other sites

Getting closer to Adelaide, I turned onto the gravel area by the side of the road. A small stream lined with overhanging trees runs alongside this part of Gorge Road, and makes for a nice setting.

6331344351_19c1efaca5_b.jpg

6331345129_c913bda13a_b.jpg

6332099948_1f099167b2_b.jpg

The sound of the flowing water tends to be quite soothing, unless of course you need to go to the toilet.

6332101242_f4c635b040_b.jpg

Link to comment
https://www.sau.com.au/forums/topic/363022-my-ceffy/page/8/#findComment-6108302
Share on other sites

Don't forget though Danny - the US got the real arse ends of the S chassis models v13 and upward. And did they even ever get a Nissan domestic/factory delivered model with the RB series motor?

I don't think we had it too bad; thank God for grey imports :)

Killer shots Rohan, keep em coming.

yeah this is true.

but the only thing we got factory delivered with an rb engine, was r31 skyline with the rb30e.

which was completely built to suit the aussie market.

shit interior, live rear end. didnt get it in turbo because of contractual issues with holden after they bought the rb30e and rb30et.

but i mean usa got cool things like the v6 powered s12s.

and 2 door bluebirds.

and in all honesty i wouldnt mind a ka24de powered s13, id actually prefer it over an sr20det one. because ka24s actually sound decent when worked a bit and respond really well to boost.

nice pics again rohan :)

Link to comment
https://www.sau.com.au/forums/topic/363022-my-ceffy/page/8/#findComment-6108500
Share on other sites

Create an account or sign in to comment

You need to be a member in order to leave a comment

Create an account

Sign up for a new account in our community. It's easy!

Register a new account

Sign in

Already have an account? Sign in here.

Sign In Now


  • Latest Posts

    • Hi, is the HKS  Tower Bar still available ? negotiable ? 🤔
    • From there, it is really just test and assemble. Plug the adapter cables from the unit into the back of the screen, then the other side to the car harness. Don't forget all the other plugs too! Run the cables behind the unit and screw it back into place (4 screws) and you should now have 3 cables to run from the top screen to the android unit. I ran them along the DS of the other AV units in the gap between their backets and the console, and used some corrugated tubing on the sharp edges of the bracket so the wires were safe. Plug the centre console and lower screen in temporarily and turn the car to ACC, the AV should fire up as normal. Hold the back button for 3 sec and Android should appear on the top screen. You need to set the input to Aux for audio (more on that later). I put the unit under the AC duct in the centre console, with the wifi antenna on top of the AC duct near the shifter, the bluetooth antenna on the AC duct under the centre console The GPS unit on top of the DS to AC duct; they all seem to work OK there are are out of the way. Neat cable routing is a pain. For the drive recorder I mounted it near the rear view mirror and run the cable in the headlining, across the a pillar and then down the inside of the a pillar seal to the DS lower dash. From there it goes across and to one USB input for the unit. The second USB input is attached to the ECUtec OBD dongle and the 3rd goes to the USB bulkhead connected I added in the centre console. This is how the centre console looks "tidied" up Note I didn't install the provided speaker, didn't use the 2.5mm IPod in line or the piggyback loom for the Ipod or change any DIP switches; they seem to only be required if you need to use the Ipod input rather than the AUX input. That's it, install done, I'll follow up with a separate post on how the unit works, but in summary it retains all factory functions and inputs (so I still use my phone to the car for calls), reverse still works like factory etc.
    • Place the new daughterboard in the case and mount it using the 3 small black rivets provided, and reconnect the 3 factory ribbon cables to the new board Then, use the 3 piggyback cables from the daughterboard into the factory board on top (there are stand offs in the case to keep them apart. and remember to reconnect the antenna and rear cover fan wires. 1 screw to hold the motherboard in place. Before closing the case, make a hole in the sticker covering a hole in the case and run the cable for the android unit into the plug there. The video forgot this step, so did I, so will you probably. Then redo the 4 screws on back, 2 each top and bottom, 3 each side and put the 2 brackets back on.....all ready to go and not that tricky really.      
    • Onto the android unit. You need to remove the top screen because there is a daughterboard to put inside the case. Each side vent pops out from clips; start at the bottom and carefully remove upwards (use a trim remover tool to avoid breaking anything). Then the lower screen and controls come out, 4 screws, a couple of clips (including 3 flimsy ones at the top) and 3 plugs on the rear. Then the upper screen, 4 screws and a bunch of plugs and she is out. From there, remove the mounting brackets (2 screws each), 4 screws on the rear, 2 screws top and bottom and 3 screws holding in the small plates on each side. When you remove the back cover (tight fit), watch out for the power cable for the fan, I removed it so I could put the back aside. The mainboard is held in by 1 screw in the middle, 1 aerial at the top and 3 ribbon cables. If you've ever done any laptop stuff the ribbon cables are OK to work with, just pop up the retainer and they slide out. If you are not familiar just grab a 12 year old from an iphone factory, they will know how it works The case should now look like this:
    • Switching the console was tricky. First there were 6 screws to remove, and also the little adapter loom and its screws had to come out. Also don't forget to remove the 2 screws holding the central locking receiver. Then there are 4 clips on either side....these were very tight in this case and needed careful persuading with a long flat screw driver....some force required but not enough to break them...this was probably the fiddliest part of the whole job. In my case I needed both the wiring loom and the central locking receiver module to swap across to the new one. That was it for the console, so "assembly is the reverse of disassembly"
×
×
  • Create New...