Jump to content
SAU Community

Recommended Posts

  • Replies 83
  • Created
  • Last Reply

Top Posters In This Topic

Top Posters In This Topic

Posted Images

sad.gif hmmm thats not cool. the plan for the moment is to keep it as simple as possible and then as funds permit, slowly rebuild the dead engine we pull out ready for the day when the engine we put in dies lol

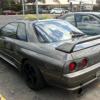
current engine has a REALLY bad knock. had ESP have a look at it and they said definitely a rebuild and to budget for between 12-15k. current engine was rebuilt about 25000k ago in melbourne, so forged internals, r33 crank, n1 oil and water pumps, and also n1 block, reconditioned head. unfortunately not being incredibly mechanically minded, at least when it comes to the internals of an engine, i'm relying on what places like ESP are telling me

Hey! Just noticed you're in Banks....mighty close to me....in fact if I listen carefully I may be able to hear you typing.

Depending on what went wrong with your current engine, if may be better to rebuild it (a basic one)

Forged Pistons and rings - ~$1000

standard rods are fine for 400rwks

New bearings ~$300

Machining/assembly - ~$1000 maybe a bit more

New Nissan head Gasket - ~$60

and Oil Pump - $500-1300 depending on what you want

and should be good to go using the old intake/exhaust gaskets

Edit - just read your last post...if that is all done already definitely rebuild it.

may only need new bearings and give the crank a quick machine, or buy a 2nd hand crank

if yours is the black on black soarer then I've spotted you a couple of times in the last 10 months since i moved down this end of town.

current engine lost oil pressure very suddenly cruising at about 150km/h and instantly developed a nice clunk.

i would be more than happy to get this engine rebuilt if it was going to work out to be about the same price as the swap we're thinking of doing.

our budget for the swap is $7000. so thats $2500 that ESP quoted us to do the swap and then about $4500 to purchase an engine.

the things I'm most worried about are we don't know how bad a shape the current engine is in until its opened up and who do we get to do the work seeing as i can't do it myself

Ye that would be me in teh Soarer :)

If you can pull the motor out yourself with the help of a few mates you will save yourself a metric butt load of money.

You have a fair budget for it, so providing you can get the motor out you will get a reasonable RB26 for $7k, if the pistons and rods are re-useable you will have change left over.

I suggest you go and speak to Greg at pro-engines in Queanbe-hole

http://www.proengines.com.au/packages.html

wow i have never even heard of that place before. might see if i can duck out from work tomorrow to go have a chat to this guy.

id be more than willing to pull the engine out with a few mates but the main problem i have is that i have nowhere with enough room lol

current engine has a REALLY bad knock. had ESP have a look at it and they said definitely a rebuild and to budget for between 12-15k. current engine was rebuilt about 25000k ago in melbourne, so forged internals, r33 crank, n1 oil and water pumps, and also n1 block, reconditioned head. unfortunately not being incredibly mechanically minded, at least when it comes to the internals of an engine, i'm relying on what places like ESP are telling me

:/ Drew.

Honestly if your block had the above done I'd go straight to rebuilding it. Check the side of your block to confirm it is an N1 first.

People who spend money on these would normally have the rest of the job done properly too. Makes me surprised it's blown so soon.

It's either had a real flogging/lack of basic maintenance or wasn't built quite right.

The obvious down side to you is the time your GTR's off the road.

The upside is you have just about enough to get the rebuild done properly and the time to get the rest while it is being rebuilt.

As Andrew said try and get the block out with a few peeps off here and save yourself a few grand.

BTW. 12-15 grand is a bullet proof build with everything replaced and nothing re-used.

You have put some really good thought into your options already. Just thought I'd sum it up.

Cheers Richard, I really appreciate the time you guys have spent helping us out.

I've got receipts for the rebuild that total nearly 20 grand so we were very shocked when ESP told us 12-15 grand to rebuild it. I'm hoping to get out to the place in queenbeyan that zebra suggested last night to have a chat with them. So we'll go from there.

Unfortunately I don't have the space or know anyone who has the space for me to be able to pull out the engine so we may have to factor that into our costs of the rebuild

If your looking at getting your engine rebuilt I'd also look at sydney. As there is a wealth of knowledge up there as well, and I think your limiting yourself if you don't at least consider getting it done up there. CRD seems to have a good rap up there. Having sorted out a lot of GTRkats issues with her rebuild.

I've definitely thought about that, even to the extent of talking to CRD on the phone. The main problem we faced though was actually getting the car there as we don't have something capable of towing a car trailer. That's the only reason we've decided to get it done in Canberra.

Speaking of Canberra, I went out to the place that zebra suggested and it didn't look like it had been used in a while. The front gate was open but everything else was shut and nobody responded to my knocking or phone calls. So I went and had another chat to Glenn at ESP and the car is now going into the shop next Wednesday to have the engine pulled and stripped down to find out exactly what needs to be replaced/fixed and how much it's going to cost.

If anyone on here has the space, time and know-how between now and then to help me pull the engine out then let me know! Lol

Seriously though....help!

Keep the advice coming guys.

Cheers,

Drew

Create an account or sign in to comment

You need to be a member in order to leave a comment

Create an account

Sign up for a new account in our community. It's easy!

Register a new account

Sign in

Already have an account? Sign in here.

Sign In Now


  • Similar Content

  • Latest Posts

    • Hi, is the HKS  Tower Bar still available ? negotiable ? 🤔
    • From there, it is really just test and assemble. Plug the adapter cables from the unit into the back of the screen, then the other side to the car harness. Don't forget all the other plugs too! Run the cables behind the unit and screw it back into place (4 screws) and you should now have 3 cables to run from the top screen to the android unit. I ran them along the DS of the other AV units in the gap between their backets and the console, and used some corrugated tubing on the sharp edges of the bracket so the wires were safe. Plug the centre console and lower screen in temporarily and turn the car to ACC, the AV should fire up as normal. Hold the back button for 3 sec and Android should appear on the top screen. You need to set the input to Aux for audio (more on that later). I put the unit under the AC duct in the centre console, with the wifi antenna on top of the AC duct near the shifter, the bluetooth antenna on the AC duct under the centre console The GPS unit on top of the DS to AC duct; they all seem to work OK there are are out of the way. Neat cable routing is a pain. For the drive recorder I mounted it near the rear view mirror and run the cable in the headlining, across the a pillar and then down the inside of the a pillar seal to the DS lower dash. From there it goes across and to one USB input for the unit. The second USB input is attached to the ECUtec OBD dongle and the 3rd goes to the USB bulkhead connected I added in the centre console. This is how the centre console looks "tidied" up Note I didn't install the provided speaker, didn't use the 2.5mm IPod in line or the piggyback loom for the Ipod or change any DIP switches; they seem to only be required if you need to use the Ipod input rather than the AUX input. That's it, install done, I'll follow up with a separate post on how the unit works, but in summary it retains all factory functions and inputs (so I still use my phone to the car for calls), reverse still works like factory etc.
    • Place the new daughterboard in the case and mount it using the 3 small black rivets provided, and reconnect the 3 factory ribbon cables to the new board Then, use the 3 piggyback cables from the daughterboard into the factory board on top (there are stand offs in the case to keep them apart. and remember to reconnect the antenna and rear cover fan wires. 1 screw to hold the motherboard in place. Before closing the case, make a hole in the sticker covering a hole in the case and run the cable for the android unit into the plug there. The video forgot this step, so did I, so will you probably. Then redo the 4 screws on back, 2 each top and bottom, 3 each side and put the 2 brackets back on.....all ready to go and not that tricky really.      
    • Onto the android unit. You need to remove the top screen because there is a daughterboard to put inside the case. Each side vent pops out from clips; start at the bottom and carefully remove upwards (use a trim remover tool to avoid breaking anything). Then the lower screen and controls come out, 4 screws, a couple of clips (including 3 flimsy ones at the top) and 3 plugs on the rear. Then the upper screen, 4 screws and a bunch of plugs and she is out. From there, remove the mounting brackets (2 screws each), 4 screws on the rear, 2 screws top and bottom and 3 screws holding in the small plates on each side. When you remove the back cover (tight fit), watch out for the power cable for the fan, I removed it so I could put the back aside. The mainboard is held in by 1 screw in the middle, 1 aerial at the top and 3 ribbon cables. If you've ever done any laptop stuff the ribbon cables are OK to work with, just pop up the retainer and they slide out. If you are not familiar just grab a 12 year old from an iphone factory, they will know how it works The case should now look like this:
    • Switching the console was tricky. First there were 6 screws to remove, and also the little adapter loom and its screws had to come out. Also don't forget to remove the 2 screws holding the central locking receiver. Then there are 4 clips on either side....these were very tight in this case and needed careful persuading with a long flat screw driver....some force required but not enough to break them...this was probably the fiddliest part of the whole job. In my case I needed both the wiring loom and the central locking receiver module to swap across to the new one. That was it for the console, so "assembly is the reverse of disassembly"
×
×
  • Create New...